

How to Grow Plumeria from Seed
Written with AI assistance, edited and checked against horticultural sources.
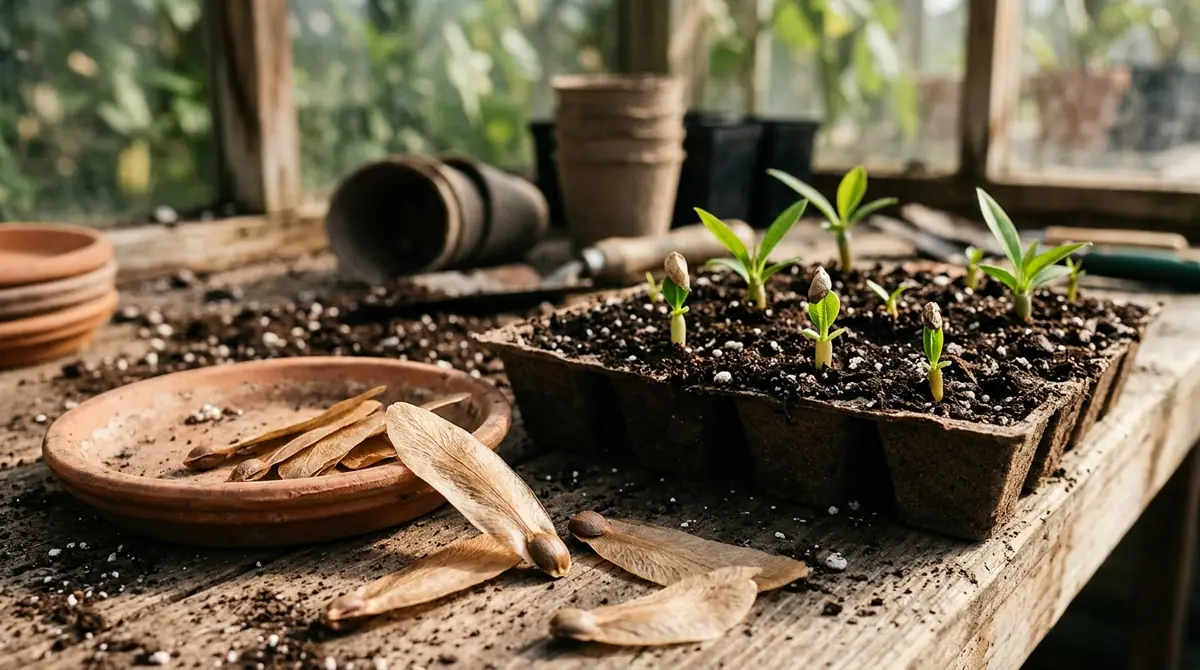
Most landscape designers reach for hardwood cuttings because they clone the parent plant predictably, while plumeria samaras are paper-thin at the top and swollen with potential at the embryo base. Growing plumeria from seed is an exercise in patience and genetic lottery, as flower color, fragrance profile, or growth habit will not be known until the first bloom cycle 3 to 5 years down the line. If you are ready to look past the instant gratification of cuttings and experience the thrill of true seedling development, you are in the right place to learn how to grow plumeria from seed with precision and scientific rigor.
1. Botanical Overview & Natural Habitat

The reproductive biology of plumeria is fascinating. In the wild, they are primarily pollinated by long-tongued sphinx moths, though they offer no nectar reward; instead, their intense nocturnal fragrance mimics nectar-producing flowers, tricking pollinators into performing cross-pollination. Once fertilized, the plant produces large, leathery, twin follicle pods (technically called mericarps) that can take up to 9 months to mature.
Each pod contains anywhere from 20 to 100 seeds. Each individual seed features a membranous wing (samara) designed to catch the wind, spinning away from the parent canopy to colonize new territory. This unique aerodynamic structure is why you must handle plumeria seeds with care—the wing is not just packaging; it is an evolutionary dispersal tool. When planning your broader tropical or multi-layered landscape designs, remember that plumerias make exceptional focal points, much like structuring a multi-tiered ecosystem when learning How to Grow a Wild Food Forest Self Sufficiency Garden.
2. Essential Environmental & Care Requirements
To successfully germinate and cultivate plumeria from seed, you must mimic the warm, high-light, and exceptionally well-drained conditions of their native Mesoamerican habitats. Plumeria seedlings cannot tolerate stagnant moisture; their delicate taproots rot within hours if left sitting in waterlogged, heavy soils.
| Parameter | Optimal Condition | Common Mistake | Why It Matters |
|---|---|---|---|
| Germination Temp | 80°F to 85°F (27°C to 29°C) | Letting substrate drop below 70°F (21°C) | Cold triggers fungal pathogens like Pythium and stalls enzymatic activation. |
| Media pH | 6.5 to 7.0 (Slightly acidic to neutral) | Using heavy, dense garden soil or pure peat | Restricts oxygen diffusion to the fragile developing root zone. |
| Light Exposure | 12 to 14 hours of bright, indirect light | Exposing fresh seedlings to harsh, direct midday sun | Scorches delicate cotyledons and evaporates moisture before roots establish. |
| Moisture Level | Consistently damp, never soggy | Keeping seeds completely saturated or bone-dry | Causes seed coat mold or desiccates the internal embryo. |
When managing soil nutrients for your young tropical trees, maintaining strict control over fertility is vital. You can draw parallel soil management lessons from structured feeding systems such as the Mittleider Gardening Method More Food from your Garden, which emphasizes precise mineral availability without guesswork.
For authoritative guidelines on tropical plant physiology and regional microclimates, consult the University of Florida IFAS Extension, which provides exceptional botanical documentation on Apocynaceae cultivation.
3. Step-by-Step Cultivation, Feeding & Propagation
Growing plumeria from seed requires a clean, methodical approach. Because fresh seeds have a high viability rate—often dropping significantly after 6 months of storage—source your seeds from reputable growers immediately after harvest in late autumn or winter.
💡 Pro-Tip: Snip off the papery wing before planting. While the wing helps dispersal in nature, underground it acts as a wick that holds excess moisture against the seed coat, inviting fungal rot. Leave just the plump seed body intact.
Follow this numbered step-by-step sequence to achieve optimal germination and seedling vigor:
- Prepare the Germination Substrate: Mix a sterile, highly porous medium consisting of 50% fine perlite or vermiculite and 50% coco coir or peat moss. Avoid standard potting soil. Fill seed trays or individual 2-inch (5 cm) pots with the mix and moisten it thoroughly with tepid water until it is evenly damp like a wrung-out sponge.
- Position the Seeds: Take the de-winged plumeria seeds and push the plump, embryo end downward into the medium at a 45-degree angle. Leave the very top of the seed (where the wing was attached) exposed roughly 1/8 inch (0.3 cm) above the soil surface. Planting them completely flat or upside down forces the seedling to expend vital energy righting itself, increasing the risk of rot.
- Provide Bottom Heat and Humidity: Place your containers on a seedling heat mat set to maintain a steady soil temperature between 80°F and 85°F (27°C to 29°C). Cover the trays loosely with a clear humidity dome or plastic wrap to lock in moisture, ensuring you vent the cover for 15 minutes daily to prevent stagnant air.
- Monitor Emergence (7 to 21 Days): Keep a close eye on moisture levels. Germination typically occurs within 7 to 21 days under ideal thermal conditions. Once the green cotyledons (seed leaves) push upward and shed the seed husk, remove the humidity dome immediately.
- Introduce Light and Gentle Air Circulation: Move the seedlings under full-spectrum LED grow lights for 12 to 14 hours per day, positioned 6 to 8 inches (15 to 20 cm) above the canopy. Run a small oscillating fan on its lowest setting nearby to strengthen the tender stems.
- First True Leaf Transition (4 to 6 Weeks): Once the second set of leaves (true leaves) emerges, step up your care routine. Begin a very dilute, balanced water-soluble fertilizer program (such as a 10-10-10 formulation mixed at one-quarter strength) every two weeks.
- Potting Up (2 to 3 Months): When seedlings reach 4 to 6 inches (10 to 15 cm) in height and roots begin circling the bottom of their original cells, transplant them individually into 4-inch (10 cm) containers using a well-draining cactus and succulent potting mix amended with extra perlite.
⚠️ Important Caution: Never overwater young plumeria seedlings. Allow the top 1 inch (2.5 cm) of soil to dry out completely between waterings. Plumeria seedlings possess zero resistance to damping-off fungi (Rhizoctonia and Pythium species), which can sever a stem at the soil line overnight.
For additional insight into how different plant species react to container transitions and intensive growing schedules, you can review techniques similar to those used when tracking development speeds in guides like How Long Does It Take for Tomatoes to Grow Tomato Growing and Harvesting Guide.
4. Common Problems, Pests & Troubleshooting
Even with meticulous care, growing plumeria from seed presents distinct hurdles. Recognizing issues early saves your crop.
- Damping-Off: Stems turn translucent, thin, and collapse at the soil surface. This is caused by overwatering combined with cool, poorly ventilated conditions. Discard infected seedlings immediately, reduce watering frequency, improve airflow, and apply a bio-fungicide containing Bacillus subtilis.
- Yellowing Cotyledons: If the earliest seed leaves yellow and drop prematurely, it is often a sign of nitrogen deficiency or root compaction. If the soil is heavy and wet, root rot is the underlying culprit. Repot into fresh, dry, fast-draining media.
- Spider Mites: Indoor environments with low humidity frequently attract two-spotted spider mites (Tetranychus urticae), which stipple plumeria leaves with fine yellow dots and spin delicate webs underneath. Wipe leaves down with insecticidal soap or horticultural oil, and raise ambient humidity.
- Leggy, Weak Stems: If your seedlings stretch upward rapidly without thickening their stems, they are starving for light. Move them closer to your high-intensity grow lights and ensure your oscillating fan is running to simulate wind stress, which triggers thicker caliper growth (thigmomorphogenesis).

5. Frequently Asked Questions
How long does it take for plumeria seeds to germinate?
Under optimal soil temperatures of 80°F to 85°F (27°C to 29°C), plumeria seeds typically germinate within 7 to 21 days. If temperatures drop below 70°F (21°C), germination can stall significantly or fail entirely due to seed rot.
Do plumeria grown from seed look like the parent plant?
No. Plumerias are open-pollinated hybrids. Growing a plumeria from seed means you are planting an F1 hybrid or open-pollinated cross, meaning the seedling will possess a unique genetic combination. It may take 3 to 5 years to bloom, and the flower color, fragrance, and growth habit will be entirely unique and unpredictable compared to the seed parent.
Can I plant plumeria seeds flat on top of the soil?
No. While some surface-sowing techniques work for ultra-fine dust seeds, plumeria seeds require proper orientation. Plant them at a 45-degree angle with the plump embryo end pointing down into the soil and the wing pointing up. This ensures the root system anchors correctly and prevents the developing stem from twisting or rotting.
When should I fertilize my plumeria seedlings?
Wait until the seedlings have developed their first set of true leaves—usually about 4 to 6 weeks after germination. Start with a balanced, water-soluble fertilizer diluted to one-quarter strength, applying it every two weeks during the active spring and summer growing season. Never fertilize dry soil, as high mineral concentrations will burn delicate, immature roots.
Related Guides
- Rooting Plumeria Cuttings
- Plumeria Rooting Hormone
- Plumeria Dormant
- Plumeria Seedling
- Variegated Plumeria
📋 Table of Contents ▼ Click to expand
Tags:
Keep reading
🌿 Related Plants You Might Like






PlantSavvyWorld
Editorial team
PlantSavvyWorld is an independent botanical education project. Articles are drafted with AI assistance, then edited and checked against university extension services, botanical garden collections and other published horticultural sources.