

Plant Plumeria Cutting
Written with AI assistance, edited and checked against horticultural sources.
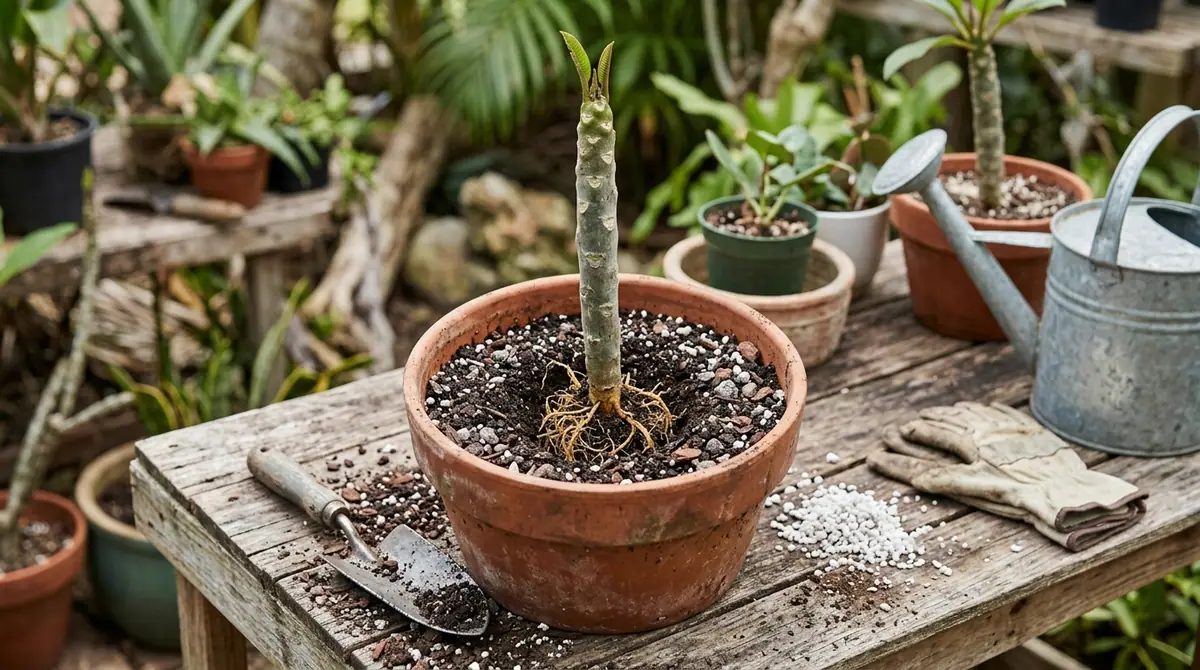
It was a sweltering July afternoon in trial gardens when a heavy branch snapped off our prized Plumeria rubra 'Celadine' during a sudden thunderstorm. Instead of despairing over the damage, I immediately reached for my pruning shears, sanitized the ragged edge, and set to work. That single accidental fracture yielded four robust, fragrant cuttings that rooted within 45 days and now line the sunny courtyard of our demonstration space. Propagating plumeria from cuttings is not merely a method of multiplication; it is a masterclass in plant physiology that rewards precision, patience, and an understanding of succulent anatomy.
1. Botanical Overview & Natural Habitat

Taxonomically, the genus comprises deciduous and evergreen shrubs and small trees. The most commonly cultivated species, Plumeria rubra, features thick, fleshy, succulent stems packed with latex sap that serves as a chemical defense mechanism against herbivores. In their native dry-forest habitats, plumerias drop their leaves during the dry season to conserve moisture, relying entirely on the water and carbohydrate reserves stored within their pachycaul stems.
When you take a cutting, you are exploiting this evolutionary adaptation. The stem acts as a nutrient and moisture reservoir, sustaining the cutting for the 30 to 60 days it takes to generate adventitious roots from the cambium layer. Unlike woody ornamentals that rely on constant moisture, plumeria cuttings require a completely different physiological trigger: dryness at the wound site to form a callus, followed by gentle, warmth-driven root initiation. Understanding this natural history transforms you from a passive gardener into an active facilitator of cellular regeneration.
2. Essential Environmental & Care Requirements
To successfully root and grow a plumeria cutting, you must replicate its native tropical microclimate. This requires strict management of temperature, light, moisture, and soil aeration.
Plumeria cuttings will not root in cold, wet soil. The basal temperature of your rooting medium must be maintained between 75°F and 85°F (24°C and 29°C). If ambient temperatures drop below 65°F (18°C), cellular activity slows down drastically, and the exposed stem tissue becomes an open invitation for opportunistic soil pathogens like Pythium and Phytophthora. For indoor propagators or those in cooler climes, utilizing a thermostatically controlled heating mat is non-negotiable.
Light requirements shift during the propagation lifecycle. While established plumerias demand full, unbridled sun (6 to 8 hours daily), fresh cuttings require bright, indirect light for the first 14 to 21 days. Direct, scorching sun on an unrooted stem causes excessive transpirational water loss before the plant has the root mass to replenish it. Once new leaves emerge at least 2 inches (5 cm) in length, gradually transition the plant into full sun over a 10-day period.
Soil aeration is the single most critical factor in preventing basal rot. Plumeria stems store ample water; sitting in heavy, compact garden soil or peat-heavy potting mixes will suffocate the basal cells. You need an ultra-porous medium that drains completely within seconds. A proven professional blend consists of 50% coarse perlite or pumice, 25% horticultural sand or turface, and 25% well-aged, low-nutrient compost or coco coir. For further reading on regional planting adaptations and soil preparation, you might find parallels in strategies used when managing unique seasonal schedules, much like understanding When to Plant Carrots in Zone 8a or timing cool-weather crops such as When to Plant Brussel Sprouts in Zone 7.
| Parameter | Optimal Condition | Common Mistake | Why It Matters |
|---|---|---|---|
| Rooting Temperature | 75°F – 85°F (24°C – 29°C) | Using a cold windowsill or unheated floor | Low temperatures halt cell division and promote stem rot before roots form. |
| Light Exposure | Bright, indirect light initially | Placing fresh cuttings in blistering afternoon sun | Excess transpiration dehydrates the stem before adventitious roots can develop. |
| Soil Mix | 50% perlite, 25% sand, 25% coir | Using dense, moisture-retaining potting soil | Compacted soil starves the base of oxygen, leading to fatal fungal pathogens. |
| Watering Frequency | Deep soak only when dry | Keeping the medium constantly soggy | Plumeria sap stores enough water; wet medium rots the unrooted cutting. |
3. Step-by-Step Cultivation, Feeding & Propagation
Propagating plumeria from stem cuttings requires surgical precision and disciplined timing. Spring, just as the plant begins its natural flush of new growth, is the ideal window. For those coordinating multiple garden projects throughout the year, keeping track of seasonal planting windows is vital—similarly to how meticulous scheduling dictates success when figuring out When to Plant Beets in Utah or planning vegetable patches alongside When to Plant Pumpkins in Southern California.
Follow this step-by-step protocol to ensure high success rates:
- Select and Harvest the Cutting: Choose a healthy, disease-free branch that is at least 12 to 18 inches (30 to 45 cm) long and roughly the thickness of a broom handle (1 to 2 inches / 2.5 to 5 cm in diameter). Using a sterilized pruning saw or sharp utility knife, make a clean, straight cut at a 90-degree angle.
- Apply Plant Sanitation and Rooting Hormone: Immediately wipe the cut surface with a clean cloth to remove excess toxic latex sap. Dip the bottom 1 inch (2.5 cm) of the stem into water, then coat it lightly with an indole-3-butyric acid (IBA) rooting powder or gel formulated for woody ornamentals.
- Cure the Cut (Callusing): Place the cutting horizontally in a shaded, well-ventilated indoor location for 7 to 14 days. This crucial waiting period allows a thick, protective callous layer to form over the wound, preventing bacteria and fungi from entering the vascular tissue. Do not plant a fresh, wet cut directly into soil.
- Prepare the Container: Select a sturdy 1-gallon (3.8-liter) nursery container with multiple bottom drainage holes. Fill it with your high-aeration mix of perlite, sand, and coco coir, leaving 2 inches (5 cm) of headspace at the top.
- Plant the Cutting: Insert the callused end of the cutting 3 to 4 inches (7.5 to 10 cm) deep into the medium. Pack the soil firmly around the base with your hands to ensure the cutting stands completely upright without wobbling. If the cutting sways in the wind or shifts in the pot, the delicate, newly forming root hairs will snap.
- Initial Irrigation and Placement: Water the potting medium thoroughly once to settle the soil around the base, allowing all excess water to drain completely. Place the pot in a warm location (75°F to 85°F / 24°C to 29°C) with bright, indirect light.
- Manage Moisture and Maintenance: Withhold further watering until the soil is completely dry to the touch 3 inches (7.5 cm) down—usually every 10 to 14 days. Mist the stem lightly every few days if ambient humidity drops below 40%, but avoid soaking the soil.
- Monitor for Growth Indicators: Within 30 to 60 days, you will notice either the tip swelling and pushing out new green leaves, or tiny root tips appearing at the container's drainage holes. Once leaves reach 3 inches (7.5 cm) in length, transition the plant to a weak, balanced liquid fertilizer (such as a 10-10-10 formulation diluted to quarter-strength) every 3 weeks to support structural development.
💡 Pro-Tip: Stability is the hidden key to plumeria rooting success. If your cutting is top-heavy and wobbles in the pot, drive two bamboo stakes into the soil on either side of the stem and secure the cutting to them using soft garden twine. A motionless cutting roots up to two weeks faster than one that constantly shifts in the breeze.
4. Common Problems, Pests & Troubleshooting
Even experienced horticulturists occasionally encounter setbacks when dealing with succulent stem cuttings. Diagnosing issues early saves the specimen.
Black Tip Syndrome: If the growing tip of your cutting turns black and squishy, you are dealing with a fungal infection (often Botryosphaeria or environmental chilling). Sterilize a sharp blade, cut away all infected tissue well into healthy green stem (at least 2 inches / 5 cm below the black rot), dab the new cut with a copper-based fungicide, and allow it to re-callus in a warmer, drier environment. For comprehensive plant pathology references, consult the Royal Horticultural Society guidelines on stem rots.
Wrinkled Stems: A slightly wrinkled stem during the first 3 weeks is normal; the cutting is burning through its stored water and carbohydrate reserves to drive cellular division. However, if the stem becomes deeply shriveled, rubbery, and soft to the touch, the cutting has either dehydrated completely or succumbed to basal rot. Squeeze the base: if it is mushy, the cutting is lost. If it is firm, give it a cautious, deep watering and ensure bottom heat is maintained.
Pest Infestations: Unrooted cuttings are rarely bothered by sap-sucking insects because of their bitter latex sap, but once leaves unfurl, spider mites and mealybugs can arrive. Inspect the undersides of new leaves weekly. Wipe away mealybugs with a cotton swab dipped in 70% isopropyl alcohol, and wash spider mites away with a strong stream of water mixed with a few drops of horticultural insecticidal soap. For research-backed management of regional agricultural pests, review resources provided by the University of California Agriculture and Natural Resources extension network.
⚠️ Important Caution: Plumeria latex sap contains toxic compounds including iridoid glycosides and plumericin. This milky sap is a strong skin irritant and can cause severe contact dermatitis or temporary blindness if it comes into eye contact. Always wear heavy nitrile gloves and protective eyewear when pruning, harvesting, or handling fresh plumeria cuttings.

5. Frequently Asked Questions
Can you root a plumeria cutting directly in water?
No, water propagation is strongly discouraged for plumeria cuttings. Because plumeria stems are succulent and store high amounts of water, placing them in stagnant water deprives the base of essential oxygen, triggering anaerobic rot within days. Water-grown roots are also structurally weak and struggle to adapt when subsequently transplanted into soil. Always root directly in a porous, well-draining soil mix.
How long does it take for a plumeria cutting to root?
Under optimal environmental conditions—with soil temperatures maintained consistently between 75°F and 85°F (24°C and 29°C)—a plumeria cutting typically takes between 30 and 60 days to produce a functional root system. Cooler ambient temperatures or a lack of bottom heat can double this timeframe or cause the cutting to fail entirely before rooting occurs.
Should I remove the leaves from my plumeria cutting?
Yes, if your cutting has large leaves attached when you harvest it, trim them off entirely or cut them in half with sterile shears. Large leaves transpire massive amounts of water, and because an unrooted stem has no way to pull moisture from the soil, keeping full leaves attached will rapidly dehydrate and kill the cutting before it can form roots.
Do I need to use rooting hormone on plumeria cuttings?
Rooting hormone is not strictly mandatory because plumerias contain natural auxins that help initiate roots on their own. However, applying a commercial rooting powder or gel containing indole-3-butyric acid (IBA) significantly accelerates the rooting process, increases the total volume of roots produced, and dramatically improves your overall success rate.
Related Guides
- How to Root a Plumeria Cutting
- Cutting Back a Maple Tree
- Rooting Plumeria Cuttings
- Plumeria Rooting Hormone
- Plumeria Dormant
📋 Table of Contents ▼ Click to expand
Tags:
Keep reading
🌿 Related Plants You Might Like






PlantSavvyWorld
Editorial team
PlantSavvyWorld is an independent botanical education project. Articles are drafted with AI assistance, then edited and checked against university extension services, botanical garden collections and other published horticultural sources.