

How to Root a Plumeria Cutting
Written with AI assistance, edited and checked against horticultural sources.
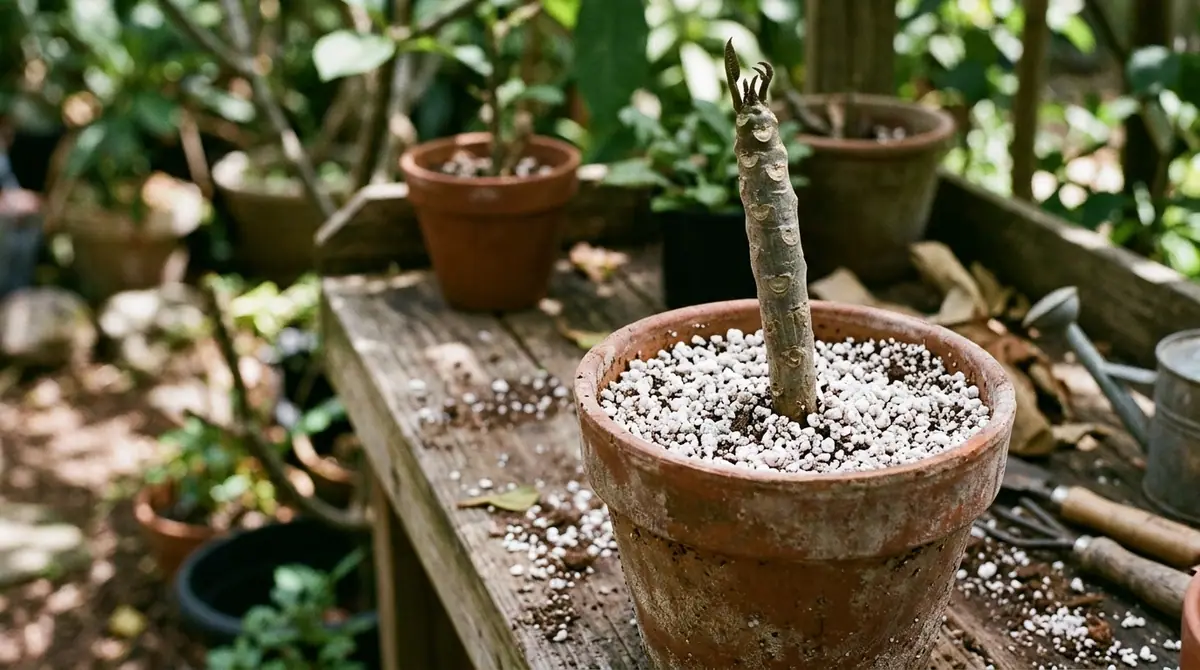
Standing on my southern California patio three summers ago, staring at a 12-inch (30 cm) tip cutting of a 'Celadine' plumeria that had snapped off during a Santa Ana wind gust, I faced a choice. I could toss it into the green waste bin, or I could apply thirty years of field experience in plant physiology to coax roots from its woody, latex-filled stem. I chose the latter. Six weeks later, that exact cutting was pushing its first velvet-green leaves, anchored by a dense web of white, fleshy roots.

1. Botanical Overview & Natural Habitat
Native to Central America, Mexico, the Caribbean, and parts of South America, plumerias thrive in regions characterized by distinct wet and dry seasons. In their natural habitat, these deciduous or semi-deciduous small trees and shrubs endure scorching sun, poor rocky soils, and prolonged drought. When a branch breaks naturally in the wild, the plant's internal survival mechanisms kick in: the wound bleeds a milky white latex sap that coagulates rapidly to seal out pathogens, and internal hormone distribution shifts to produce adventitious roots from the cambium layer once monsoon rains arrive.
Understanding this evolutionary background dictates how we treat cuttings in a domestic setting. Plumerias are succulent-like in their ability to store water and energy reserves inside their thick, pithy stems. This stored carbohydrate reserve is precisely what fuels root generation long before the cutting has access to an established root system.
The genus contains several prominent species, most notably Plumeria rubra (the source of most modern cultivars with red, pink, yellow, and multicolored blooms) and Plumeria obtusa (known for its evergreen nature, glossy blunt leaves, and intensely fragrant white flowers). Botanically, a plumeria stem possesses a thick outer bark, a vascular cambium ring, a soft inner wood, and a central pith. Adventitious roots emerge primarily from the cambial ring near the basal cut end. Because these tissues are naturally prone to rot in cold, stagnant, or waterlogged conditions, mimicking the well-drained, sun-baked soils of their native range is non-negotiable for success.
2. Essential Environmental & Care Requirements
Successful plumeria propagation relies on strict control of temperature, moisture, and light. If any single variable falls outside the narrow tolerance window of a rooting stem, failure rates skyrocket due to dehydration or stem rot.
| Parameter | Optimal Condition | Common Mistake | Why It Matters |
|---|---|---|---|
| Ambient Temperature | 75°F – 85°F (24°C – 29°C) | Keeping cuttings below 65°F (18°C) | Low soil and air temperatures halt cellular division and root initiation, giving fungi time to colonize the cut. |
| Bottom Heat | 80°F (27°C) at soil level | Relying solely on ambient room heat | Direct basal warmth accelerates enzymatic activity and root hormone transport significantly faster than top growth. |
| Substrate Moisture | Barely damp; dry out between waterings | Keeping the potting mix constantly soggy | Plumeria stems lack functional roots to transpire water; wet media suffocates nascent root initials and causes rot. |
| Light Exposure | Bright, indirect light to partial sun | Placing fresh cuttings in scorching direct midday sun | Excessive solar radiation dehydrates the unrooted stem before it can absorb moisture, causing shriveling. |
Water quality also plays a role. Municipal water high in sodium or boron can burn the developing root tips. If your tap water is heavily treated, letting it sit in an open container for 24 hours or using rainwater is ideal.
According to guidance from the University of Florida IFAS Extension, maintaining proper sanitation during propagation prevents the entry of opportunistic fungal pathogens like Phytophthora and Pythium, which are the primary culprits behind cutting loss.
3. Step-by-Step Cultivation, Feeding & Propagation
To achieve a near 100% success rate when learning how to root a plumeria cutting, timing is everything. Take or start your cuttings in late spring or early summer when ambient temperatures naturally support rapid cell division.
Step 1: Procure and Inspect the Cutting
Select a healthy, disease-free branch tip measuring between 12 and 18 inches (30 to 45 cm) in length. Ensure the stem is firm to the touch, with gray-green or greenish-brown bark. Avoid soft, green terminal growth that wilts easily, as well as excessively old, woody stems that lack the vigor to produce roots.
Step 2: Make a Clean Cut and Apply Rooting Hormone
Using a pruning saw or heavy shears sterilized in a 10% bleach solution or rubbing alcohol, make a straight, clean cut across the stem. Immediately rinse away the dripping white latex sap with clean water. Apply a thin dusting of IBA (Indole-3-butyric acid) rooting powder—at a concentration of 0.3% to 0.8%—to the outer 1 inch (2.5 cm) of the basal cut.
Step 3: Allow the Wound to Callus
Place the freshly cut stem vertically in a shaded, dry, and well-ventilated area for 7 to 14 days. During this time, the wound will form a hard, corky callus. Never skip this step; planting a fresh, uncallused plumeria cutting directly into moist soil is an invitation for soil-borne fungi to enter the vascular system.
Step 4: Prepare the Rooting Substrate
Fill a 1-gallon (3.8-liter) black nursery container with a hyper-porous potting mix. An ideal formula consists of 50% perlite or pumice and 50% coarse horticultural sand, sterile peat, or coco coir. Avoid standard potting soil with high organic matter retention.
Step 5: Plant the Cutting
Insert the callused base of the plumeria cutting 3 to 4 inches (7.5 to 10 cm) deep into the prepared substrate. Pack the medium firmly around the stem so that the cutting stands upright without a stake. If the cutting is top-heavy, tie it securely to a bamboo stake rather than pushing it deeper into the soil.
Step 6: Provide Bottom Heat and Initial Hydration
Place the container in a location where ambient temperatures consistently hover around 80°F (27°C). If natural heat is insufficient, place the pot on a horticultural propagation heating mat set to 80°F (27°C). Water the medium lightly once to settle the soil around the base. Do not water again until the mix is completely dry at a depth of 3 inches (7.5 cm).
Step 7: Monitor Root Development
Over the next 30 to 60 days, leaves will emerge from the tip. Once these leaves reach approximately 4 to 6 inches (10 to 15 cm) in length and the stem feels firm and rigid when gently wiggled, a functional root system has formed. At this stage, transition the plant to a full-sun location and begin a balanced, low-nitrogen fertilizer regimen (such as a 10-30-10 formulation) at half strength every 2 weeks to encourage robust root and floral development.
💡 Pro-Tip: Never wrap plastic bags around plumeria cuttings to create a DIY greenhouse. While humidity chambers work wonders for leafy tropicals, plumeria stems store ample moisture; sealing them in high humidity traps stagnant air, invites fungal rot, and causes the delicate callus to decay before roots can form.
4. Common Problems, Pests & Troubleshooting
Even experienced growers encounter challenges when propagating tropical species. Recognizing early warning signs saves struggling cuttings from total failure.
- Black, Mushy Stem Base (Stem Rot): Caused by overwatering or uncallused stems planted in cold, heavy soil.
- Solution: Use a sterile razor blade to slice away all rotting tissue until you reach clean, white, latex-bleeding wood. Re-dust with rooting hormone, allow it to callus for an additional 14 days in a dry environment, and restart the process in fresh, dry perlite.
- Wrinkled or Shriveled Stem: Indicates severe dehydration. While a slight loss of turgor is normal as the cutting burns stored energy, a deeply wrinkled stem means moisture is escaping faster than the callused base can tolerate.
- Solution: Mist the stem lightly in the evening, ensure ambient humidity is around 50%, and check that the rooting medium is not bone-dry.
- Premature Leaf Drop or Failure to Leaf Out: If the stem is firm and heavy, lack of foliage simply means root development is preceding shoot growth. However, if the tip turns black and soft (tip rot), cut it back by 2 inches (5 cm) below the affected zone and treat with a copper-based fungicide.
- Pests (Spider Mites and Mealybugs): Young, tender leaves emerging on newly rooted cuttings are prime targets for sap-sucking insects. Inspect leaf axils weekly and treat infestations immediately with insecticidal soap or horticultural oil, following safety guidelines provided by the Royal Horticultural Society.
⚠️ Important Caution: Plumeria sap contains diterpenes and plumerin, which are toxic and highly irritating to human skin and mucous membranes. Always wear nitrile gloves and protective eyewear when cutting stems, and wash your hands immediately if you come into direct contact with the milky latex.

5. Frequently Asked Questions
How long does it take for a plumeria cutting to root?
Most healthy plumeria cuttings develop a functional root system within 45 to 90 days. The exact timeframe depends heavily on ambient temperature, bottom heat consistency, and the cultivar's natural vigor. Warmer temperatures (around 80°F to 85°F / 27°C to 29°C) significantly accelerate the process, while cooler conditions can stall root initiation for months.
Can you root plumeria cuttings directly in water?
While plumeria cuttings can form roots in a jar of water, water-grown roots are structurally different and far more fragile than those grown in a porous soil medium. Water roots lack the fine root hairs necessary to absorb nutrients effectively in soil. When you transplant a water-rooted cutting into soil, it frequently experiences severe transplant shock and high mortality rates. Stick-in-soil or perlite propagation is vastly superior.
How do I know if my plumeria cutting has roots without pulling it up?
Never pull or tug aggressively on a cutting to check for roots, as this snaps delicate new root tips. Instead, look for two reliable indicators: active, vigorous leaf growth at the terminal tip (leaves growing longer than 4 inches / 10 cm), and a noticeable increase in stem firmness when you gently press the sides of the stem. If the stem feels rigid rather than spongy, roots have successfully formed.
Why is the tip of my plumeria cutting turning black?
Tip blackening—often referred to as tip rot or black tip—is typically caused by a drop in temperature, exposure to frost, or fungal spores entering a fresh wound during damp weather. To save the cutting, use a sterile blade to cut downward in 1-inch (2.5-cm) increments until you see clean, solid, latex-exuding white wood. Seal the fresh cut with a dab of cinnamon or a commercial pruning sealer, and move the cutting to a warmer, drier location.
Related Guides
- Plant Plumeria Cutting
- Will Peatmoss Help with Root Rot
- Cutting Back a Maple Tree
- Rooting Plumeria Cuttings
- Plumeria Rooting Hormone
📋 Table of Contents ▼ Click to expand
Tags:
Keep reading
🌿 Related Plants You Might Like






PlantSavvyWorld
Editorial team
PlantSavvyWorld is an independent botanical education project. Articles are drafted with AI assistance, then edited and checked against university extension services, botanical garden collections and other published horticultural sources.