

Rooting Plumeria Cuttings
Written with AI assistance, edited and checked against horticultural sources.
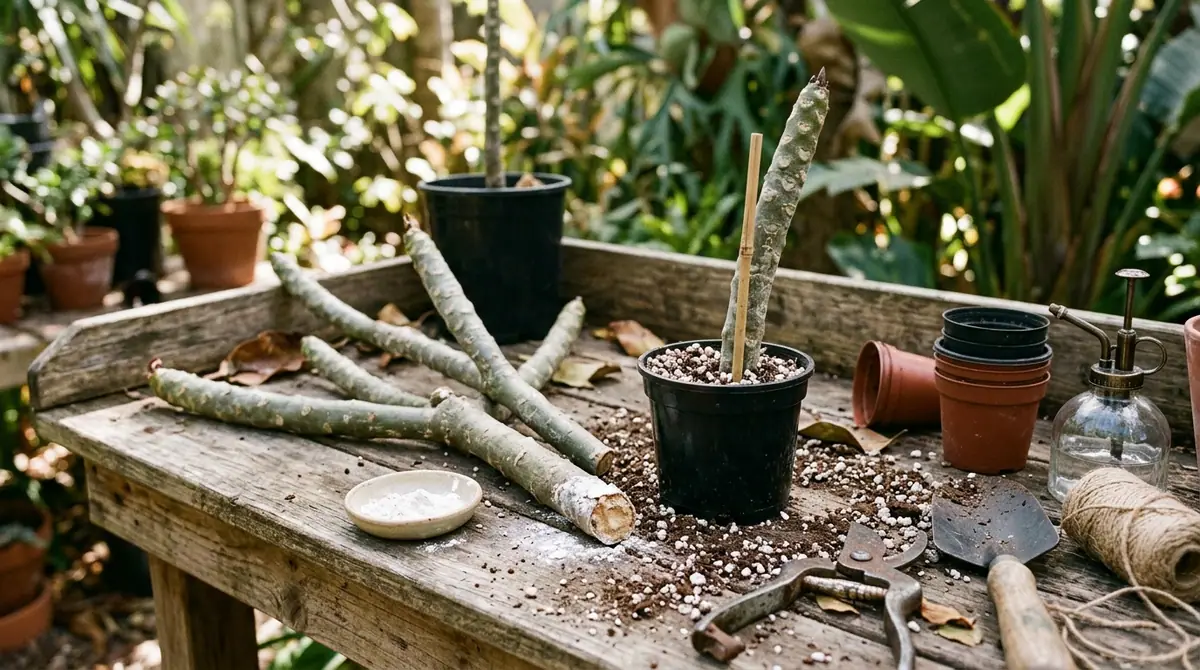
1. Botanical Overview & Natural Habitat

Understanding this evolutionary history is critical for successful propagation. When you take a stem cutting from a mature plumeria, you are harvesting a specialized storage organ packed with carbohydrates and water. The plant's natural defense mechanism against injury is to exude a milky white, toxic latex that rapidly seals the wound to prevent pathogen entry. Botanically speaking, plumerias do not possess pre-formed root initials along their stems like some willows or tomatoes. Instead, when exposed to the correct balance of warmth, oxygen, and moisture, the un-differentiated parenchyma cells within the vascular cambium layer must undergo dedifferentiation, forming a callus from which adventitious roots eventually emerge. This biological reality dictates every step of the rooting process: if the medium is too wet, oxygen is excluded, the callus rots, and the cutting dies before root primordia can form.
2. Essential Environmental & Care Requirements
To coax roots out of a dormant plumeria cutting, you must replicate the warm, dry, well-drained conditions of its native dry-forest habitat. Below is a breakdown of the specific physical parameters required for optimal root strike.
| Parameter | Optimal Condition | Common Mistake | Why It Matters |
|---|---|---|---|
| Ambient Temperature | 75°F–85°F (24°C–29°C) | Temperatures below 65°F (18°C) | Cold triggers dormancy; warm soil stimulates cellular division and root hormone activation. |
| Medium Moisture | Barely damp; dry out between waterings | Keeping the medium constantly soggy | Excess water starves the base of oxygen, causing the soft stem tissue to rot instantly. |
| Light Exposure | Bright, indirect light or filtered sun | Direct, scorching afternoon sun on unrooted stems | Without roots, high heat causes rapid transpirational water loss before the cutting can absorb moisture. |
| Media Porosity | 50% perlite/pumice + 50% peat-free compost | Using heavy garden topsoil or dense potting mix | Dense soils pack tightly, holding perched water tables that suffocate developing root tips. |
| Cutting Length | 12 to 18 inches (30 to 45 cm) | Using tiny tips under 6 inches (15 cm) | Small cuttings lack the carbohydrate reserves necessary to sustain life during the lengthy rooting window. |
💡 Pro-Tip: Always verify that your cutting's latex sap has completely dried and cured into a hard, leathery seal before putting it into any growing medium. I generally let my freshly harvested cuttings sit in a shaded, well-ventilated room for 7 to 14 days. This critical curing period drops the internal moisture content slightly, signaling to the cutting that it must activate its survival mechanisms and generate roots.
3. Step-by-Step Cultivation, Feeding & Propagation
Rooting plumeria cuttings successfully requires patience, sterile technique, and strict adherence to moisture discipline. Follow this step-by-step protocol to maximize your success rate.
- Select and Harvest the Cutting: Choose a healthy, firm, terminal branch from a mature plumeria tree during the active growing season (late spring or early summer). Using a sterilized pruning saw or sharp bypass pruners cleaned with 70% isopropyl alcohol, make a clean cut 12 to 18 inches (30 to 45 cm) below the growing tip.
- Strip Leaves and Cure: Immediately remove all leaves from the cutting to reduce moisture loss through transpiration. Wipe away any dripping latex with a paper towel and place the cutting horizontally in a warm, dry, shaded location for 7 to 14 days until the basal wound is entirely calloused over and dry to the touch.
- Prepare the Rooting Container: Select a 1-gallon (3.8-liter) to 2-gallon (7.6-liter) dark plastic pot with generous bottom drainage holes. Dark containers absorb solar heat better, which warms the root zone. Fill the container with a porous rooting blend consisting of equal parts coarse perlite and professional-grade cactus mix, or coir and pumice.
- Apply Rooting Compound (Optional): Dip the fully calloused base of the cutting 1 inch (2.5 cm) into water, then lightly dust it with a rooting hormone powder containing 0.3% Indole-3-butyric acid (IBA). Tap the cutting gently to shake off any excess powder.
- Plant the Cutting: Use a wooden stake to poke a pilot hole in the center of your prepared medium. Insert the calloused base of the plumeria cutting 3 to 4 inches (7.5 to 10 cm) deep into the mix. Firm the medium tightly around the base with your hands so the heavy cutting stands completely upright without wobbling.
- Position and Provide Heat: Place the potted cutting in a warm spot receiving bright, indirect light. If ambient temperatures drop below 75°F (24°C), place the container on a horticultural heating mat set to 80°F (27°C).
- Manage Moisture Sparingly: Water the medium just enough to lightly settle it around the stem. Do not water again until the potting mix is completely dry several inches down—typically every 14 to 21 days depending on ambient humidity. Misting the stem daily with a spray bottle can help prevent desiccation while roots are absent.
- Monitor for Growth: Look for signs of active growth, such as the unfurling of new, soft green leaves at the tip, which typically occurs within 45 to 90 days. Once robust leaves appear and gentle tugging reveals firm resistance from developing roots, the plumeria is successfully established.
⚠️ Important Caution: Never squeeze or wiggle a plumeria cutting to check if roots have formed. The newly emerging root tips are exceptionally brittle; snapping them delays establishment and creates an open wound where soil-borne pathogens can easily enter and cause terminal stem rot.
For further scientific insights on woody plant propagation and rooting hormone mechanics, consult the Royal Horticultural Society Propagation Guide or review regional extension bulletins like the University of Florida IFAS Extension Plumeria Production Guide.
4. Common Problems, Pests & Troubleshooting
Even experienced growers encounter obstacles when dealing with unrooted tropical stems. Here is how to diagnose and correct the most frequent issues:
- Black Tip or Soft Stem Rot: If the top of the cutting turns black or the base becomes squishy and oozes foul-smelling liquid, you are dealing with fungal or bacterial rot brought on by excessive moisture or unsterilized tools.
- Solution: Using a sterilized blade, slice away all rotten tissue moving upward until you hit clean, white, latex-oozing wood. Dust the fresh cut with powdered sulfur or cinnamon, let it re-cure for two weeks, and restart the rooting process in a completely fresh, sterile, dry medium.
- Shriveling and Wrinkling Bark: The cutting is losing more water than it can absorb, which is normal to a degree before roots form, but extreme shriveling indicates the environment is too hot and dry.
- Solution: Move the cutting out of direct, reflective sun and into bright, filtered light. Mist the bare stem daily to reduce transpirational stress while maintaining a dry root zone.
- Spider Mites: These microscopic pests thrive in the warm, dry conditions favored by plumeria cuttings, spinning fine webs along the stem and any emerging tender tips.
- Solution: Wipe down the stem with a cotton pad soaked in insecticidal soap or neem oil diluted according to label directions.
- Failure to Root After 120 Days: If the cutting remains firm and green but shows no new growth or root resistance after four months, temperatures are likely too low.
- Solution: Relocate the pot to a warmer environment or introduce a bottom heat mat to stimulate cellular metabolism.

5. Frequently Asked Questions
Can I root plumeria cuttings directly in water?
While plumeria cuttings will produce roots in a jar of water, water-grown roots develop in an aquatic environment with vastly different cellular structures than soil-grown roots. When you eventually transfer a water-rooted plumeria into soil, those delicate water roots frequently suffer severe transplant shock, rot, and die back. It is vastly superior to root your cuttings directly in a porous, soil-less medium from day one.
How long does it take for plumeria cuttings to root?
Under optimal conditions—maintaining a soil temperature between 75°F and 85°F (24°C–29°C)—plumeria cuttings typically take anywhere from 45 to 90 days to produce a functional root system. Cooler ambient temperatures, low light levels, or overwatering can easily stretch this timeline out to 120 days or longer.
Why is my plumeria cutting turning mushy at the bottom?
A mushy base is the classic symptom of stem rot, caused almost exclusively by overwatering or planting the cutting in a heavy, poorly draining soil mix that traps stagnant moisture around the calloused wound. Fungi naturally present in organic matter attack the un-rooted wood when oxygen levels drop to zero, causing rapid tissue collapse.
Should I remove the leaves from a plumeria cutting?
Yes, absolutely. You should strip all existing leaves off the cutting at the time of harvest. Leaves continuously transpire moisture into the air; because an unrooted cutting has no roots to absorb replacement water, leaving foliage attached will rapidly dehydrate and kill the branch before it has a chance to generate a root system.
Related Guides
- Plumeria Rooting Hormone
- How to Cut Plumeria for Rooting
- Rooting Hormone for Fiddle Leaf Fig
- Plumeria Dormant
- How to Grow Plumeria from Seed
📋 Table of Contents ▼ Click to expand
Tags:
Keep reading
🌿 Related Plants You Might Like






PlantSavvyWorld
Editorial team
PlantSavvyWorld is an independent botanical education project. Articles are drafted with AI assistance, then edited and checked against university extension services, botanical garden collections and other published horticultural sources.