

How to Cut Plumeria for Rooting
Written with AI assistance, edited and checked against horticultural sources.
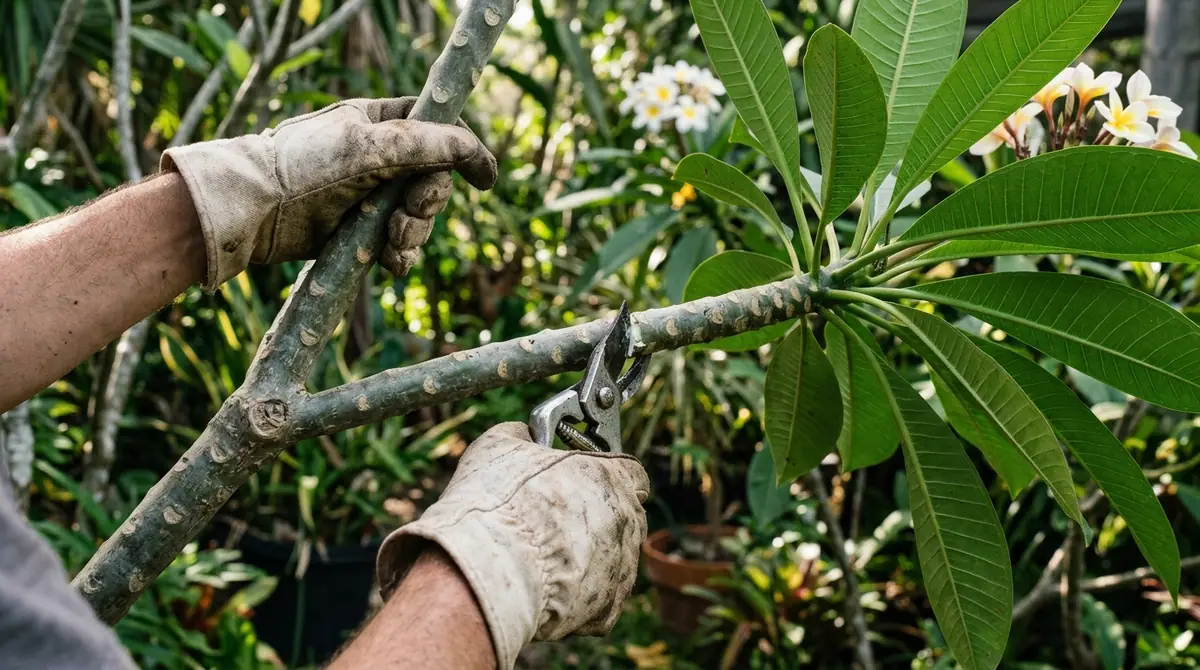
Plants possess remarkable evolutionary resilience, especially stem succulents equipped with specialized latex sap systems designed to heal wounds and regenerate root tissues in harsh tropical environments. When done with precision, hygiene, and an understanding of plant physiology, cutting and rooting plumeria is a deeply satisfying horticultural art. Here is the definitive, masterclass guide to propagating Plumeria spp. from stem cuttings.
1. Botanical Overview & Natural Habitat

In their native habitat, plumerias grow as deciduous or semi-deciduous shrubs or small trees, reaching heights of 15 to 30 feet (4.5 to 9 m) with an equal spread. Their thick, succulent, water-storing branches are an adaptation designed to survive prolonged droughts. When a branch breaks naturally due to high winds or animal activity, the exposed wound calluses over quickly, preventing pathogen entry, and eventually drops roots into the soil below when the monsoon rains arrive. This evolutionary survival mechanism is precisely what we mimic when we take a cutting for propagation.
The genus Plumeria contains roughly 7 to 11 accepted species, with Plumeria rubra (common frangipani), Plumeria obtusa (evergreen plumeria), and Plumeria pudica being the most widely cultivated. Botanically, plumeria stems feature prominent leaf scars (nodes) and an inner pith surrounded by a ring of vascular cambium—the meristematic tissue responsible for producing the secondary xylem and phloem, and crucially, adventitious roots. Understanding this internal architecture dictates how we make our cuts and where rooting hormone must be applied to stimulate cellular division.
2. Essential Environmental & Care Requirements
To successfully root a plumeria cutting, you must artificially replicate the warm, bright, and well-drained conditions of its native neotropical home. Because the cutting lacks roots during the critical first 30 to 90 days, it relies entirely on stored internal energy, warmth, and ambient humidity to initiate root primordial growth without rotting.
Temperature is the single most critical environmental variable. Rooting occurs most rapidly when ambient air temperatures remain consistently between 75°F and 85°F (24°C to 29°C), with bottom heat elevating the rooting medium to 80°F (27°C). If temperatures drop below 65°F (18°C), cellular activity slows dramatically, leaving the stagnant, moisture-rich cutting vulnerable to fungal pathogens like Phytophthora or Pythium.
Light is equally vital, though newly planted cuttings require bright, indirect light rather than scorching, direct desert sun. Direct sunlight increases foliar transpiration and heats the stem before roots can supply adequate moisture, causing dehydration. A bright, shaded patio, a greenhouse with 30% shade cloth, or an indoor setup beneath high-output LED grow lights delivering a 14-hour photoperiod is ideal.
| Parameter | Optimal Condition | Common Mistake | Why It Matters |
|---|---|---|---|
| Ambient Temperature | 75°F – 85°F (24°C – 29°C) | Allowing temps below 65°F (18°C) | Low warmth stalls cell division and invites stem rot before rooting begins. |
| Medium Moisture | Barely damp (wrung-out sponge) | Overwatering or keeping soil soggy | Cuttings lack roots; excess water causes rapid basal rot and fungal collapse. |
| Light Exposure | Bright, indirect light / 30% shade | Full, scorching direct afternoon sun | Excessive heat and light cause moisture loss before the root system can replace it. |
| Cutting Length | 12 to 18 inches (30 to 45 cm) | Taking small tips under 8 inches (20 cm) | Small cuttings lack sufficient stored carbohydrates and water reserves to survive. |
For detailed regional climate guidelines and university-backed horticultural research, consult resources provided by the University of Florida IFAS Extension or the Royal Horticultural Society (RHS).
3. Step-by-Step Cultivation, Feeding & Propagation
Selecting the right branch and executing clean cuts determines propagation success. Never take cuttings from diseased, stunted, or pest-infested trees. The ideal branch is a terminal branch tip measuring 12 to 18 inches (30 to 45 cm) in length, with firm, grayish-green or silver-green bark.
- Sanitize Your Tools: Wipe down a sharp, heavy-duty pruning saw or bypass pruners with a 70% isopropyl alcohol solution or a 10% bleach solution to prevent transferring systemic viruses or bacterial pathogens from other plants.
- Make the Cut: Cut cleanly through the stem at a slight 45-degree angle approximately 12 to 18 inches (30 to 45 cm) below the growing tip. The clean angle increases the surface area exposed to the rooting medium and potential moisture absorption.
- Manage the Sap and Foliage: Immediately wipe away the dripping white latex sap with a damp paper towel. Trim off all large leaves, leaving only two or three tiny, immature leaves at the very apex to minimize moisture loss through transpiration.
- Cure the Wound (Callusing): Place the freshly cut branch in a warm, dry, shaded location with good air circulation for 7 to 14 days. The cut end must dry out and form a hard, corky, silvery-gray callus. Never plant a fresh, wet cut directly into soil, as open wounds act as open doors for soil-borne fungi.
- Prepare the Rooting Medium: Mix a fast-draining, highly porous substrate consisting of equal parts perlite, coarse horticultural pumice, and aged peat moss or coco coir. Avoid heavy garden soils or fine potting mixes that retain excessive moisture.
- Apply Rooting Hormone (Optional): Dip the fully callused basal end of the cutting into water, then dust it lightly with a powder rooting hormone containing 0.3% Indole-3-butyric acid (IBA). Tap off any excess powder.
- Planting the Cutting: Fill a 1-gallon (3.8-liter) black plastic nursery container with your prepared medium. Insert the callused base 2 to 3 inches (5 to 7.5 cm) deep into the center of the pot. Firm the mix gently around the stem to anchor it vertically. Use bamboo stakes and soft garden twine to secure the cutting if it wobbles; any movement will snap fragile, newly emerging root hairs.
💡 Pro-Tip: Do not water your newly planted plumeria cutting immediately after placing it in the soil. Wait 7 full days to give the callus a chance to settle and adjust, then apply your first light watering. This initial dry period tricks the plant into aggressively searching for moisture by pushing out roots.
Once roots are established—typically confirmed in 60 to 90 days by gentle tug resistance and new, vibrant green leaf growth—you can begin a conservative feeding regimen. Apply a low-nitrogen, high-phosphorus water-soluble fertilizer (such as a 10-30-10 formulation) diluted to one-quarter strength every 3 weeks to encourage robust root system development without forcing premature, weak top-growth.
4. Common Problems, Pests & Troubleshooting
Even experienced horticulturists encounter setbacks when propagating succulents. Recognizing distress signals early saves the cutting.
- Basal Stem Rot (Black Tip or Soft Stem): If the bottom of the cutting turns black, mushy, or squishy, stem rot has set in, usually caused by overwatering or un-callused planting. Use a sterile blade to slice away all rotted tissue well above the infection until you see clean, white, latex-bleeding flesh. Re-dip the fresh cut in a copper-based fungicide, let it re-callus for 14 days, and restart the rooting process in fresh, dry medium.
- Shriveling and Wrinkling Stems: If the upper stem begins to pucker and wrinkle like a dried prune, the cutting is dehydrating faster than it can take up moisture. This typically indicates the medium is too dry, temperatures are too high, or the cutting was taken from an unhealthy, dehydrated parent tree. Misting the ambient air around the stem (avoiding the soil) can help, but ensure the base is not simultaneously rotting.
- Spider Mites and Scale Insects: Young plumeria leaves are magnets for sap-sucking pests. Inspect the undersides of leaves weekly. Treat infestations immediately with insecticidal soap or horticultural oil, ensuring temperatures are below 85°F (29°C) to prevent leaf burn.
⚠️ Important Caution: Plumeria sap contains irritants known as euphorbiacean-type compounds that can cause severe contact dermatitis, eye irritation, and allergic reactions in sensitive individuals. Always wear chemical-resistant nitrile gloves and safety glasses when cutting branches or handling fresh stems, and wash your hands thoroughly afterward.

5. Frequently Asked Questions
Can I root a plumeria cutting directly in water?
While plumeria cuttings will technically produce roots in a jar of water, water-grown roots develop a fragile, specialized cellular structure called aerenchyma. These water roots struggle to transition to a terrestrial soil medium and frequently rot or die back when finally transplanted. For long-term success, always root your plumeria cuttings directly in a porous, well-draining soil mix rather than water.
How long does it take for a plumeria cutting to root?
Under optimal conditions—with soil temperatures maintained at 80°F (27°C) and bright, indirect light—most healthy plumeria cuttings will push out viable root systems within 45 to 90 days. Cooler temperatures, overcast weather, or late-season propagation can extend this timeline to 120 days or more.
Why is my plumeria cutting turning brown and mushy at the top?
A condition known as "black tip" or top-down rot typically occurs when moisture settles on the terminal growing tip during humid, cool weather, or if the cutting was exposed to freezing temperatures. Cut the stem back several inches below the brown, mushy tissue until you reach firm, healthy green wood, and seal the new wound with waterproof pruning sealer or cinnamon powder to stop fungal progression.
Should I remove all the leaves from my cutting?
Yes, you should strip away all large, mature leaves, leaving only two or three tiny, emerging leaves at the tip. Plumeria leaves transpire massive amounts of water. Because your unrooted cutting lacks a functional root system to replace transpired moisture, leaving large leaves on the stem will rapidly dehydrate and kill the cutting before roots can form.
Related Guides
- Rooting Plumeria Cuttings
- Plumeria Rooting Hormone
- Rooting Plumeria
- Rooting Hormone for Fiddle Leaf Fig
- Plumeria Dormant
📋 Table of Contents ▼ Click to expand
Tags:
Keep reading
🌿 Related Plants You Might Like






PlantSavvyWorld
Editorial team
PlantSavvyWorld is an independent botanical education project. Articles are drafted with AI assistance, then edited and checked against university extension services, botanical garden collections and other published horticultural sources.