

Rooting Plumeria
Written with AI assistance, edited and checked against horticultural sources.
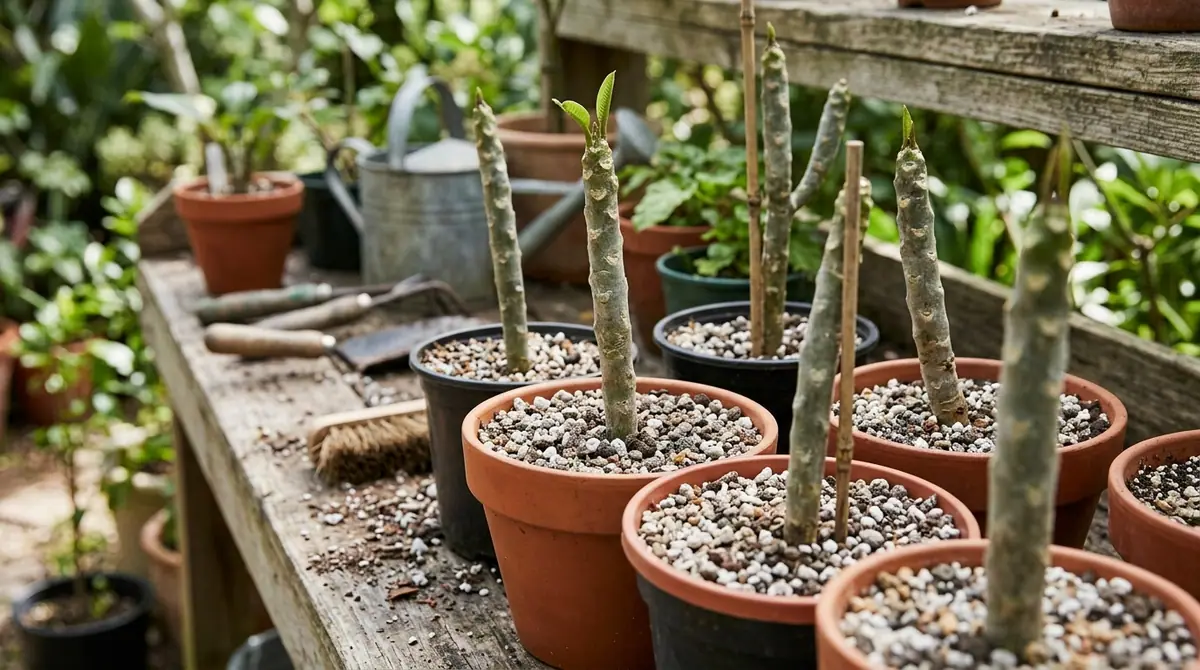
1. Botanical Overview & Natural Habitat
The first time I watched a bare, seemingly dead wooden club of a plumeria erupt into a canopy of tropical fragrance, I was hooked. It was the spring of 2011 in a greenhouse, and a cutting given to me by an old Hawaiian grower looked like nothing more than a discarded piece of driftwood. Yet, within six weeks of applying bottom heat and structural restraint, emerald leaves began to unfurl.

Botanically speaking, plumeria wood contains a high concentration of latex sap. When a stem is severed, this sap flows freely before coagulating to form a protective seal. Understanding this internal hydraulic and chemical system is the key to successful propagation. Unlike many soft-wood ornamentals, plumeria cuttings cannot be treated like delicate annuals. They require a period of callus formation where the vascular cambium layer differentiates into specialized cells capable of producing root meristems.
Taxonomically, the genus encompasses roughly 7 to 8 recognized species, with Plumeria rubra (frangipani) and Plumeria obtusa being the most common parents of modern cultivated hybrids. In the landscape, mature specimens develop a gnarled, architectural branching structure that makes them prized focal points. When you propagate a plumeria from a cutting, you are cloning the exact genetic characteristics of the parent tree—preserving flower color, fragrance intensity, and growth habit precisely. According to research from the University of Florida IFAS Extension, woody cuttings from established cultivars maintain complete trueness-to-type, bypassing the genetic variability inherent in seed propagation.
2. Essential Environmental & Care Requirements
Rooting plumeria is an exercise in managing thermodynamics, moisture physics, and light dynamics. Because a cutting lacks a root system, it cannot absorb water to replace transpirational losses. Therefore, your primary objective is to minimize moisture loss while stimulating cellular division at the basal cut.
Temperature is the single most critical variable. The basal temperature of the rooting medium must be maintained between 75°F and 85°F (24°C and 29°C). Air temperature should ideally hover around 80°F (26°C). If ambient temperatures drop below 65°F (18°C), cellular activity slows dramatically, leaving the exposed, un-rooted stem vulnerable to opportunistic fungal pathogens like Phytophthora and Pythium. For indoor propagators, a thermostatically controlled propagation heating mat is non-negotiable.
Light requirements shift during the rooting cycle. While mature plumeria trees demand 6 to 8 hours of direct, unfiltered sunlight daily, a fresh cutting will dehydrate rapidly under intense solar radiation before roots can support it. Provide bright, indirect light or filtered morning sun—roughly 2,000 to 3,000 foot-candles—for the first 30 to 45 days. Once roots establish and top growth reaches 2 to 3 inches (5 to 7.5 cm), gradually step the plant up to full sun over a 14-day period.
Air circulation is equally vital. Stagnant, humid microclimates invite stem rot. Ensure gentle air movement around the upper canopy of the cutting to deter fungal spores, while keeping the rooting medium consistently aerated.
| Parameter | Optimal Condition | Common Mistake | Why It Matters |
|---|---|---|---|
| Medium Temp | 75°F – 85°F (24°C – 29°C) | Letting substrate drop below 65°F (18°C) | Low temperatures halt callus formation and invite rot |
| Light Level | Bright, indirect (2,000–3,000 fc) | Direct, scorching midday sun on unrooted cuttings | Excess light causes rapid dehydration before root initiation |
| Substrate pH | 6.2 to 6.8 | Highly acidic or alkaline soil mixes | Extreme pH locks out micronutrients necessary for root growth |
| Watering | "Tuck and dry" method; barely damp | Keeping medium soggy and waterlogged | Saturated soils displace oxygen, causing immediate basal rot |
3. Step-by-Step Cultivation, Feeding & Propagation
Successful propagation begins with selecting the right wood. Select firm, disease-free branch tips measuring at least 12 inches (30 cm) in length and 1 to 2 inches (2.5 to 5 cm) in diameter. Avoid soft, green terminal growth that bends easily, as it lacks the carbohydrate reserves required for sustained root generation.
💡 Pro-Tip: Always use a sterilized, razor-sharp pruning saw or grafting knife. A dull tool crushes the vascular bundles, creating a jagged wound that traps moisture and invites bacterial soft rot. Sterilize your blade in a 10% household bleach solution or isopropyl alcohol between every single cut.
Step 1: Harvesting and Cauterization
Make a clean, horizontal or slightly angled cut through the mature stem. Immediately wipe away excess dripping latex with a paper towel. Place the cutting in a shaded, well-ventilated indoor location for 7 to 14 days to allow the basal wound to form a thick, leathery callus. The cut end should turn a grayish-brown and feel completely dry and firm to the touch before planting.
Step 2: Selecting the Rooting Substrate
Never root plumeria in heavy garden soil or standard potting mix. You need an ultra-porous, fast-draining medium. Combine equal parts coarse perlite, horticultural-grade pumice, and aged coco coir. Alternatively, a blend of 60% perlite and 40% peat-free organic compost works well. The goal is a medium that holds just enough moisture to encourage rooting without retaining free water around the stem base.
Step 3: Preparing the Container
Select a container that matches the size of the cutting. A 1-gallon (3.8-liter) nursery pot—roughly 6 to 8 inches (15 to 20 cm) in diameter—is ideal for a standard 12-inch cutting. Deeper containers are better than wide ones because plumeria cuttings benefit from vertical root run. Ensure the pot has generous drainage holes.
Step 4: Hormonal Application (Optional)
While plumeria will root naturally without assistance, dusting the callused end with an indole-3-butyric acid (IBA) rooting hormone powder at a concentration of 0.3% to 0.8% accelerates cell division. Tap the cutting gently after application to remove excess powder; over-application can burn the emerging root tissue.
Step 5: Planting the Cutting
Fill your container with the prepared substrate. Use a dibble stick or your finger to create a central hole 3 to 4 inches (7.5 to 10 cm) deep. Insert the callused base of the cutting into the hole and firm the medium securely around the stem so the cutting stands upright without support. If the cutting is top-heavy, secure it to a bamboo stake using soft garden twine rather than pressing the soil down too hard, which compacts pore space.
Step 6: Initial Watering and Heat Application
Water the medium thoroughly once to settle the particles around the stem base, then allow it to drain completely. Place the pot onto your heating mat, ensuring a substrate temperature of 75°F to 85°F (24°C to 29°C).
Step 7: Post-Planting Moisture Management
Do not water the medium again until it is completely dry at a depth of 2 inches (5 cm). Over-watering during the first 30 days is the leading cause of propagation failure. Check moisture levels by lifting the pot—it should feel noticeably lightweight before your next watering. Root emergence typically occurs within 35 to 65 days, signaled by the expansion of new terminal leaves and firm resistance when gently tugging the stem.
4. Common Problems, Pests & Troubleshooting
When rooting plumeria, most issues trace back to excessive moisture and insufficient bottom heat.
Black Tip Fungus (Colletotrichum gloeosporioides): This pathogen attacks emerging terminal growth during cool, wet weather. The tips turn black, mushy, and die back. Prevent this by keeping ambient humidity moderate and applying a preventative copper-based fungicide to the tip if local humidity exceeds 80%.
Basal Stem Rot: If the base of your cutting turns soft, spongy, or dark brown, rot has set in.
⚠️ Important Caution: Do not wait for rot to spread upward. Unpot the cutting immediately. Use a sterile razor blade to slice away all rotted tissue well into clean, white, latex-oozing wood (at least 1 inch above the infected area). Treat the fresh cut with powdered sulfur or cinnamon as a natural antifungal, allow it to re-callus for 14 days in dry air, and restart the rooting process in fresh, sterile medium.
Dehydration and Wrinkling: If the stem feels slightly wrinkled or rubbery, the cutting is losing water faster than its undeveloped vascular system can handle. This often happens if light levels are too high or ambient temperatures fluctuate wildly. Mist the air around the plant (avoiding soaking the soil) and move it to a location with 50% shade until turgidity returns.
Sucking Pests: Young, tender leaves on newly rooted cuttings attract aphids and spider mites. Because young root systems cannot tolerate harsh chemical insecticides or systemic treatments, wash foliage gently with a solution of insecticidal soap and warm water using a soft microfiber cloth.
For further botanical insights on managing woody tropical ornamentals and avoiding root pathogens, consult the Royal Horticultural Society (RHS) propagation guidelines.

5. Frequently Asked Questions
Can I root a plumeria cutting directly in a glass of water?
While plumeria cuttings will produce roots in water, water-grown roots develop without root hairs and lack structural rigidity. When you transplant a water-rooted cutting into soil, these fragile roots almost always suffer transplant shock, wither, and die. It is vastly superior to root directly in an aerated, soil-less medium to encourage terrestrial root structures from day one.
How do I know if my plumeria cutting has successfully rooted?
The most reliable indicator of successful rooting is structural resistance—if you gently wiggle the stem after 6 weeks and feel firm resistance, roots have anchored into the medium. Additionally, the push of vibrant new green leaves from the apex indicates that the stem is drawing moisture and nutrients from active roots below. Do not unpot the cutting to check, as breaking microscopic root hairs will set back development.
What time of year is best to take plumeria cuttings?
Late spring through mid-summer is the ideal propagation window. During these months, ambient temperatures are naturally elevated, sunlight is intense, and the parent plant is in active growth mode, maximizing the carbohydrate storage within the stems and ensuring faster callus and root formation.
Why is my plumeria cutting turning mushy at the bottom?
A mushy, soft, or foul-smelling base is the textbook symptom of basal stem rot, caused by a combination of cold temperatures and overly wet rooting medium. Pathogenic fungi attack the un-rooted wood before callus tissue can seal the vascular bundles. To fix this, cut away the rotted wood until you see clean white tissue, let it dry out and re-callus for two weeks, and restart in a warm, dry, fast-draining mix.
Related Guides
- Rooting Plumeria Cuttings
- Plumeria Rooting Hormone
- How to Cut Plumeria for Rooting
- Rooting Hormone for Fiddle Leaf Fig
- Plumeria Dormant
📋 Table of Contents ▼ Click to expand
Tags:
Keep reading
🌿 Related Plants You Might Like






PlantSavvyWorld
Editorial team
PlantSavvyWorld is an independent botanical education project. Articles are drafted with AI assistance, then edited and checked against university extension services, botanical garden collections and other published horticultural sources.