Written with AI assistance, edited and checked against horticultural sources.
The morning I first successfully germinated a batch of Plumeria rubra seeds from a hand-pollinated tree in my conservatory, I learned a humbling lesson about patience and moisture control. I had buried three winged samaras vertically like little lawn darts into dense, soggy potting soil, assuming they needed a good deep drink to wake up. Within four days, the embryo axes turned translucent and melted into a mushy, fungal rot. Plumeria seeds are architectural marvels, carrying a built-in helicopter wing, but they are unforgiving of stagnation. When I finally shifted to a porous, sterile medium, laid them flat at precisely 0.25 inches (0.6 cm) deep, and kept the ambient heat locked at 85°F (29°C), the transformation was breathtaking. Today, I want to walk you through the exact science and hands-on technique required to take a raw plumeria seed and grow it into a vigorous, branching tropical specimen.
1. Botanical Overview & Natural Habitat
Plumerias belong to the Apocynaceae (dogbane) family and the genus Plumeria, native primarily to Central America, Mexico, the Caribbean, and parts of South America. In their natural habitats, these deciduous to semi-evergreen small trees thrive in tropical and subtropical dry forests. They experience distinct wet and dry seasons, a physiological memory that dictates how a young plumeria seedling behaves in human care.
Botanically, a plumeria seed develops inside a leathery, paired follicle (often called a horn) that splits open upon maturity. Each seed features a membranous wing (samara) designed for wind dispersal (anemochory). When you examine a plumeria seedling during its first 30 days of life, you are looking at an epigeal germination process. The hypocotyl arches upward, lifting the seed coat into the air, while the flat cotyledons unfurl to capture maximum sunlight before the true leaves emerge from the apical meristem.
Unlike cuttings (clones), which replicate the exact genetic profile of the parent plant, every plumeria seedling is a genetic lottery. This means flower color, scent, growth habit, and vigor will be entirely unique. While this introduces an element of surprise—you may wait 2 to 4 years to see your seedling's first blooms—it is also how new cultivars are bred. Understanding their dry-forest ancestry tells us everything we need to know about their root systems: they demand exceptional drainage, high light intensity, and warm ambient temperatures to prevent root rot caused by stagnant water.
2. Essential Environmental & Care Requirements
Growing a plumeria seedling successfully requires mimicking the microclimate of a tropical dry forest during its establishment phase.
Parameter
Optimal Condition
Common Mistake
Why It Matters
Temperature
80°F–90°F (27°C–32°C)
Letting temperatures drop below 70°F (21°C)
Cold halts metabolic activity and invites soil pathogens.
Light
12–16 hours of bright, indirect to direct light
Deep shade or intense, unacclimated midday sun
Weak light causes etiolation; harsh sun scorches tender cotyledons.
Soil pH
6.5 to 7.0 (Slightly acidic to neutral)
Highly compacted, heavy clay or pure peat moss
Prevents nutrient lockout and ensures rapid root oxygenation.
Moisture
Allow top 0.5 inches (1.3 cm) to dry out
Keeping soil permanently saturated
Stifles gas exchange in root hairs, triggering stem rot.
Light intensity is the primary driver of compact, healthy stem development in seedlings. If you notice your plumeria seedling stretching tall with pale, thin stems—a condition known as etiolation—it is crying out for higher lumens. Supplement with full-spectrum LED grow lights positioned 12 inches (30 cm) above the foliage for 14 hours daily if natural sunlight is insufficient.
Air circulation is equally critical. Stagnant indoor air creates a breeding ground for fungal spores like Rhizoctonia and Pythium, which cause damping-off disease. A small oscillating fan running on low speed nearby strengthens the juvenile stems through mechanical wind stress (thigmomorphogenesis), resulting in thicker, more resilient trunks. For deeper academic insight into tropical plant environmental tolerances, consult the Royal Botanic Gardens, Kew.
Growing a plumeria from seed is a rewarding exercise in precision horticulture. Follow this exact sequence to maximize your germination rates and support early seedling vigor.
Source Fresh Seed: Acquire fresh plumeria seeds that still retain some flexibility in the seed body and are not brittle or bleached out. Viability drops sharply after 6 to 12 months.
Prepare the Medium: Mix a sterile, highly porous germination blend consisting of 50% perlite or coarse pumice, 25% coco coir, and 25% professional seed-starting compost. Avoid heavy garden soil completely.
Position the Seed: Lay the seed flat horizontally on top of the medium. Gently press it down so the flat end is anchored, but leave the paper-thin wing exposed above the soil surface. Never bury a plumeria seed vertically or completely submerge it in dense media.
Moisten and Cover: Mist the planting tray thoroughly with a fine spray bottle using lukewarm water. Cover the container with a clear plastic humidity dome or bag to maintain 80% to 90% relative humidity.
Apply Bottom Heat: Place the tray on a seedling heat mat set to maintain a constant soil temperature of 85°F (29°C). Germination typically occurs within 7 to 21 days.
Remove the Dome: The moment you see the hook of the hypocotyl breaking the soil surface, remove the humidity dome immediately to prevent fungal buildup.
Transition to Individual Pots: Once the seedlings develop their first true leaves (usually around week 4 or 5), gently pot them up individually into 3-inch (7.6 cm) containers using the same fast-draining potting matrix.
Initiate Feeding Protocol: At week 6, begin fertilizing with a balanced, water-soluble fertilizer diluted to quarter-strength (e.g., a 20-20-20 formula with micronutrients) applied every two weeks during the active growing season.
💡 Pro-Tip: When transplanting your 4-week-old seedlings into individual containers, plant them slightly deeper—up to the base of the cotyledons—than they were growing in the seed tray. This encourages adventitious rooting along the lower hypocotyl, anchoring the young plant firmly and producing a thicker, more stable trunk base as it matures.
4. Common Problems, Pests & Troubleshooting
Even with meticulous care, growing plumeria seedlings presents distinct challenges. Recognizing physiological stress early saves your plants.
Damping-Off Disease: You notice a sudden pinching, water-soaked lesion at the soil line, and the seedling collapses overnight. This is caused by soil-borne fungi thriving in stagnant, cold moisture. Treat immediately by withholding water, dusting the soil surface with powdered cinnamon (a natural antifungal), and improving air movement. If the stem is severed, the seedling cannot be saved.
Yellowing Cotyledons: If the seed leaves turn yellow and drop prematurely during the first two weeks, it is usually normal as the plant exhausts the stored endosperm. However, if true leaves turn yellow later, it points to overwatering or nitrogen deficiency. Check root health: white, firm roots indicate a feeding issue, while brown, mushy roots indicate rot.
Spider Mites: Tiny, stippled yellow dots appear on the upper surface of the leaves, accompanied by fine webbing underneath. Seedlings are intensely vulnerable because of their tender leaf tissue. Wash the foliage thoroughly with a gentle castile soap solution (1 teaspoon per quart of water) and repeat every 5 days for two weeks to break the pest lifecycle.
⚠️ Important Caution: Never let your plumeria seedling sit in standing water beneath its pot. Empty drainage saucers within 10 minutes of watering. Plumeria roots suffocate rapidly in waterlogged media, leading to irreversible root rot and sudden plant collapse. For further troubleshooting guidelines on tropical plant pathology, visit the University of Florida IFAS Extension.
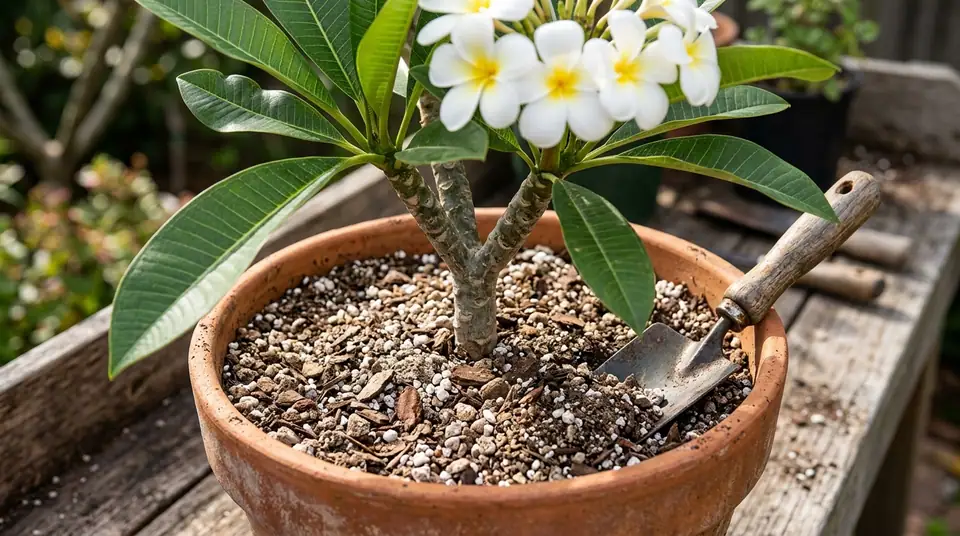
Potted plumeria plant with white flowers and a garden trowel in coarse potting soil
5. Frequently Asked Questions
How long does it take for a plumeria seedling to produce its first flowers?
A seedling typically takes between 2 to 4 years to reach flowering maturity. Because seedlings are grown from seed rather than cuttings, their juvenile phase must run its course. Providing maximum sunlight, consistent warmth, and regular balanced fertilization during the growing season will help your plant reach maturity as quickly as possible.
Should I cut off the wing of the plumeria seed before planting?
No, leave the wing completely intact. While some growers worry it will trap moisture, the wing actually serves as a natural anchor when laid flat on the soil surface and does not inhibit germination. Removing or damaging the wing risks tearing the embryonic tissue housed within the seed body.
Can I grow plumeria seedlings indoors year-round?
Yes, you can grow them indoors permanently if you can provide optimal conditions. They require a south-facing window with at least 6 hours of direct sunlight or a high-output LED grow light system providing 14 hours of daily illumination. Keep indoor winter temperatures above 65°F (18°C) and reduce watering significantly during shorter winter days to honor their natural dormancy cycle.
Why is my plumeria seedling getting so tall and leggy instead of bushier?
Leggy growth is almost always caused by insufficient light intensity. When a seedling receives too little light, it stretches rapidly to find a brighter environment. Move the plant closer to your strongest light source or supplement with a dedicated plant grow light positioned directly overhead.
PlantSavvyWorld is an independent botanical education project. Articles are drafted with AI assistance, then edited and checked against university extension services, botanical garden collections and other published horticultural sources.