

When Can You Plant Seed Potatoes
Written with AI assistance, edited and checked against horticultural sources.
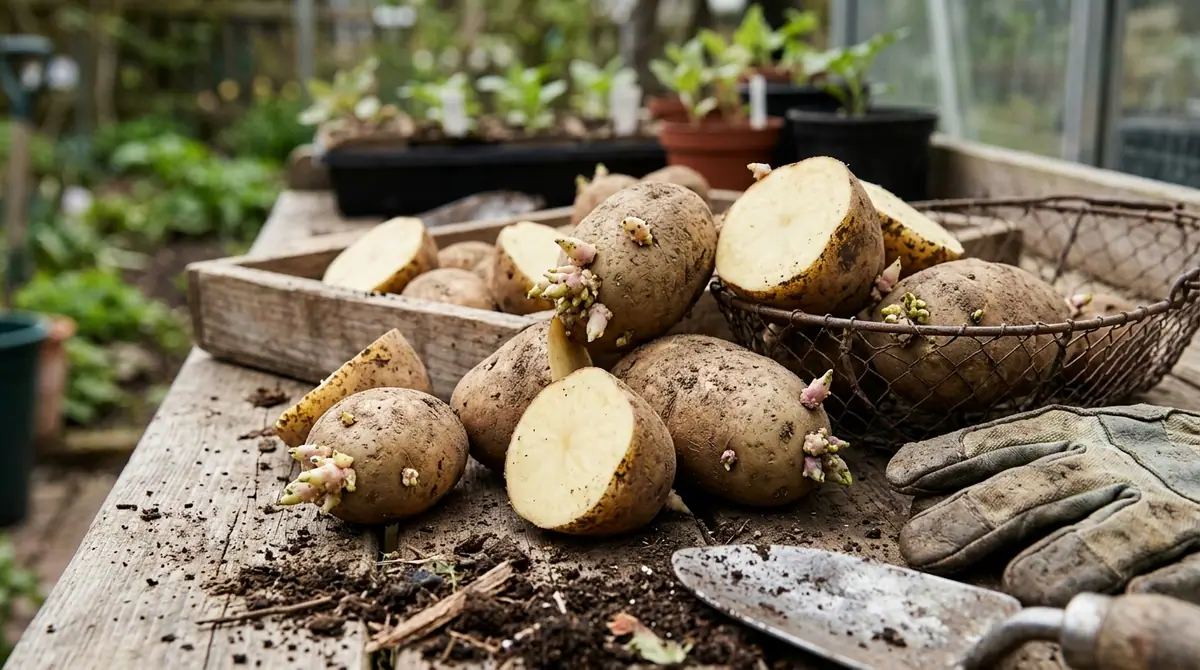
I pulled on my mud-crusted muck boots, stepped out into the biting March frost, and jammed my digital soil thermometer four inches down into the garden bed. The readout flickered: 42°F (5.5°C). My hands were freezing, but I smiled—the threshold had finally been crossed. Years ago, I made the rookie mistake of dropping seed potatoes into frozen, waterlogged soil in late February simply because I was impatient for spring. Every single one of them rotted before sending up a single green shoot. That frustrating lesson taught me that timing isn't just a suggestion when growing potatoes; it is the absolute margin between a bountiful harvest of crisp, golden tubers and a subterranean graveyard of mushy starch. If you are asking yourself when can you plant seed potatoes, the answer hinges on soil temperature, frost dates, and biological preparation rather than a rigid calendar month. I am going to walk you through the exact science and field-tested methods to get your potato crop off to a flawless start.
1. Botanical Overview & Natural Habitat

Unlike true seeds, which are the product of sexual reproduction via the tomato-like botanical fruits the potato plant sometimes produces, "seed potatoes" are actually whole tubers or cut sections of tubers used for vegetative propagation. Each seed potato is a modified underground stem (a stolon swelling) packed with stored carbohydrates and dormant meristematic buds known as "eyes."
When you place a seed potato into the soil, it relies entirely on these stored starches to fuel initial root and shoot development until true leaves emerge to begin photosynthesis. Because their wild ancestors developed in cool, mountainous soils, potatoes are distinctly cool-season crops. They thrive when daytime air temperatures range between 60°F and 70°F (15°C to 21°C), and night temperatures stay around 55°F (13°C). When temperatures consistently soar above 85°F (29°C), tuber production grinds to a halt, and the plant focuses exclusively on survival.
Understanding this botanical heritage helps explain why matching your planting window to the right soil temperature—rather than just waiting for the last spring frost—is the single most critical factor for success. For an in-depth look at how root and tuber systems behave under varying subterranean conditions, you can cross-reference my analysis in the How Deep Do Pepper Plant Roots Go? Pot Size & Substrate Depth Guide.
2. Essential Environmental & Care Requirements
Creating the ideal underground microclimate for your seed potatoes requires attention to soil composition, moisture, and thermal dynamics. Because tubers expand entirely beneath the soil surface, the substrate must offer minimal mechanical resistance while maintaining high aeration.
| Parameter | Optimal Condition | Common Mistake | Why It Matters |
|---|---|---|---|
| Soil Temperature | 45°F to 55°F (7°C to 13°C) | Planting below 40°F (4.4°C) | Cold soil causes seed pieces to rot before rooting; warm soil above 65°F (18°C) encourages fungal pathogens. |
| Soil pH | 5.8 to 6.5 | Highly alkaline soil above 7.0 | Slightly acidic conditions suppress Streptomyces scabies, the bacterium responsible for common potato scab. |
| Soil Moisture | Consistently moist (like a wrung-out sponge) | Waterlogging or severe drought | Saturated soil starves developing roots of oxygen; drought halts tuber expansion and causes deformities. |
| Sunlight | 6 to 8 hours of direct sun daily | Shaded garden beds | Reduced solar radiation limits leaf-area photosynthesis, starving underground tubers of necessary sugars. |
Soil texture is just as vital as temperature. Heavy clay soils pack tightly around expanding tubers, resulting in misshapen, stunted potatoes and making harvest a backbreaking chore. If your native soil leans heavy, amend it generously with aged compost and coarse horticultural sand to improve drainage.
For those managing complex edible landscapes or integrating crops into existing ornamental designs, keeping soil nutrition balanced is essential. While potatoes are heavy feeders, excess nitrogen will trick the plant into growing a massive, lush canopy of dark green leaves at the absolute expense of tuber formation—a common pitfall for beginning growers.
3. Step-by-Step Cultivation, Feeding & Propagation
Getting your timing right means aiming for 2 to 4 weeks before your area's average last spring frost date, provided your soil has warmed to at least 45°F (7°C) at a 4-inch (10 cm) depth. Follow this sequential protocol to move from bare tubers to a thriving harvest.
- Source Certified Disease-Free Seed Potatoes: Purchase certified seed potatoes from a reputable nursery or extension service. Never use grocery store potatoes, as they are frequently treated with anti-sprouting chemicals and may harbor latent viral or bacterial pathogens.
- Chitting (Pre-Sprouting): Four weeks before planting, place your seed potatoes in a cool, bright indoor location (around 50°F to 60°F or 10°C to 15°C) with indirect sunlight. This process, known as chitting, encourages short, thick, dark green sprouts to form, giving your plants a 7-to-10-day head start in the garden.
- Cutting the Tubers: Two days before planting, use a sterilized razor blade or sharp knife to cut larger seed potatoes into chunks. Ensure each piece weighs roughly 1.5 to 2 ounces (42 to 57 grams) and contains at least two distinct, visible "eyes."
- Curing the Cuts: Lay the cut pieces out in a single layer at room temperature with good air circulation for 48 to 72 hours. This allows them to form a protective, corky callus, which acts as a primary defense against soil-borne fungi.
- Digging the Trenches: Dig planting trenches 4 to 6 inches (10 to 15 cm) deep. Space your trenches about 24 to 30 inches (60 to 76 cm) apart to allow adequate room for hilling later.
- Placing the Seed Pieces: Drop the seed pieces into the trench spaced 12 inches (30 cm) apart, with the dominant sprouts pointing directly upward. Press them gently into the loose soil base.
- Initial Backfilling: Cover the seed pieces with just 2 to 3 inches (5 to 7.5 cm) of soil. Leaving the trench partially empty allows sunlight to warm the root zone faster and prevents early shoots from exhausting themselves trying to punch through a deep layer of heavy earth.
- Hilling as They Grow: Once the green shoots reach 6 to 8 inches (15 to 20 cm) tall, pull soil up around the stems, burying the lower third of the plant. Repeat this hilling process every two to three weeks until the plants begin to flower. Hilling prevents developing tubers near the surface from turning green and developing solanine upon exposure to sunlight.
💡 Pro-Tip: If a sudden, severe late frost threatens your newly emerged potato foliage, don't panic. Simply cover the emerging green shoots with a thick layer of straw or floating row covers overnight. Because the growing tips are still insulated underground, a top-frost rarely kills an established root system.
4. Common Problems, Pests & Troubleshooting
Even with impeccable timing, garden ecosystems throw curveballs. Identifying issues early saves your crop from total loss.
- Seed Piece Decay: If your plants fail to emerge after 4 weeks, dig down carefully. If you find slimy, foul-smelling mush, the soil was too cold and wet when planted, inviting Pythium and Fusarium fungal rots. Always wait for the 45°F (7°C) soil threshold and ensure your cuts are fully calloused.
- Colorado Potato Beetle (Leptinotarsa decemlineata): These yellow-and-black striped beetles and their brick-red larvae are voracious defoliators. Hand-pick adults and egg masses from the undersides of leaves immediately in the spring. For heavy infestations, apply Bacillus thuringiensis subspecies tenebrionis (Bt) or spinosad according to label directions.
- Common Scab (Streptomyces scabies): This soil bacterium causes unsightly, corky, pitted lesions on the skin of the tubers. While edible, scab ruins storage quality. Prevent it by maintaining a soil pH below 6.5 using elemental sulfur and avoiding fresh, uncomposted manure, which raises alkalinity.
- Green Tubers and Solanine Poisoning: Tubers exposed to sunlight turn green and produce high levels of solanine, a bitter glycoalkaloid that causes gastrointestinal distress. Prevent this by practicing diligent hilling throughout the growing season.
For additional regional strategies on timing edible crops against unpredictable seasonal shifts, you can review guidelines from the University of California Agriculture and Natural Resources publication portal, which offers exceptional data on regional soil management.
⚠️ Important Caution: Never consume green-skinned potatoes or potato greens (leaves, stems, and true berries). All green parts of the Solanum tuberosum plant contain toxic levels of solanine and chaconine. If a tuber is only slightly green, you can aggressively pare away the green flesh with a knife, but discard any tubers that are extensively discolored.

5. Frequently Asked Questions
What happens if you plant seed potatoes too early?
If you plant seed potatoes in soil that is too cold (below 40°F / 4.4°C) and waterlogged, the tubers cannot initiate metabolic growth. Instead, they sit dormant while soil-borne pathogens attack the cellular walls, causing the seed piece to rot entirely before a root system can form. Patience is always rewarded with potatoes.
Do I need to cut my seed potatoes before planting?
No, cutting is entirely optional. Whole seed potatoes (often called "b-size" or golf-ball-sized potatoes) actually perform exceptionally well because their intact skin forms a natural barrier against soil pathogens. However, cutting larger tubers into multi-eye chunks stretches your planting stock and produces robust yields, provided you allow the cut surfaces to callous over for 48 hours before planting.
Can I grow potatoes from grocery store potatoes?
While grocery store potatoes will sprout under the right conditions, it is strongly discouraged. Commercial potatoes are routinely treated with chemical sprout inhibitors to extend shelf life on supermarket displays, which can result in erratic, weak growth in your garden. Furthermore, store-bought tubers can carry dormant fungal, bacterial, or viral diseases (like potato virus Y) that will contaminate your garden soil for future seasons. Always source certified disease-free seed potatoes.
How do I know when my potatoes are ready to harvest?
You have two harvesting windows depending on your culinary goals. For "new potatoes"—small, tender, thin-skinned treats—you can gently dig around the root zone 70 to 80 days after planting, right after the plants finish flowering. For a main crop meant for winter storage, wait until the plant foliage naturally turns yellow, dies back, and dries out completely. Cut the dead vines down to the soil line, wait 10 to 14 days for the tuber skins to toughen up in the ground, and then carefully fork them out on a dry, overcast day. To ensure your broader landscape and companion edible beds remain coordinated throughout these seasonal transitions, consult the expert cultivation calendar found in the RHS Vegetable Growing Guidelines.
Related Guides
- Why Are My Potatoes So Small
- When to Harvest Fingerling Potatoes
- When Plant Potatoes Zone 5
- When Do You Plant Potatoes in Virginia
- When to Plant Sweet Potatoes in Kansas
📋 Table of Contents ▼ Click to expand
Tags:
Keep reading
🌿 Related Plants You Might Like






PlantSavvyWorld
Editorial team
PlantSavvyWorld is an independent botanical education project. Articles are drafted with AI assistance, then edited and checked against university extension services, botanical garden collections and other published horticultural sources.