

When is the Best Time to Transplant a Plant
Written with AI assistance, edited and checked against horticultural sources.
A drooping, heat-stressed Japanese maple in the dead of a humid July afternoon cannot handle a massive structural shift while pouring all its energy into transpirational cooling and leaf maintenance. Rushing nature by moving a tree at the wrong time causes it to drop every single leaf by August, because understanding when is the best time to transplant a plant is the single most critical factor separating a flourishing garden from a graveyard of expensive nursery stock.

1. Botanical Overview & Natural Habitat
To understand when to move a plant, you must first understand how root systems function in nature. Plants do not grow at a uniform rate year-round; instead, they alternate between vegetative top growth and subterranean root development. Root growth flushes typically occur when soil temperatures are between 50°F and 65°F (10°C to 18°C), long before top growth emerges in spring, or in autumn after top growth has hardened off and soil remains warm from summer.
In native habitats, plants naturally experience shifting conditions, but they do so gradually. When we transplant, we accelerate this adaptation timeline from months to minutes. Deciduous plants—those that drop their leaves in winter—enter a state of true dormancy where metabolic rates drop to a fraction of their summer peaks. During this dormant window, the plant directs virtually zero resources toward leaf maintenance, flowers, or fruit production. This makes dormancy the gold standard for moving woody perennials, shrubs, and trees.
Conversely, evergreen plants require slightly different handling. They continue transpiring water through their needles or leaves even in winter, which means moving them in late winter or early spring just before the spring flush gives their roots time to anchor before dry summer winds kick in. For a deeper academic dive into root regeneration timelines, consult the RHS Guidance on Planting and Transplanting.
2. Essential Environmental & Care Requirements
Successful transplantation hinges on matching environmental triggers with internal plant physiology. If you ignore soil temperature, relative humidity, and photoperiod, even the most meticulous digging technique will fail.
Soil moisture is your primary operational metric. The soil should be consistently moist—ideally after a slow soaking rain or a deep irrigation session 24 hours prior—so that the root ball holds together and root hairs do not experience osmotic shock. Avoid moving plants in freezing soil (below 35°F / 1.7°C) because frozen ground shears brittle root tips. Similarly, avoid ambient air temperatures exceeding 85°F (29°C), as high heat dramatically increases transpirational pull, causing the foliage to desiccate faster than damaged roots can absorb water.
| Parameter | Optimal Condition | Common Mistake | Why It Matters |
|---|---|---|---|
| Soil Temperature | 50°F – 65°F (10°C – 18°C) | Transplanting in frozen ground or mid-summer heat | Directs energy to root regeneration rather than leaf or shoot maintenance. |
| Root Ball Diameter | 1 inch of stem diameter = 10–12 inches of root ball width | Digging too close to the trunk and severing structural roots | Preserves the fine feeder roots responsible for water and nutrient uptake. |
| Planting Depth | Crown level with or 1/2 inch above surrounding soil | Burying the root flare too deep | Prevents stem rot, oxygen starvation, and eventual girdling. |
| Post-Transplant Watering | 1 inch (2.5 cm) of water per week for the first 8 weeks | Shallow, daily sprinkles that only wet the topsoil | Encourages deep root run rather than shallow, vulnerable surface rooting. |
💡 Pro-Tip: Always match your transplanting schedule to an overcast day or late afternoon. Moving plants late in the day gives them 12 to 14 hours of cool darkness to recover from mechanical shock before the sun hits them with full UV radiation and heat stress.
3. Step-by-Step Cultivation, Feeding & Propagation
Executing a clean transplant requires a surgical approach to digging and root management. Whether you are shifting mature shrubs or managing vegetable starts like When to Start Tomatoes Indoors Zone 6, follow this rigorous protocol:
- Hydrate the Specimen: Water the plant deeply 24 hours before digging. This ensures the root cells are fully turgid and minimizes wilting.
- Prune Dead Material: Remove any dead, diseased, or broken branches to reduce the plant's overall transpirational load. Do not aggressively prune healthy canopy unless you are dealing with an extreme root-to-shoot imbalance.
- Mark the Orientation: Tie a piece of biodegradable twine to the north-facing side of the trunk or stems. Replanting the specimen in its exact compass orientation prevents sunscald on bark that spent years facing a specific direction.
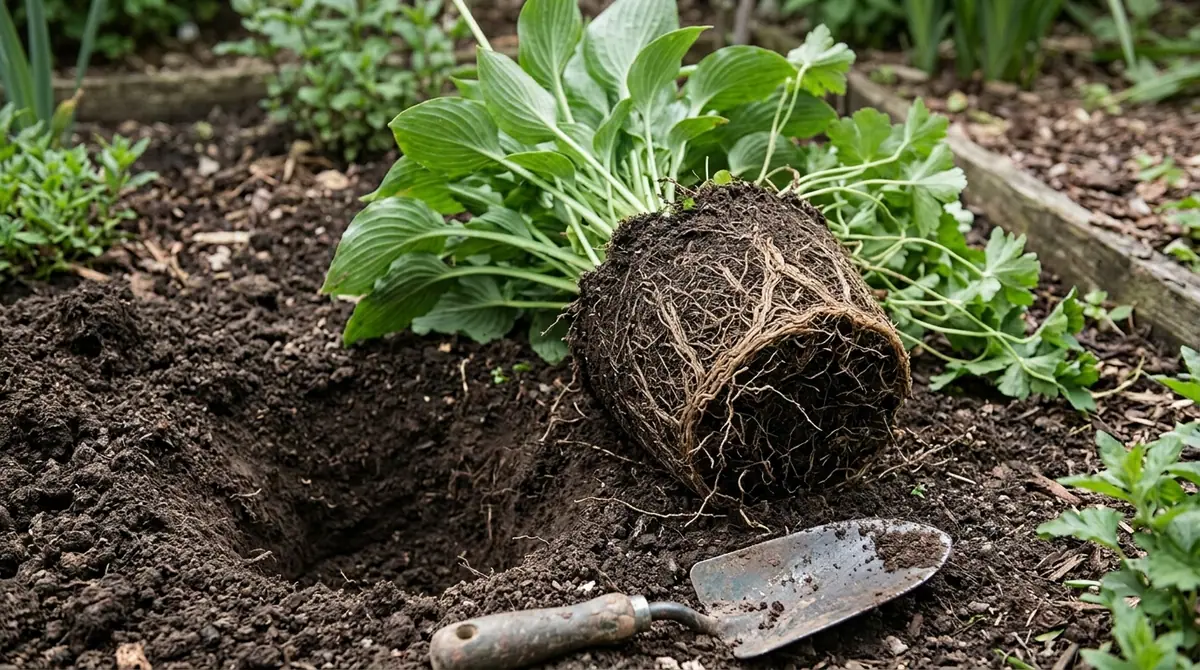
- Trench the Root Ball: Using a sharp, sterilized spade, carve a circle around the plant. For established shrubs, aim for a root ball radius of roughly 10 to 12 inches for every 1 inch of stem caliper. Dig straight down to create a clean vertical trench.
- Undercut the Root Ball: Gently slide the spade beneath the root ball at a 45-degree angle to sever the taproot and deep anchors, then carefully leverage the plant onto a burlap sheet or tarp.
- Prepare the Recipient Hole: Dig a new hole twice as wide as the root ball, but keep it slightly shallower than the root ball's depth. The top of the root flare must sit slightly above grade to account for settling.
- Set and Backfill: Place the plant in the hole, ensuring proper compass orientation. Fill halfway with native soil, tamp lightly with your hands to remove large air pockets, and water thoroughly to settle the soil. Fill the remainder and water again.
- Mulch and Basin: Apply a 2 to 3-inch (5 to 7.5 cm) layer of organic compost or hardwood mulch around the root zone, keeping it 2 inches away from the trunk to prevent collar rot. Form a shallow soil berm at the edge of the root zone to hold irrigation water.
For specific protocols when handling younger, more delicate stock, such as moving ornamentals detailed in When to Transplant Snapdragon Seedlings, handle root systems exclusively by their leaves rather than their fragile stems to avoid crushing vascular tissues.
4. Common Problems, Pests & Troubleshooting
Transplants are inherently vulnerable, signaling distress calls that opportunistic pests and pathogens can detect from miles away.
- Transplant Shock & Wilting: If leaves droop dramatically 48 hours after moving, the root system cannot keep up with water demand. Check soil moisture 3 inches (7.5 cm) down. If it is dry, irrigate deeply. If the soil is already saturated, the roots may be drowning due to poor drainage; refrain from watering and apply a temporary shade cloth over the canopy for 7 days to reduce solar load.
- Secondary Pest Infestations: Stressed plants produce elevated levels of sugars and amino acids in their sap, acting as a dinner bell for aphids, spider mites, and borers. Inspect the undersides of leaves weekly. Wash light infestations away with a strong jet of water or apply insecticidal soap; avoid systemic insecticides on newly moved plants as they add chemical stress to an already compromised system.
- Root Rot: Common in heavy clay soils or rainy autumns where water pools in the newly dug planting hole. Symptoms include yellowing leaves and premature leaf drop. Ensure your planting site has adequate percolation before moving specimens; if drainage is poor, rebuild the bed as a raised berm.
For detailed guidelines on managing plant vigor before stress hits—such as pruning techniques outlined in When to Top Pepper Plants—always prioritize plant health prior to any major disturbance.
⚠️ Important Caution: Never fertilize a newly transplanted plant with high-nitrogen synthetic fertilizers. Forcing fast top growth before the root system has re-established structural integrity and water uptake capabilities will cause the plant to collapse from dehydration. Stick to mycorrhizal inoculants or weak liquid kelp solutions instead.

5. Frequently Asked Questions
Can I transplant plants in the middle of summer?
Moving plants in mid-summer is risky because high temperatures and intense sunlight accelerate water loss through transpiration while damaged roots struggle to absorb moisture. If you must move a plant during summer, do so on a cloudy day, aggressively prune back non-essential foliage to reduce water loss, and provide temporary shading and constant irrigation for at least three weeks. For seed-grown varieties, similar careful timing applies; consult resources like When to Start Tomato Seeds Indoors Zone 6 to ensure your growing schedule aligns with safe outdoor transition windows.
How do I know if my plant is truly dormant?
True dormancy in deciduous plants is marked by total leaf drop, hardened wood, and closed, firm buds. For herbaceous perennials, dormancy means all top growth has died back to the crown at soil level, with only underground tubers, rhizomes, or root structures remaining active at a minimal metabolic rate.
Should I water immediately after transplanting?
Yes. Watering immediately after placing the plant in its new hole is mandatory. This process, known as "mudding in," settles the soil particles tightly around the microscopic root hairs, eliminating air pockets that would otherwise dry out the roots and cause plant failure.
How long does transplant shock last?
Transplant shock typically lasts anywhere from a few weeks to a full growing season, depending on the plant's maturity, species, and how much root mass was lost during the move. Smaller perennials often bounce back within 14 days, whereas large trees and woody shrubs may show stunted growth for an entire year while they rebuild their subterranean architecture. Additional horticultural support can also be found through university agricultural extensions such as the University of Minnesota Extension Yard and Garden.
Related Guides
- Can You Transplant Roses in the Fall
- When to Transplant Japanese Maple
- How to Transplant a Japanese Maple Tree
- When to Transplant Tomatoes
- When to Transplant Snapdragon Seedlings
📋 Table of Contents ▼ Click to expand
Tags:
Keep reading
🌿 Related Plants You Might Like






PlantSavvyWorld
Editorial team
PlantSavvyWorld is an independent botanical education project. Articles are drafted with AI assistance, then edited and checked against university extension services, botanical garden collections and other published horticultural sources.