

How to Transplant a Japanese Maple Tree
Written with AI assistance, edited and checked against horticultural sources.

1. Botanical Overview & Natural Habitat
Japanese maples (Acer palmatum and its close relatives Acer japonicum and Acer pseudosieboldianum) belong to the Sapindaceae family. Native to the understory of moist, temperate forests in Japan, Korea, China, and eastern Russia, these woody plants evolved to grow beneath a high, dappled canopy. This evolutionary heritage explains why their paper-thin leaves scorch under blazing afternoon sun and why their root systems are naturally shallow, spreading, and fibrous rather than plunging straight down like a taproot.
In their native woodland habitats, Japanese maples rely on deep layers of decomposing leaf litter, continuous organic top-dressing, and soils rich in mycorrhizal fungi. Understanding this architecture is foundational when you consider when is the best time to transplant a plant. Because their root architecture lacks a deep anchor, they form a wide, spreading root plate that requires careful handling during excavation.
Their delicate, palmate leaves—often deeply lobed or reticulated—transpire moisture rapidly. When you disturb the root system during a transplant, the plant’s ability to take up water temporarily drops by 40% to 60%. If you miscalculate the timing or expose those fragile feeder roots to dry air for even 15 minutes, you will cause irreversible vascular damage.
For additional scientific insight into maple biology and regional hardiness, you can consult the Royal Horticultural Society (RHS) database on deciduous trees.
2. Essential Environmental & Care Requirements
Before you slide a spade into the earth, you must match your new planting site to the precise physiological needs of Acer palmatum. Japanese maples thrive in USDA Hardiness Zones 5 through 9, tolerating winter temperatures down to -20°F (-29°C) and summer highs up to 90°F (32°C) provided they receive adequate humidity and root protection.
| Parameter | Optimal Condition | Common Mistake | Why It Matters |
|---|---|---|---|
| Soil pH | 5.5 to 6.5 (Slightly Acidic) | Planting in alkaline soil (pH > 7.5) | Alkaline conditions lock up essential iron and manganese, triggering severe interveinal chlorosis. |
| Drainage | Loamy, well-draining, rich in organic matter | Heavy compacted clay or standing water | Wet feet cause Phytophthora root rot, which kills feeder roots within 14 days. |
| Light Exposure | Morning sun (4–6 hours) with afternoon shade | Full scorching sun all day in southern climates | Intense afternoon rays bleach and scorch the delicate leaf margins, leading to premature defoliation. |
| Mulch Depth | 2 to 3 inches (5 to 7.5 cm) kept 2 inches away from trunk | Volcano mulching piled directly against the bark | Piling mulch against the trunk traps moisture, inviting fungal pathogens and collar rot. |
| Moisture | Consistently moist, never waterlogged | Irregular wet-dry cycles | Drought stress causes crispy brown leaf tips and stalls root regeneration. |
Soil composition is the single most critical factor for survival. If you are amending your garden soil, incorporate well-rotted leaf mold or compost, mimicking the forest floor textures detailed in studies from the Morton Arboretum. Avoid high-nitrogen chemical fertilizers immediately after moving your tree; instead, focus entirely on root stimulation and moisture management.
3. Step-by-Step Cultivation, Feeding & Propagation
The success of your transplant hinges on seasonal timing. You must execute this process during the deep dormant window—late autumn after leaf drop (typically November) or early spring before bud break (late February to March). Avoid moving trees during active summer growth or freezing winter ground conditions.
⚠️ Important Caution: Never grab a Japanese maple by its trunk to lift or drag it out of a hole. The weight of the root-ball can shear the bark at the root collar, introducing fatal bacterial or fungal infections. Always lift by supporting the root-ball directly underneath with a sturdy burlap sling or nursery tarp.
Follow this meticulous 7-step protocol to ensure your Japanese maple transitions smoothly to its new home:
- Pre-Water the Root Zone: Soak the soil thoroughly 48 hours before digging. Deliver 5 to 10 gallons (19 to 38 liters) of water to ensure the root ball holds together and the delicate feeder roots are fully hydrated.
- Prune Dead or Damaged Branches: Sterilize your bypass pruners with 70% isopropyl alcohol and remove any dead, diseased, or crossing branches. Reduce the canopy volume by roughly 10% to 15% to compensate for the upcoming root loss, taking care not to alter the tree's natural cultivar shape.
- Trench and Define the Root-Ball: Measure the trunk diameter at 6 inches (15 cm) above ground level. For every 1 inch (2.5 cm) of trunk diameter, allow for 10 to 12 inches (25 to 30 cm) of root-ball radius. Dig a circular trench outside this radius, cutting cleanly through stray roots with a sharp spade rather than tearing them.
- Undercut the Root-Ball: Working at a 45-degree angle beneath the trench, drive your spade or a root saw downward to sever the taproot and deep anchor roots. Gently rock the root-ball to loosen it from the surrounding subsoil.
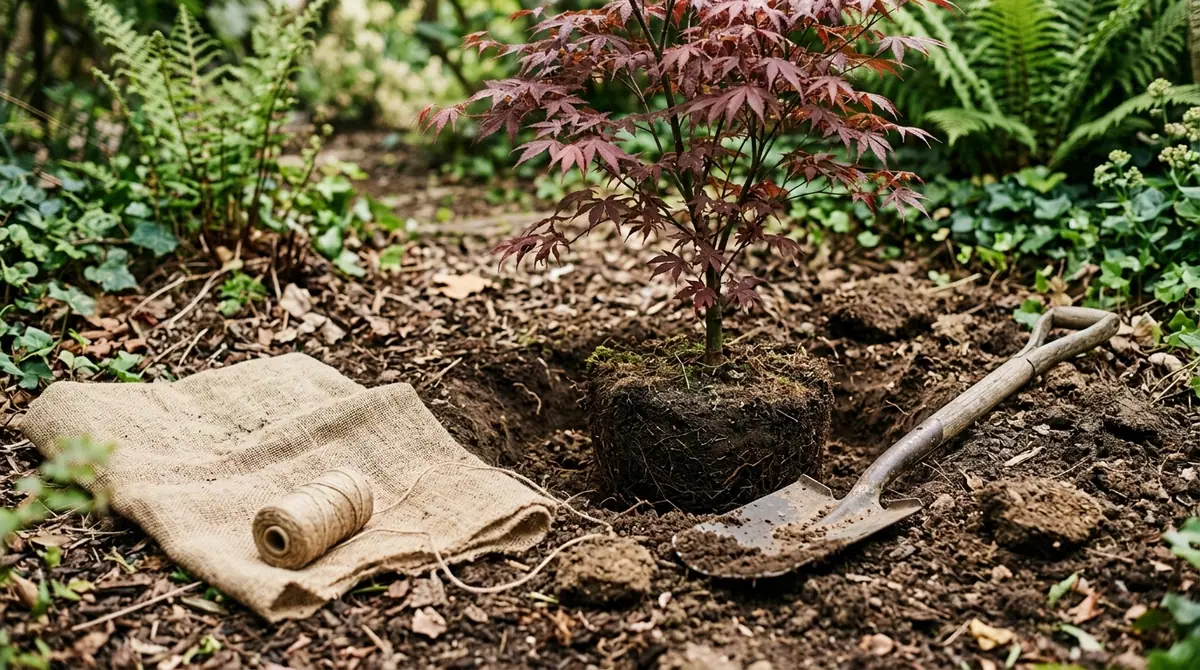
- Wrap and Lift: Slide a heavy-duty burlap sheet or landscaping tarp beneath the root-ball. Wrap it securely with jute twine to keep the soil tightly compressed around the fragile root network during transit. Lift the tree out carefully, ensuring it remains upright.
- Prepare the Recipient Pit: Dig a new hole that is twice as wide as the root-ball, but keep it slightly shallower—about 90% of the root-ball depth. The top of the root flare must sit 1 to 2 inches (2.5 to 5 cm) above the surrounding grade to prevent settling and subsequent suffocation.
- Backfill and Water In: Fill the hole halfway with the native soil (do not heavily amend it, or roots will refuse to leave the pit). Tamp gently with your hands to remove large air pockets, then water thoroughly to settle the soil. Finish backfilling, apply a 2-inch (5 cm) layer of shredded hardwood mulch, and maintain a strict watering schedule of 1 inch (2.5 cm) of water every 7 days for the first full growing season.
💡 Pro-Tip: If you are planning a transplant months in advance, perform a root-pruning trench 6 months prior. Dig halfway around the root-ball in year one, severing those roots to stimulate dense feeder root growth closer to the trunk, then complete the move in year two. This minimizes transplant shock by 70%.
4. Common Problems, Pests & Troubleshooting
Even with textbook execution, transplanted Japanese maples experience stress. Recognizing the early warning signs allows you to intervene before decline becomes irreversible.
- Leaf Scorch (Crispy Margins): If leaves turn brown and crispy along the edges during May or June, your tree is experiencing moisture stress or excess wind exposure. Erect a temporary shade cloth (30% density) over the tree and apply a deep watering cycle twice a week.
- Interveinal Chlorosis (Yellowing Leaves with Green Veins): This signals iron deficiency, almost always caused by soil pH creeping above 7.0. Apply chelated iron or granular elemental sulfur to slowly lower the soil pH into the optimal 5.5–6.5 range.
- Verticillium Wilt: A devastating soil-borne fungus that causes sudden dieback on one side of the tree while the other side appears normal. Look for dark greenish-brown staining in the vascular ring beneath the bark. If confirmed, there is no chemical cure; you must remove the tree and avoid planting another susceptible species in that spot for at least 5 years.
- Aphids and Scale Insects: Stressed trees attract sap-sucking pests. Blast them off with a strong jet of water from your garden hose, or apply horticultural oil in late winter while the tree is completely dormant to smother overwintering scale eggs.

5. Frequently Asked Questions
Can I transplant a Japanese maple in the middle of summer?
Moving a Japanese maple during the peak heat of summer (July or August) is extremely risky. The tree's transpiration rate is at its highest, and severed roots cannot supply enough water to match atmospheric demand, often resulting in severe defoliation or death within 72 hours. If a summer move is unavoidable, you must erect structural shade, mist the canopy daily, and accept a high rate of branch dieback.
How big should the root ball be when digging up a Japanese maple?
As a general rule of thumb, maintain a root-ball diameter of 10 to 12 inches (25 to 30 cm) for every 1 inch (2.5 cm) of trunk caliper measured 6 inches (15 cm) above the ground. For a tree with a 3-inch (7.5 cm) trunk, your root-ball must be roughly 30 to 36 inches (76 to 91 cm) wide and at least 18 to 24 inches (46 to 61 cm) deep.
What soil amendments should I add to the planting hole?
Paradoxically, you should avoid heavy soil amendments in the planting hole. Backfilling with a rich mixture of commercial potting soil creates a "bathtub effect," where water drains rapidly through your amended hole but gets trapped by the surrounding native clay, drowning the new roots. Backfill exclusively with native soil, reserving compost strictly for top-dressing as a surface mulch.
How long does it take for a transplanted Japanese maple to recover from shock?
Most established Japanese maples require two full growing seasons to recover completely from a transplant. During the first year, the tree invests almost all its energy into regenerating the fibrous root system rather than pushing top growth. Do not panic if canopy growth appears slow or stunted during the first 12 months following relocation.
Related Guides
- When to Transplant Japanese Maple
- Japanese Maple in Texas
- Graft Japanese Maple
- Cutting Back a Maple Tree
- Sun Valley Maple Tree
📋 Table of Contents ▼ Click to expand
Tags:
Keep reading
🌿 Related Plants You Might Like






PlantSavvyWorld
Editorial team
PlantSavvyWorld is an independent botanical education project. Articles are drafted with AI assistance, then edited and checked against university extension services, botanical garden collections and other published horticultural sources.