

When to Transplant Flower Seedlings
Written with AI assistance, edited and checked against horticultural sources.
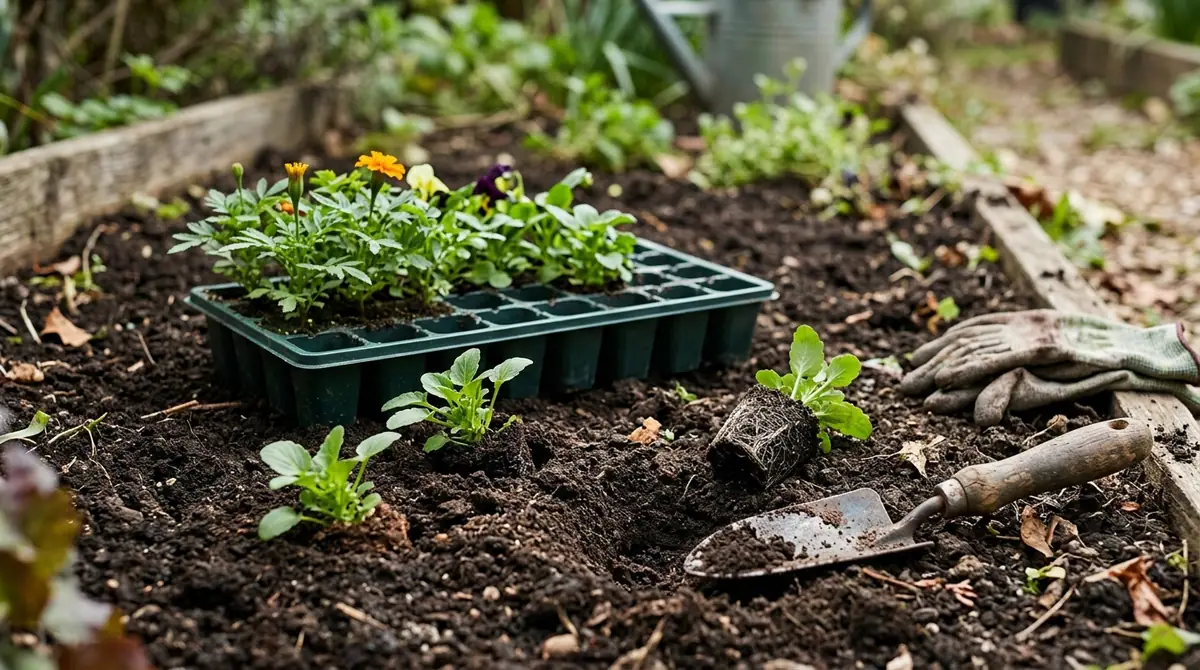

1. Botanical Overview & Natural Habitat
From a botanical perspective, transplanting is a violent disruption of a plant's vascular architecture. In nature, most flowering plants germinate in situ—dropped from the parent plant directly into the surrounding soil profile, where their taproots or fibrous root systems establish downward and outward in an uninhibited gradient. When we grow seedlings in modular trays, pots, or indoor setups, we artificially confine root growth.
Understanding root morphology dictates your timeline. Taprooted flowers like poppies (Papaver spp.) and lupines (Lupinus spp.) form a dominant downward-plunging root very early; if these are kept in small cells too long, the primary root hits the bottom, curls, and the plant suffers irreversible transplant shock. Conversely, fibrous-rooted flowers like marigolds (Tagetes spp.), petunias, and snapflowers (Antirrhinum majus) develop a dense, branching web of fine roots that tolerate container confinement slightly longer.
In their native habitats, wild annuals and perennials time their growth flushes to coincide with stable seasonal shifts—typically when frost risks dissipate, daylight lengths exceed 12 hours, and soil temperatures warm up. I always remind growers that a seedling is ready for transplanting not just when it reaches a certain height above ground, but when its root-to-shoot ratio achieves a functional balance. That balance means a root ball dense enough to hold its shape when slipped from a cell, yet young enough that root tips are still actively growing (white or light cream in color) rather than brown, woody, or tightly spiraled (root-bound).
2. Essential Environmental & Care Requirements
Transitioning indoor-nurtured or protected seedlings to the unpredictable outdoor environment requires careful environmental management. You cannot simply move a plant from a warm, 70°F (21°C) indoor windowsill with 40% humidity into 45°F (7°C) outdoor winds and UV-heavy sunlight without fatal consequences.
The most critical phase preceding transplantation is hardening off. This is a 7-to-10-day physiological conditioning process where seedlings gradually synthesize protective cuticle waxes on their leaves and thicken their cell walls. Start by placing trays outdoors in a shaded, wind-protected spot for 1 to 2 hours on day one, slowly increasing direct sunlight and exposure duration over the subsequent week.
Soil temperature is equally vital. While air temperatures fluctuate wildly in spring, soil temperatures dictate metabolic uptake and root elongation. Most temperate flower seedlings require soil temperatures between 60°F and 65°F (15°C to 18°C) to prevent phosphorus lockout and root stunting.
| Parameter | Optimal Condition | Common Mistake | Why It Matters |
|---|---|---|---|
| Soil Temperature | 60°F – 65°F (15°C – 18°C) | Planting when soil is below 50°F (10°C) | Cold soil halts root metabolism and nutrient uptake, inviting fungal pathogens like Pythium. |
| Hardening Off Duration | 7 to 10 days of gradual exposure | Moving indoors-grown seedlings straight to full sun | Unconditioned leaves scorch, cells rupture from wind stress, and plants suffer permanent stunting. |
| Transplant Timing | Overcast day or late afternoon | Transplanting at noon under intense sun | High evaporation rates cause rapid wilting before damaged roots can absorb moisture. |
| Root Ball Moisture | Thoroughly moist at transplant | Transplanting bone-dry or waterlogged root cells | Dry roots snap easily and reject new soil contact; waterlogged roots lack oxygen for cellular respiration. |
💡 Pro-Tip: Always water your seedling trays thoroughly 2 to 3 hours before you plan to transplant. Turgid, water-filled plant tissues are far more flexible and resilient against physical handling than wilted, dry cells.
3. Step-by-Step Cultivation, Feeding & Propagation
Executing the physical transplant requires precision. Rushing this process tears delicate root hairs, inviting soil-borne pathogens into the plant's vascular system.
Before getting your hands dirty, you may find it helpful to compare this floral transition process with other garden tasks by reviewing our guide on when to transplant cucumber seedlings: stop root shock & boost growth.
- Monitor True Leaf Development: Verify your seedlings have developed at least two to three sets of true leaves beyond the initial cotyledons (seed leaves). True leaves indicate a mature photosynthetic factory capable of supporting root regeneration.
- Select the Ideal Weather Window: Choose an overcast day, early morning, or late afternoon to avoid high transpiration rates and heat stress.
- Prepare the Destination Beds: Dig planting holes slightly wider than the root ball, but keep the depth identical to the seedling's current container depth. Burying stems too deep (except for leggy tomatoes or specific taprooted exceptions) risks stem rot.
- Gently Extract the Seedling: Never pull a seedling upward by its stem. Instead, invert the cell pack or squeeze the flexible plastic container sides, gently easing the root ball out from the base. For stubborn trays, tap the bottom firmly with a trowel handle.
- Inspect and Tease Roots: If roots are circling densely around the outer edge of the root ball, use your fingertips to gently tease or score them outward. This encourages them to grow into the surrounding garden soil rather than continuing their circular growth habit.
- Position and Backfill: Place the root ball into the prepared hole. Fill in with native garden soil mixed with a small amount of finished compost, gently firming the soil around the base with your hands to eliminate large air pockets.
- Water in with Care: Apply a gentle, deep watering immediately after planting to settle the soil particles snugly against the root hairs. Avoid high-pressure hose streams that can wash away topsoil or crush young stems.
- Apply Protective Mulch: Spread a 1-inch (2.5 cm) layer of fine organic mulch (such as finely shredded bark or leaf mold) around the base, keeping it 0.5 inches (1.3 cm) away from the actual stem to prevent collar rot.
⚠️ Important Caution: Do not apply chemical high-nitrogen fertilizers immediately upon transplanting. Forcing vegetative growth before the root system has re-established structural integrity forces the plant to burn critical energy reserves, often resulting in sudden collapse.
If you are expanding your garden layout to include edible root crops or seasonal fruits, check out these related planting resources: when to plant onions in southern california (zone 9 & 10 planting calendar) and when to plant strawberries in kansas: zone 6a/6b seasonal calendar.
4. Common Problems, Pests & Troubleshooting
Even with careful execution, environmental stressors can trigger issues during the transition window. Recognizing symptoms early allows you to intervene before permanent damage occurs.
- Foliar Chlorosis (Yellowing Leaves): If lower leaves turn pale yellow shortly after transplanting, the plant is likely experiencing nutrient lockout due to cold, wet soils. Ensure drainage is adequate and wait for ambient temperatures to rise. For further guidance on diagnosing plant stress factors, consult resources provided by the Royal Horticultural Society.
- Stem Collapse (Damping Off): If seedlings suddenly pinch at the soil line and fall over, fungal pathogens like Rhizoctonia or Pythium have attacked weak tissue. This usually happens when seedlings are planted too deeply in poorly draining, over-watered garden beds. Remove infected plants immediately and improve soil aeration.
- Severe Wilt and Sunscald: White or bleached patches on leaves combined with limp stems indicate the hardening-off phase was skipped or rushed. Provide temporary shade cloth protection for 3 to 4 days while the plant repairs its damaged cellular walls.
- Pest Predation (Cutworms): Freshly transplanted, tender-stemmed seedlings are prime targets for nocturnal cutworms. Protect individual stems by wrapping them in 2-inch (5 cm) collars made from recycled cardboard toilet paper rolls pressed 1 inch (2.5 cm) into the soil. For comprehensive management of common garden pests and sustainable control strategies, review the recommendations from the University of California Integrated Pest Management Program.

5. Frequently Asked Questions
How do I know if my flower seedlings are root-bound before I transplant them?
Gently slide a seedling out of its container or cell pack. If you see a dense, tightly wound mat of roots circling the perimeter of the soil medium with very little loose soil visible, the plant is root-bound. You must gently tease these roots apart with your fingers before planting to ensure they grow outward into the garden soil.
Can I transplant flower seedlings during the middle of a sunny day?
No. Transplanting under intense midday sun causes rapid transpirational water loss through the leaves faster than the newly disturbed root system can absorb moisture from the surrounding soil. Always transplant on overcast days, early in the morning, or during the late afternoon hours.
Should I fertilize flower seedlings right after transplanting?
Avoid standard synthetic fertilizers immediately after transplanting. The high salt index of chemical fertilizers can burn raw, recovering root hairs. Instead, water them in with a diluted, organic seaweed extract or a low-dose liquid kelp solution, which contains natural cytokinins that stimulate root growth without causing fertilizer burn.
What should I do if my seedlings get leggy before I can transplant them?
Leggy seedlings—tall, thin, and weak-stemmed due to insufficient light—require careful handling. When transplanting, you can bury slightly more of the stem for certain species (like marigolds, zinnias, and petunias) to encourage adventitious root formation along the buried portion, and immediately provide bright, direct light or setup support stakes to prevent them from snapping in outdoor winds.
Related Guides
- When to Transplant Snapdragon Seedlings
- When to Transplant Cilantro Seedlings
- Sweet Memory Sky Flower
- How Do You Measure Flower Pots
- Chigger Flower
📋 Table of Contents ▼ Click to expand
Tags:
Keep reading
🌿 Related Plants You Might Like






PlantSavvyWorld
Editorial team
PlantSavvyWorld is an independent botanical education project. Articles are drafted with AI assistance, then edited and checked against university extension services, botanical garden collections and other published horticultural sources.