

Monstera Seeds
Written with AI assistance, edited and checked against horticultural sources.
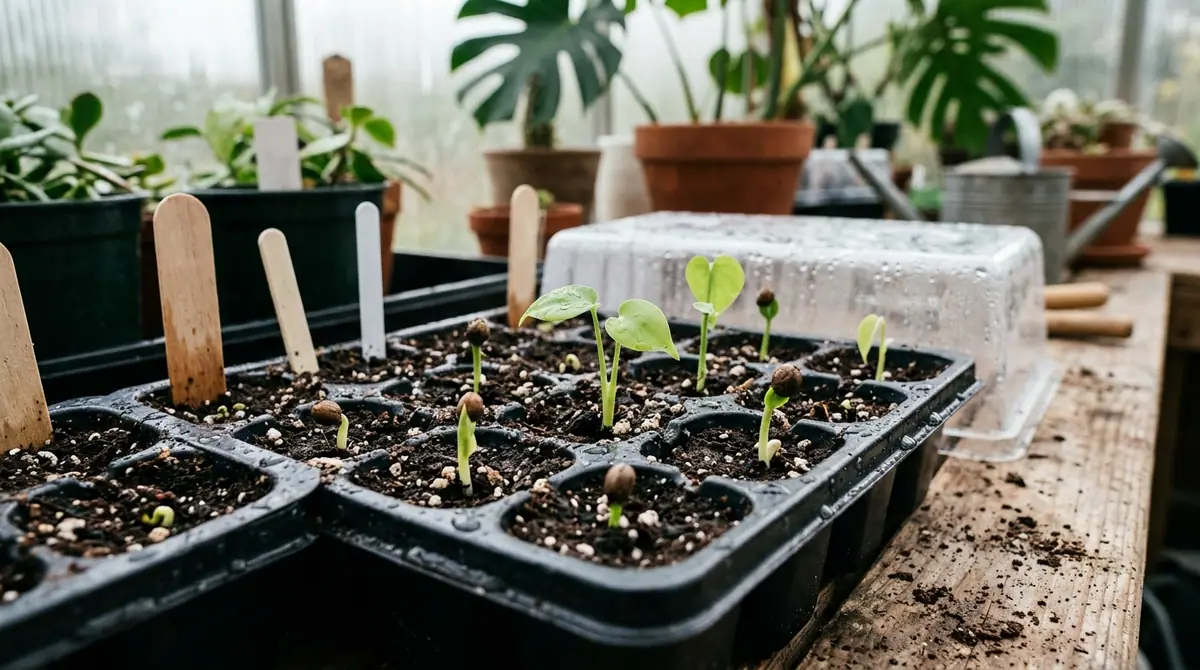
Monstera deliciosa seeds look like pale, wet green beans, wrapped in a slippery, pungent pulp that smells intensely of overripe pineapple and banana. When planted in soil, tiny, pale green hooks break the surface over the next 14 days. While most people propagate Monsteras through stem cuttings, growing them from seed is a rewarding experiment in indoor horticulture. Understanding how to handle tropical seeds aids in timing outdoor projects, such as figuring out When to Start Seeds Outdoors or mapping out vegetable schedules like When to Start Tomato Seeds Indoors Zone 6 and When to Start Seeds Indoors Zone 7a.
1. Botanical Overview & Natural Habitat

Botanically, a Monstera "seed" is actually a recalcitrant seed—meaning it has no dormancy period and cannot dry out or tolerate cold storage without losing its viability entirely. In the wild, mature Monstera deliciosa produce a composite, corn-cob-like infructescence that takes more than 12 months to ripen. The hexagonal outer green scales drop off to reveal edible, fragrant white flesh packed with seeds. Because these seeds lack a hard protective seed coat, they must be sown within 3 to 5 days of extraction from the fruit. If you purchase "Monstera seeds" online from a vendor shipping dry, hard brown pellets labeled as Monstera, you are almost certainly being scammed; authentic fresh seeds are plump, green, retain a high moisture content, and degrade rapidly in open air.
For a deeper dive into the botanical classification and morphological traits of aroid species, consult the Missouri Botanical Garden Plant Finder.
2. Essential Environmental & Care Requirements
Because tropical rainforest floors are intensely warm and humid, mimicking these microclimate metrics is non-negotiable for successful germination. If your ambient indoor conditions drop below standard tropical baselines, your germination rates will plummet, and fungal pathogens will quickly colonize the seed surfaces.
| Parameter | Optimal Condition | Common Mistake | Why It Matters |
|---|---|---|---|
| Temperature | 80°F to 85°F (27°C to 29°C) | Keeping seeds at room temp (68°F / 20°C) | Low warmth stalls enzymatic activation, triggering seed rot. |
| Humidity | 80% to 90% relative humidity | Leaving seed trays uncovered in dry air | Rapid desiccation kills recalcitrant, moisture-dependent seeds. |
| Substrate pH | 5.5 to 6.5 slightly acidic | Using heavy, alkaline garden soil | Aroids suffocate in dense dirt; mild acidity aids nutrient uptake. |
| Light | Bright, indirect light or LED grow lights | Placing trays in direct, scorching midday sun | Direct sun overheats enclosed humidity domes and cooks delicate embryos. |
💡 Pro-Tip: Always use a bottom-heating propagation mat equipped with a digital thermostat probe. Maintaining a constant soil temperature of 82°F (28°C) cuts the average germination window down from 21 days to just 7 to 10 days, dramatically reducing the window for fungal infection.
3. Step-by-Step Cultivation, Feeding & Propagation
Growing Monstera from seed requires absolute cleanliness. Because the seeds are high in starches and sugars and sit in warm, humid environments, mold spores will aggressively target them if sanitation is ignored.
Before you begin, gather your supplies: fresh Monstera seeds, a sterile propagation tray with a clear humidity dome, a seedling mix consisting of 50% coco coir and 50% perlite, a spray bottle filled with a weak copper fungicide solution or chamomile tea (a natural anti-fungal), and a bottom-heating mat.
- Clean and Prepare the Seeds: If your seeds arrived with pulp attached, soak them in lukewarm water for 24 hours, then gently rub away all fruit flesh. Any remaining pulp will rot and invite Pythium or Botrytis fungi.
- Mix and Sterilize the Substrate: Blend your coco coir and perlite. Moisten the mix until it feels like a wrung-out sponge; it should hold its shape when squeezed but not drip excess water. Pack it loosely into your propagation tray cells or flat.
- Sow at the Correct Depth: Press each seed horizontally onto the surface of the damp medium. Cover them with a paper-thin layer—no more than 0.125 inches to 0.25 inches (0.3 cm to 0.6 cm)—of perlite or coir. Monstera seeds need a whisper of cover to maintain moisture, but burying them 1 inch (2.5 cm) deep will suffocate them.
- Apply Heat and Humidity: Place the tray on your heating mat, set to 82°F (28°C), and secure the clear humidity dome on top. Position the setup under full-spectrum LED grow lights running for 14 hours a day.
- Monitor and Mist: Inspect the tray daily. If condensation on the dome clears up, mist the surface lightly with your water bottle. Look for the emergence of the first radical root within 7 to 14 days.
- Acclimate and Transplant: Once the seedlings develop their first true leaf—usually around week 4—begin "hardening off" the humidity by cracking the dome vents open by 0.5 inches (1.2 cm) daily over a one-week period. Once roots fill a 2-inch (5 cm) cell, step them up into individual pots using a chunky aroid mix containing orchid bark and horticultural charcoal.
⚠️ Important Caution: Never fertilize newly sprouted Monstera seedlings with standard chemical houseplant fertilizers. Their root systems are exquisitely sensitive to high salt concentrations. Wait until the plant has produced at least three true leaves, and even then, dilute a balanced liquid fertilizer to 25% strength.
For formal horticultural standards on container hygiene and soil-borne pathogen prevention, reference the guidelines provided by the Royal Horticultural Society (RHS).
As your indoor seed-starting confidence grows, you might find yourself expanding your winter horticultural repertoire to include edible garden crops or ornamental flowers, making use of guides like When to Start Squash Seeds Indoors, When Plant Squash Seeds, and When to Start Stock Seeds Indoors to keep your seed racks busy year-round.
4. Common Problems, Pests & Troubleshooting
Even with meticulous sterile techniques, tropical seed propagation presents unique hurdles. Diagnosing them early saves the crop.
- Damping-Off Disease: If your seedlings suddenly pinch at the soil line, turn translucent, and collapse overnight, you are dealing with soil-borne fungi like Rhizoctonia or Pythium. This is almost always caused by stagnant, overly wet air combined with cool temperatures. Remove affected seedlings immediately, increase ventilation, and switch your misting water to a mild, brewed chamomile tea to suppress fungal growth naturally.
- White Fuzzy Mold on Seeds: A light dusting of white saprophytic mold on the seed coat before germination often occurs in high humidity. Wipe the seed gently with a cotton swab dipped in 3% hydrogen peroxide, rinse with clean water, and reset it in fresh, sterile perlite.
- Stalled Growth / Failure to Germinate: If 21 days pass with zero action and the seeds are firm, your substrate temperature is likely too low. Check your heating mat with an infrared thermometer to ensure it is actually hitting the 80°F to 85°F (27°C to 29°C) threshold.
- Yellowing Cotyledons: If the first embryonic leaves turn yellow and drop off before true leaves form, the substrate is either holding too much stagnant water (suffocating roots) or the seedling has exhausted its internal endosperm reserves and urgently needs a microscopic dose of weak, balanced nitrogen-rich liquid feed.

5. Frequently Asked Questions
Can you buy real Monstera seeds online?
Yes, but you must exercise extreme caution. Because authentic seeds are strictly recalcitrant and lose viability within days of harvest, reputable sellers are almost exclusively private hobbyists, botanical gardens, or collectors located in tropical zones where Monstera fruits naturally. If an online marketplace sells dry, packaged "rare variegated Monstera seeds" in colorful foil packets, it is a scam; variegated Monsteras do not come true from seed, and dry seeds are dead seeds.
Why are my Monstera seeds turning black and mushy?
This is the classic symptom of seed rot, triggered by a combination of excess moisture, lack of oxygen in a compacted soil mix, and temperatures below 75°F (24°C). When a seed lacks a hard protective coat, any microscopic bacterial or fungal spore in stagnant water will quickly digest the soft, starch-rich interior of the seed. Always use light, airy perlite-heavy mixes and maintain active bottom heat.
How long does it take for a Monstera seed to grow into a mature plant with splits?
Growing a Monstera from seed to a mature, fenestrated (split-leaf) specimen is a multi-year commitment. Typically, seedlings produce solid, heart-shaped juvenile leaves for the first 12 to 24 months. True fenestrations—the characteristic splits and holes of Monstera deliciosa—do not begin to appear until the plant reaches a juvenile maturity threshold, usually when it is 2 to 3 years old, provided it receives high-intensity indirect light and adequate climbing support.
Do Monstera seedlings from seed show variegation?
No. Natural or tissue-culture-induced variegation (such as the prized Monstera deliciosa 'Albo Borsigiana' or 'Thai Constellation') is a genetic mutation that destabilizes chlorophyll production. When variegated plants flower and set seed, the genetic markers do not pass reliably to the offspring; more than 99% of seedlings from a variegated parent will revert entirely to standard green. If you want a guaranteed variegated plant, you must purchase a rooted stem cutting or a tissue-cultured specimen.
Related Guides
📋 Table of Contents ▼ Click to expand
Tags:
Keep reading
🌿 Related Plants You Might Like






PlantSavvyWorld
Editorial team
PlantSavvyWorld is an independent botanical education project. Articles are drafted with AI assistance, then edited and checked against university extension services, botanical garden collections and other published horticultural sources.