

When to Start Squash Seeds Indoors
Written with AI assistance, edited and checked against horticultural sources.
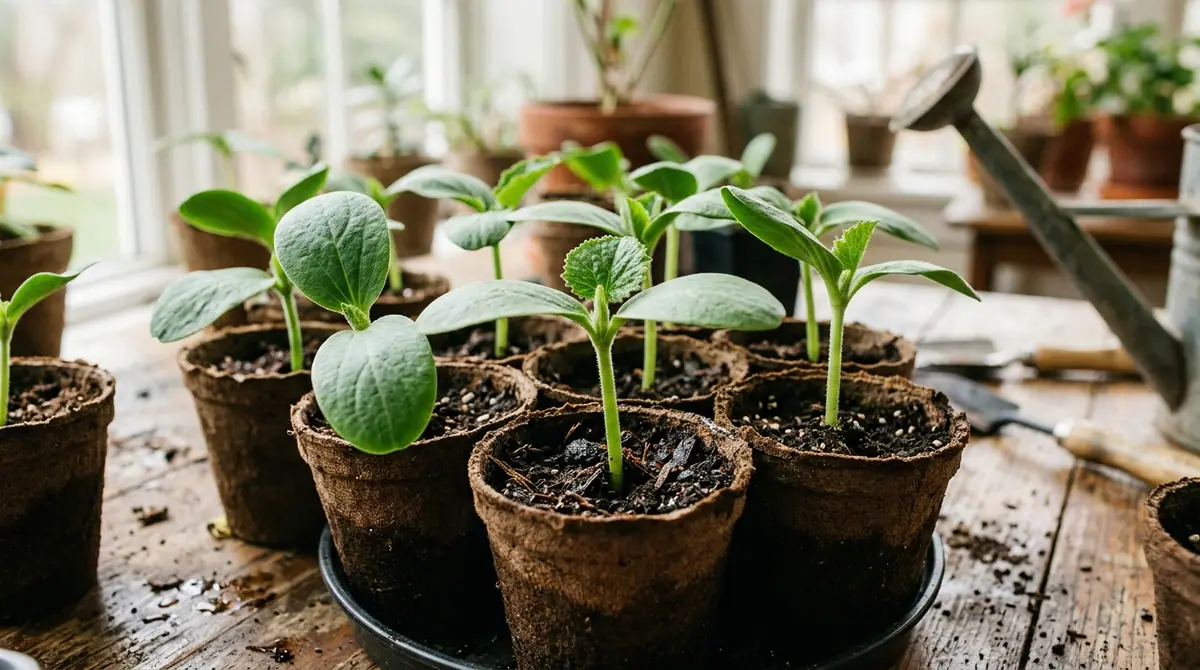
Squash plants are notoriously impatient teenagers of the plant world; they grow at a furious pace and detest having their root systems disturbed. Starting squash seeds a full month too early causes leggy, pale seedlings to collapse under their own weight as their roots spiral helplessly in undersized cell packs, leaving them traumatized by indoor life and unable to cope with lingering frost. Figuring out precisely when to start squash seeds indoors is the single most critical decision you will make all season, dictating whether cucurbits thrive or wither before they ever touch garden soil.

1. Botanical Overview & Natural Habitat
Squash plants belong to the sprawling Cucurbitaceae family, encompassing both summer types (Cucurbita pepo) like zucchini and pattypan, and long-keeping winter types like butternut (Cucurbita moschata) and acorn squash. Originating in Mesoamerica, these warm-season annuals evolved in tropical and subtropical climates characterized by intense sunlight, consistent warmth, and rich, well-draining soils.
Botanically speaking, squash are monoecious, meaning separate male and female flowers appear on the same vine, relying heavily on insect pollinators to bridge the gap. Because their native habitat features virtually no frost, squash possess zero cold tolerance. The vegetative phase is explosive. Under optimal conditions, a germinated seed can transform into a transplant-ready vine in just three to four weeks.
This rapid cellular expansion is precisely why timing matters so much. Unlike peppers or tomatoes, which benefit from an eight-to-ten-week indoor head start, squash outgrow indoor containers in the blink of an eye. If started too early, they become root-bound, signaling the plant to stunt its future growth potential. If started too late, you miss out on peak summer yields. You must align your indoor sowing schedule directly with your region's last expected spring frost date, working backward by exactly 3 to 4 weeks—never more.
2. Essential Environmental & Care Requirements
Replicating the ancestral Mesoamerican habitat indoors requires strict control over temperature, light, and moisture. Squash seeds demand bottom heat to break dormancy efficiently. While they can germinate at lower temperatures, soil hovering between 80°F to 85°F (26°C to 29°C) cuts germination down to a rapid 3 to 5 days. Once the cotyledons unfurl, drop the ambient temperature to 70°F to 75°F (21°C to 24°C) during the day and no lower than 60°F (15°C) at night to prevent elongation and fungal issues like damping-off.
Light is the second make-or-break variable. Place your seed trays under full-spectrum LED grow lights positioned precisely 2 to 3 inches (5 to 7.5 cm) above the foliage, running for 14 to 16 hours daily. Natural windowsill light is almost never sufficient; squash will instantly stretch toward the window, resulting in weak, translucent stems that snap easily in a breeze.
| Parameter | Optimal Condition | Common Mistake | Why It Matters |
|---|---|---|---|
| Soil Temperature | 80°F – 85°F (26°C – 29°C) | Starting seeds in cold, unheated rooms (<65°F) | Cold soil causes seed rot and delays germination, inviting pathogens. |
| Light Exposure | 14–16 hours daily under full-spectrum LEDs | Relying on weak, indirect windowsill light | Insufficient light creates leggy, weak stems prone to collapse. |
| Container Type | Biodegradable peat or coir pots (4-inch / 10cm) | Using tiny 72-cell seedling trays | Squash develop rapid taproots that bind and suffer shock when separated. |
| Soil Moisture | Consistently damp like a wrung-out sponge | Over-saturating or letting pots dry out completely | Extreme moisture swings cause root rot and stem cracking. |
For deep dives into managing fragile root systems during early transitions, look at How to Germinate Eggplant Seeds Fast: Heat, Moisture & 7-Day Protocol and When to Transplant Cucumber Seedlings: Stop Root Shock & Boost Growth.
3. Step-by-Step Cultivation, Feeding & Propagation
Growing healthy squash starts indoors requires precision and a gentle touch. Because these plants resent root disturbance, container selection is just as important as your calendar. Skip standard multi-cell plug trays entirely. Instead, opt for individual 4-inch (10 cm) biodegradable peat pots or cow pots that can be planted directly into the ground later.
Here is my field-tested, step-by-step protocol for starting squash seeds indoors successfully:
- Calculate Your Timeline: Determine your local average last frost date. Count backward precisely 21 to 28 days. Mark this date on your calendar as your indoor sowing day.
- Prepare the Growing Medium: Fill your 4-inch (10 cm) containers with a sterile, finely milled seed-starting mix. Pre-moisten the soil until it holds its shape when squeezed but drips no excess water.
- Sow the Seeds: Press two squash seeds per pot flat into the soil at a depth of 1 inch (2.5 cm). Covering them too shallowly leads to helmet heads (where the seed coat gets stuck on the leaves); too deep exhausts the seed before it breaks the surface.
- Apply Heat and Humidity: Cover the trays with a humidity dome to trap moisture and place them on a propagation heat mat set to 85°F (29°C). Check daily for the first signs of emergence.
- Provide Light Immediately: The moment green loops break the soil line, remove the humidity dome, turn off the heat mat, and switch on your grow lights positioned 2 inches (5 cm) above the leaves.
- Thin the Herd: Once seedlings reach 2 inches (5 cm) tall and display their first set of true leaves, use clean snips to cut away the weaker seedling at the soil line. Never pull it out, as tugging damages the root system of the survivor.
- Harden Off: Exactly 7 to 10 days before your intended outdoor planting date, begin the hardening-off process. Move seedlings outside to a sheltered, shady spot for 1 hour on day one, gradually increasing sun exposure and duration until they spend 24 hours outdoors without drooping.
💡 Pro-Tip: When thinning your squash seedlings, always snip the unwanted plant at the base with scissors rather than pulling it up by the roots. Yanking the extra seedling disrupts the delicate root ball of the plant you intend to keep, triggering hidden transplant shock weeks before it even hits the garden.
4. Common Problems, Pests & Troubleshooting
Indoor squash propagation comes with distinct challenges. The most prevalent issue is leggy, spindly growth. If your seedlings resemble pale green thread rather than sturdy bushes, your lights are too far away or your indoor temperatures are running too hot at night. Lower your lights immediately and introduce a small oscillating fan on its lowest setting for a few hours a day. The gentle breeze stimulates the stems to thicken and strengthen through a botanical process called thigmomorphogenesis.
Damping-off—a fungal pathogen driven by Pythium or Rhizoctonia—can wipe out an entire tray overnight. It manifests as a water-soaked, pinched brown lesion at the base of the stem, causing the seedling to tip over and die. Prevent this by ensuring immaculate sanitation, using fresh sterile soil, watering only from the bottom via capillary action, and maintaining robust airflow. For additional insights on optimizing delicate seedling environments, consult How to Grow Strawberries Indoors: From Fruit Seeds to Sweet Berries.
⚠️ Important Caution: Never wait until squash seedlings outgrow their 4-inch pots indoors. If you see roots spiraling out of the bottom drainage holes, plant them out immediately—even if it means providing temporary frost protection outdoors with cloches or row covers. Severely root-bound squash will frequently stunt permanently and fail to produce fruit.

5. Frequently Asked Questions
Can I plant squash seeds directly into the garden instead of starting them indoors?
Yes, absolutely. Because squash hate root disturbance, direct sowing is often preferred in regions with a long growing season. Wait until all danger of frost has passed and soil temperatures reach at least 70°F (21°C). Start seeds indoors only if your growing season is short and you need to beat an early autumn frost.
Why are my indoor squash seedlings turning yellow?
Yellowing leaves usually point to overwatering, nitrogen deficiency, or a lack of light. If the soil is constantly soggy, the roots are suffocating and cannot take up nutrients. Let the top half-inch of soil dry out between waterings and feed them a half-strength, balanced organic liquid fertilizer once the first true leaves appear.
How do I know when my squash seedlings are ready to transplant?
Your seedlings are ready for the garden when they have developed their first set of true leaves (leaves with serrated edges, distinct from the smooth embryonic seed leaves) and a sturdy stem, and when a gentle squeeze of the pot reveals a healthy network of white roots holding the soil together. This typically happens 3 to 4 weeks after sowing.
Should I pinch off the first flowers on my indoor squash seedlings?
If your seedlings somehow manage to form flower buds while still indoors—which occasionally happens if they were started too early—pinch them off immediately. You want the plant to channel 100% of its metabolic energy into building robust foliage, a strong root system, and structural integrity before it focuses on reproduction.
Related Guides
- When to Start Tomatoes Indoors Zone 6
- When to Start Tomato Seeds Indoors Zone 6
- When to Start Strawberries Indoors
- When to Start Stock Seeds Indoors
- When to Start Seeds Indoors Zone 7a
📋 Table of Contents ▼ Click to expand
Tags:
Keep reading
🌿 Related Plants You Might Like






PlantSavvyWorld
Editorial team
PlantSavvyWorld is an independent botanical education project. Articles are drafted with AI assistance, then edited and checked against university extension services, botanical garden collections and other published horticultural sources.