

When to Start Pepper Seeds Indoors Zone 5
Written with AI assistance, edited and checked against horticultural sources.
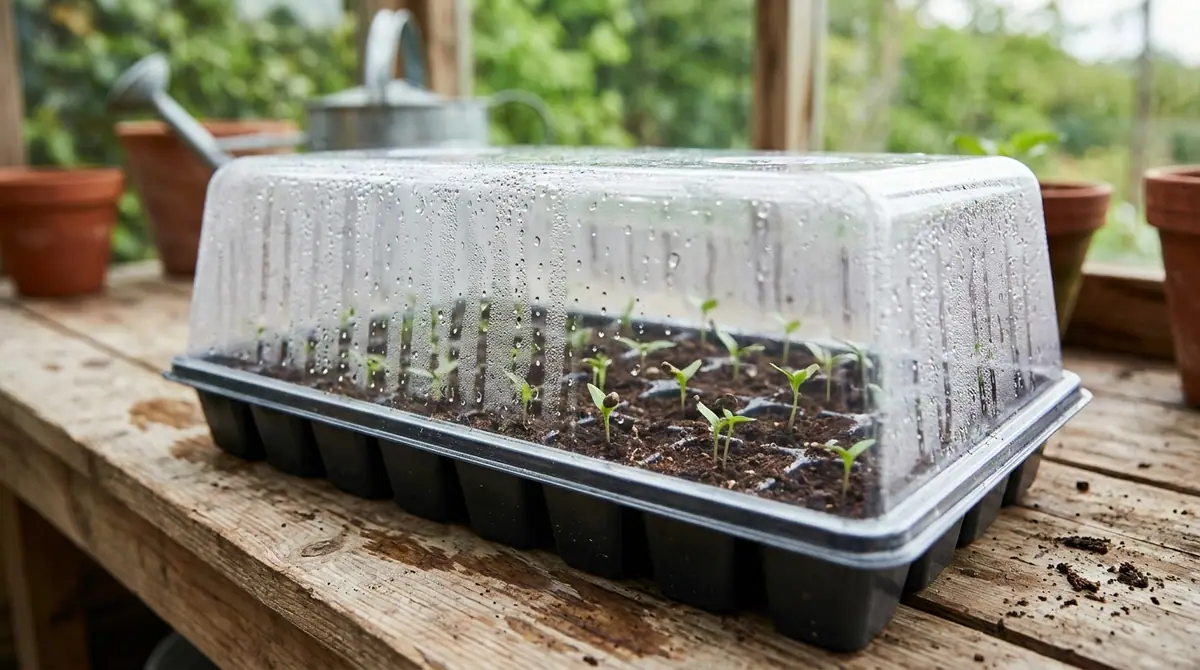
Peppers (Capsicum species) require a long, uninterrupted season of warmth to transition from vegetative growth to heavy fruiting, making indoor seed starting the single most important skill to develop as a northern gardener. Starting 'King of the North' bell peppers too early results in root-bound, woody-stemmed prisoners, while waiting until mid-May in a short 120-day frost-free Zone 5 window locks you out of harvesting fully ripe, crimson-red bells before the first autumn freeze in late September. Timing in Zone 5 is everything.
1. Botanical Overview & Natural Habitat

In their native habitats, peppers do not experience winter frosts. When we cultivate them as annuals in USDA Hardiness Zone 5—where average last frost dates span from May 1 to May 31 and winter temperatures plunge far below freezing—we are fighting their native biology. Zone 5 gives us a frost-free growing window of roughly 120 to 150 days. Many high-performing peppers, particularly pungent C. Chinense varieties, demand 100 to 120 days from transplant to reach maturity. If you direct-sow pepper seeds into your garden soil in mid-May, the soil temperature will be too cold, germination will stall, and frost will arrive before your fruit even sets.
Starting seeds indoors allows us to artificially replicate the tropical spring these plants crave. In Zone 5, the correct window to sow pepper seeds indoors is 8 to 10 weeks before your average last spring frost date. For a typical Zone 5 garden where the last frost hits around May 15, you should sow your seeds between March 6 and March 20. Starting them earlier than 10 weeks creates leggy, stressed transplants that struggle to recover after hardening off. Starting them later than 6 weeks robs you of peak summer harvest time.
2. Essential Environmental & Care Requirements
Pepper seeds and young seedlings have strict environmental thresholds. Ignore them, and germination drops sharply or disease takes over.
| Parameter | Optimal Condition | Common Mistake | Why It Matters |
|---|---|---|---|
| Soil Temperature | 80°F–85°F (27°C–29°C) | Placing trays on cold basements or unheated windowsills | Temperatures below 70°F (21°C) drastically slow germination rates and invite fungal pathogens like Pythium. |
| Soil Moisture | Consistently damp like a wrung-out sponge | Over-saturation or letting the medium dry completely | Excess water suffocates embryonic roots; dry spells kill emerging radicals. |
| Light Intensity | 14–16 hours daily, 2–3 inches (5–7 cm) above foliage | Relying solely on a dim, indirect south-facing window | Weak light causes etiolation (leggy, pale stems that snap easily). |
| Ambient Air Temp | 70°F–75°F (21°C–24°C) day / 65°F (18°C) night | Exposing tender seedlings to chilly drafts under 55°F (13°C) | Sudden cold shocks stunt root development and lock out nutrient uptake. |
Substrate selection is equally critical. Never use heavy garden soil in indoor seed trays; it lacks proper aeration, compacts easily, and introduces soil-borne fungal spores. Instead, use a sterile, fine-textured seed-starting mix composed primarily of sphagnum peat moss, vermiculite, and perlite. If you are also managing other indoor crops, you can review our dedicated substrate and pot sizing guides like How Deep Do Pepper Plant Roots Go? Pot Size & Substrate Depth Guide to ensure your containers accommodate root systems properly as the plants mature.
3. Step-by-Step Cultivation, Feeding & Propagation
Growing professional-grade pepper transplants in Zone 5 requires precision. Follow this step-by-step protocol to go from packet to vigorous, garden-ready starts.
- Sanitize and Prepare Containers: Wash all reused cell packs, plug trays, or small pots in a solution of one part household bleach to nine parts water. Rinse thoroughly and fill them with pre-moistened seed-starting mix, pressing the medium gently to eliminate large air pockets while maintaining a fluffy, aerated texture.
- Sow Seeds at the Correct Depth: Plant pepper seeds 0.25 inches (0.6 cm) deep. Drop one or two seeds per cell to ensure high germination coverage. Cover them lightly with the moist seed mix and press down lightly to ensure good seed-to-soil contact.
- Apply Bottom Heat and Moisture: Cover your trays with clear plastic humidity domes to trap ambient moisture. Place the trays directly onto a horticultural heating pad set to maintain a soil temperature of 80°F to 85°F (27°C to 29°C). Check daily; use a fine mist spray bottle if the surface begins to dry out.
- Transition to Light at Emergence: Monitor the trays daily. The moment you see green loops breaking the soil surface (typically within 7 to 21 days, depending on freshness and species), remove the humidity dome immediately and turn off the bottom heat. Position full-spectrum LED grow lights 2 to 3 inches (5 to 7 cm) above the seedlings. Keep the lights on for 14 to 16 hours daily.
- Pot Up Into Larger Containers: Once your seedlings develop their second set of true leaves, gently transplant them from their starting cells into individual 3-inch or 4-inch (7.5 to 10 cm) pots filled with a nutrient-rich, well-draining potting soil. Bury the stems slightly deeper than they grew in the seed tray to encourage adventitious root formation.
- Initiate Fertilizer and Air Circulation: One week after potting up, begin fertilizing weekly with a balanced, water-soluble organic fertilizer diluted to one-quarter strength. Run a small oscillating fan on low nearby for a few hours each day; the gentle breeze thickens plant stems through a mechanical response called thigmomorphogenesis.
- Harden Off Before Transplanting: In late May—roughly 10 to 14 days after your last spring frost—begin hardening off your pepper starts. Move them outdoors to a sheltered, shady spot for 1 hour on day one, gradually increasing exposure to direct sun and wind over 10 days until they can tolerate a full 24 hours outside.
💡 Pro-Tip: Pepper germination can be notoriously slow, particularly with hot habaneros and ghost peppers. If you want to accelerate your spring schedule, pre-sprout your pepper seeds using the damp paper towel method inside a sealed plastic bag kept on a seed warmer for 4 to 6 days before planting the sprouted seeds directly into your potting mix. This trick also works wonders when you are timing other warm-season crops, as detailed in our guide on How to Germinate Eggplant Seeds Fast: Heat, Moisture & 7-Day Protocol.
4. Common Problems, Pests & Troubleshooting
Indoor environments lack the natural predators and ecosystem balances of an outdoor garden, making vigilance vital.
- Damping-Off Disease: Caused by soil-borne fungi such as Pythium or Rhizoctonia, this condition pinches plant stems right at the soil line, causing healthy-looking seedlings to collapse overnight. Prevent it by using sterile soil mixes, avoiding over-watering, and ensuring good air circulation around your trays.
- Leggy Seedlings: If your pepper stems look like pale, spindly thread, your lights are too far away or your photoperiod is too short. Lower your LED fixtures immediately. Unfortunately, severely stretched pepper plants cannot be corrected; pinch them back or start fresh if they are too weak.
- Edema: Water-soaked bumps or blisters appearing on the undersides of leaves indicate that the plant is taking up more water through its roots than it can transpire through its leaves. This happens when humidity is too high and air movement is non-existent. Increase fan circulation and let the top inch of soil dry out slightly between waterings.
- Fungus Gnats: These small, dark flies hover around your seed trays. While adult gnats are harmless nuisances, their larvae feed on tender root hairs. Apply Bacillus thuringiensis israelensis (BTI) to your watering cans or top-dress your pots with a layer of horticultural sand to disrupt their life cycle.
⚠️ Important Caution: Never rush your pepper plants into the garden before overnight soil and air temperatures stabilize. If night temperatures drop below 55°F (13°C) for consecutive days, pepper plants will experience cold shock. This physiological stall causes permanent stunting, flower drop, and a drastic reduction in total seasonal yield, completely erasing any advantage you gained by starting them early indoors.

5. Frequently Asked Questions
Can I start pepper seeds in egg cartons?
While egg cartons are popular zero-waste containers, they are generally poor choices for starting peppers. Cardboard cartons dry out far too quickly, wick moisture away from the delicate root zone, and lack adequate depth for the vigorous taproot systems peppers develop. Furthermore, paper egg cartons easily grow mold under the high humidity and warmth required for pepper germination. Stick to professional plastic cell packs or modular plug trays for reliable results.
Should I top my indoor pepper seedlings?
Yes, topping can be beneficial for certain varieties of Capsicum annuum. When your indoor pepper plant reaches roughly 6 to 8 inches (15 to 20 cm) tall and has at least six sets of true leaves, you can pinch out the growing tip of the main stem. This halts apical dominance, forces the plant to redirect energy into lateral side shoots, and results in a bushier, multi-stemmed plant capable of holding significantly more fruit. For comprehensive guidance on managing crop layouts and spacing once they leave the indoor setup, consult the University of Illinois Extension Vegetable Gardening Guide.
Why are my pepper leaves turning yellow?
Yellowing leaves on indoor seedlings are typically caused by either over-watering or nitrogen deficiency. If the soil stays constantly waterlogged, roots suffocate and cannot absorb nutrients, leading to chlorosis (yellowing). If your watering habits are correct and the seedlings are older than four weeks, they have likely exhausted the limited nutrients in their starter mix. Apply a balanced, half-strength organic liquid fertilizer to restore healthy, deep-green foliage.
Do I need a heat mat to start peppers?
While pepper seeds can germinate at room temperature (70°F / 21°F), the process is erratic, taking anywhere from 14 to 30 days, and lower temperatures drastically reduce overall germination percentages. A horticultural heating pad elevates soil temperature into the ideal 80°F to 85°F (27°C to 29°C) sweet spot, cutting germination times down to 7 to 10 days and ensuring a uniform, vigorous crop. For additional research-backed insights on optimizing vegetable yields in northern climates, visit the Royal Horticultural Society Vegetable Growing Advice.
Related Guides
- When to Start Tomatoes Indoors Zone 6
- When to Start Tomato Seeds Indoors Zone 6
- When to Start Seeds Indoors Zone 7a
- When to Start Peppers Indoors Zone 6
- When to Start Strawberries Indoors
📋 Table of Contents ▼ Click to expand
Tags:
Keep reading
🌿 Related Plants You Might Like






PlantSavvyWorld
Editorial team
PlantSavvyWorld is an independent botanical education project. Articles are drafted with AI assistance, then edited and checked against university extension services, botanical garden collections and other published horticultural sources.