

How to Grow Strawberries Indoors: From Fruit Seeds to Sweet Berries
Written with AI assistance, edited and checked against horticultural sources.
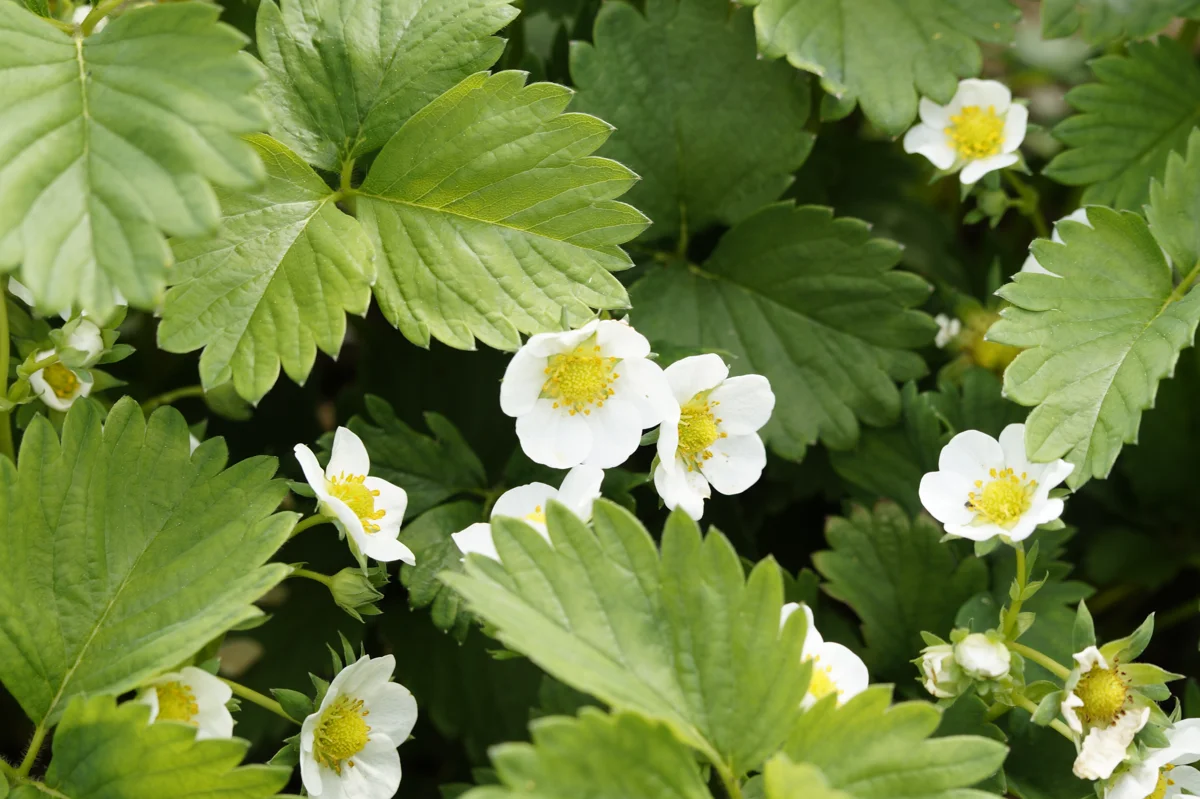
Growing strawberries indoors on a kitchen windowsill is a rewarding way to produce tiny, intensely flavorful berries during the winter months.
1. Botanical Overview & Natural Habitat

While we often associate strawberries with sun-drenched fields, their wild ancestors have adapted to a variety of climates and conditions. They typically thrive in temperate regions, preferring well-drained soil and a good amount of sunlight. In their natural state, many strawberry varieties are herbaceous perennials, meaning they live for more than two years, dying back in winter and regrowing from their roots in spring.
For indoor cultivation, we specifically look at day-neutral or everbearing varieties. These are a botanist's dream for year-round harvests because they are not dependent on the length of daylight hours to initiate flowering. Unlike short-day varieties that flower when nights are long, or long-day varieties that flower when nights are short, day-neutral types will produce flowers and fruit continuously as long as they have adequate light, warmth, and nutrients. This makes them perfectly suited for the controlled environment of an indoor growing setup, allowing us to bypass the natural seasonal limitations and enjoy fresh strawberries anytime.
2. Essential Environmental & Care Requirements
Successfully growing strawberries indoors, especially from seed, hinges on replicating their ideal environmental conditions. It's about creating a miniature ecosystem that supports healthy growth and abundant fruiting.
The most crucial element for indoor strawberries is light. Since they won't receive the intensity and duration of natural sunlight year-round, artificial lighting is non-negotiable. Full-spectrum LED grow lights are your best bet. They provide the balanced range of wavelengths plants need for photosynthesis, mimicking natural sunlight. Aim for lights that offer at least 30-watt output for a small to medium setup. Position them about 8 inches (approximately 20 cm) above your plants, ensuring even coverage. You'll want to provide 12-14 hours of light per day. Consistent exposure is key, so using a timer is highly recommended to maintain this schedule without fail.
Temperature is another vital factor. Strawberries are relatively adaptable, but they perform best in a moderate temperature range. For optimal growth and fruit production, aim for daytime temperatures between 65-75°F (18-24°C) and slightly cooler nights, around 60-65°F (15-18°C). Avoid drastic temperature fluctuations, which can stress the plants and hinder fruiting. They can tolerate slightly cooler temperatures, especially during their initial growth phases, but prolonged exposure to cold can be detrimental.
Humidity levels should also be considered. While strawberries don't require tropical levels of humidity, they do appreciate moderate levels, ideally between 40-60%. Dry indoor air, common in heated homes during winter, can lead to issues like reduced flowering or blossom drop. You can increase humidity by using a humidifier, placing plants on a pebble tray filled with water, or grouping plants together. Good air circulation is also important to prevent fungal diseases, so consider a small, oscillating fan to keep the air moving gently around your plants.
Watering is a delicate balance. Overwatering is a common pitfall that can lead to root rot, while underwatering will stress the plant and impact fruit development. The goal is to keep the soil consistently moist but not waterlogged. Allow the top inch (about 2.5 cm) of the soil to dry out slightly between waterings. The frequency will depend on your environment, the pot size, and the plant's growth stage. When you water, do so thoroughly until water drains from the bottom of the pot, and then discard any excess water that collects in the saucer.
Finally, soil and pot selection are foundational. For soil, a well-draining potting mix is essential. A good blend might include peat moss or coco coir for moisture retention, perlite or vermiculite for aeration, and some compost for nutrients. If you're venturing into hydroponics, specific nutrient solutions designed for fruiting plants will be necessary. For container growing, choose pots that are at least 6-8 inches (15-20 cm) deep and wide to allow for root development. Ensure all containers have drainage holes.
Here's a handy table summarizing these key requirements:
| Parameter | Optimal Condition | Common Mistake | Why It Matters |
|---|---|---|---|
| Light | 12-14 hours of full-spectrum LED light (30W+) at 8 inches (20 cm) | Insufficient light duration or intensity; incorrect light spectrum | Photosynthesis, flowering, and fruit production |
| Temperature | Day: 65-75°F (18-24°C); Night: 60-65°F (15-18°C) | Extreme fluctuations; consistently too hot or too cold | Healthy vegetative growth, flower initiation, and fruit set |
| Humidity | 40-60% | Too low (dry air) | Prevents blossom drop and encourages pollination |
| Watering | Consistently moist, not waterlogged; allow top inch (2.5 cm) to dry | Overwatering (root rot); underwatering (stress, poor fruiting) | Essential for nutrient transport, cell function, and overall plant health |
| Soil/Medium | Well-draining potting mix with good aeration and moisture retention | Heavy, compacted soil; soilless mixes lacking nutrients | Healthy root development and nutrient uptake |
3. Step-by-Step Cultivation, Feeding & Propagation
Growing strawberries indoors can be approached in a couple of ways: starting from seed or propagating from runners. Both methods are rewarding and offer a unique journey into strawberry cultivation.
Starting from Seed
Growing strawberries from seed is a more involved process but offers the satisfaction of nurturing a plant from its very beginning.
- Seed Extraction & Cold Stratification:
- First, understand that fresh strawberry seeds are often difficult to germinate. For best results, seeds require a period of cold stratification to break their dormancy, mimicking a winter chill.
- Obtain your strawberry seeds. If you're harvesting them from a store-bought strawberry, be aware that they may be sterile or hybrids that don't breed true. It's generally best to purchase certified seeds from a reputable supplier.
- To stratify, place your dried seeds on a slightly damp paper towel. Fold the towel over the seeds and place the entire thing inside a small, airtight plastic bag or container.
- Label the bag with the date and place it in your freezer for 3 to 4 weeks. This period of cold exposure is crucial for germination.
- Sowing the Seeds:
- After stratification, prepare your seed-starting mix. A good blend is a 50/50 mix of peat moss (or coco coir) and perlite. Moisten this mix thoroughly until it’s damp but not soggy.
- Gently press the stratified seeds onto the surface of the moist mix in your seed-starting trays or small pots. Do not bury them deep. Strawberry seeds are tiny and require light to germinate, so a very light dusting of the mix or vermiculite is all they need, if anything at all.
- Cover your trays or pots with a clear plastic dome or plastic wrap to maintain high humidity. Place them in a warm spot, ideally around 70-75°F (21-24°C).
- Germination & Early Care:
- Germination can be slow and erratic, often taking anywhere from 2 to 4 weeks, sometimes even longer. Be patient!
- Once you see seedlings emerge, remove the plastic cover to improve air circulation and prevent damping-off disease.
- Provide gentle light. Initially, fluorescent grow lights or the same full-spectrum LEDs you'll use for mature plants can be set on a dimmer setting or placed further away (12-18 inches or 30-45 cm) for about 10-12 hours a day. Gradually increase light intensity and duration as the seedlings grow stronger.
- Keep the soil consistently moist but not wet. A spray bottle can be useful for this delicate stage.
- Transplanting & Grow Lights:
- When the seedlings have developed their first set of true leaves (the leaves that appear after the initial cotyledons) and are large enough to handle, it's time to transplant them into larger individual pots. Use a well-draining potting mix.
- At this stage, introduce your primary grow lights. Provide 12-14 hours of 30-watt full-spectrum LED light at a distance of 8 inches (approximately 20 cm) above the foliage. Ensure consistent light and temperature (65-75°F or 18-24°C).
- Feeding Your Plants:
- Once your seedlings are established in their pots, you can begin a light feeding schedule. Use a balanced liquid fertilizer diluted to half strength. As the plants mature and start to flower, switch to a fertilizer slightly higher in phosphorus and potassium to encourage fruit production. Follow the fertilizer's instructions for frequency, but generally, feeding every 2-3 weeks is sufficient.
- Hand Pollination:
- This is a crucial step for indoor fruit development. Since you won't have natural pollinators like bees buzzing around, you'll need to lend a hand.
- When blossoms open indoors, gently brush the center of each flower with a soft watercolor paintbrush or a cotton swab. This act of hand pollination is vital to ensure full, symmetrical berry formation. Repeat this process daily for each open flower as it appears. Without it, you might get small, misshapen fruits or no fruits at all.
Propagation from Runners
If you have an existing strawberry plant, you can propagate new plants from its runners. This is a much faster way to get new plants, and they will be genetically identical to the parent.
- Identify Runners: Strawberry plants naturally send out long stems called runners, at the end of which a new plantlet will form.
- Prepare a Pot: Fill a small pot (4-6 inches or 10-15 cm) with a moist potting mix.
- Anchor the Runner: Gently bend the runner so that the developing plantlet sits on top of the soil in the prepared pot. You can use a small piece of wire or a bent paperclip to gently hold the plantlet in place, encouraging roots to form into the soil.
- Water and Wait: Keep the soil in the new pot consistently moist. The runner will continue to nourish the plantlet until it develops its own roots. This can take anywhere from 2 to 4 weeks.
- Separate and Pot: Once the new plantlet has a good root system and a few small leaves, you can carefully cut the runner connecting it to the parent plant. It is now an independent plant ready for its own larger pot and care.
4. Common Problems, Pests & Troubleshooting
Even with the best care, indoor plants can encounter issues. Being prepared to identify and address these problems will help ensure a bountiful harvest.
- No Flowers or Fruit: This is often related to insufficient light. Ensure your grow lights are strong enough, positioned correctly, and on for 12-14 hours daily. Temperature fluctuations or inconsistent watering can also inhibit flowering.
- Blossom Drop: Flowers open but then shrivel and fall off without setting fruit. This can be caused by low humidity, inconsistent watering, extreme temperature swings, or a lack of pollination. Ensure your humidity is within the optimal range (40-60%), water consistently, and hand-pollinate diligently.
- Small, Misshapen Berries: This is a classic sign of poor pollination. Make sure to hand-pollinate each flower thoroughly. Insufficient nutrients can also contribute to smaller fruit size.
- Leaf Yellowing: This can be a sign of overwatering (leading to root rot and nutrient lockout) or underwatering. Check soil moisture levels. If the soil is consistently wet and the plant is struggling, it might be root rot. If it's dry and brittle, increase watering. Nutrient deficiencies can also cause yellowing; ensure you are fertilizing appropriately.
- Pests: While indoor growing reduces exposure to many outdoor pests, some can still find their way in.
- Aphids: Small, green or black insects that cluster on new growth and the undersides of leaves. They suck sap from the plant.
- Spider Mites: Tiny, almost invisible pests that create fine webbing on leaves. They cause stippling and yellowing of the foliage.
- Fungus Gnats: Small, dark flies that hover around the soil surface. Their larvae live in the soil and can damage roots if populations are high. They are usually a sign of overwatered soil.
Treatment for Pests:
- For minor infestations, try wiping pests off with a damp cloth or spraying the plant with a strong jet of water.
- Insecticidal soap or neem oil sprays are effective organic options. Always follow product instructions carefully and test on a small area of the plant first.
- Improve air circulation and avoid overwatering to deter fungus gnats. Letting the top inch or two of soil dry out can help. Sticky traps can also catch adult gnats.
💡 Pro-Tip: Don't be afraid to experiment with different strawberry varieties. While 'Albion', 'Seascape', and 'San Andreas' are popular day-neutral choices, you might find other varieties thrive exceptionally well in your specific indoor setup. Keep a growing journal to track what works best for you!
⚠️ Important Caution: When using any pesticides, even organic ones like neem oil or insecticidal soap, ensure good ventilation. Avoid spraying directly before or during hand pollination, as residue can be harmful to the delicate flower parts. Always wash your harvested berries thoroughly, regardless of how they were grown.

5. Frequently Asked Questions
Can I really grow strawberries from the seeds inside a store-bought strawberry?
While technically possible, it's generally not recommended for consistent results. The seeds from commercially grown strawberries, especially hybrids, may not be viable or may not produce fruit true to the parent plant. For the best chance of success and predictable fruit quality, it's advisable to purchase certified strawberry seeds from a reputable seed supplier.
How do I know if my indoor strawberry plant is getting enough light?
Observe your plant closely. If the leaves are a healthy, deep green and the plant is producing flowers and runners, it's likely getting adequate light. Signs of insufficient light include spindly, weak growth, pale green or yellowish leaves, and a lack of flowering or fruit production. The leaves might also stretch out to try and reach the light source.
My indoor strawberries taste bland. What am I doing wrong?
Several factors can contribute to bland-tasting berries. The most common culprits are insufficient light and nutrient deficiencies. Strawberries need plenty of light to develop sugars and flavor compounds. Ensure your grow lights are adequate. Also, make sure you are using a balanced fertilizer that is suitable for fruiting plants, and consider switching to one with a slightly higher potassium content as the plants begin to flower and fruit. Consistent watering is also important; stressed plants can produce less flavorful fruit.
How often should I repot my indoor strawberry plants?
Strawberry plants can become root-bound relatively quickly, especially when grown in smaller containers. It's generally a good idea to repot them annually, typically in late winter or early spring before their main growing season begins. This is also a good time to divide any overgrown plants or to check for root health. When repotting, choose a pot that is one size larger than the current one, and use fresh, well-draining potting mix.
Happy growing! I hope this comprehensive guide empowers you to embark on your indoor strawberry journey. That first bite of a homegrown, sun-kissed berry in the middle of winter is an experience you won't soon forget.
For more in-depth gardening advice, the RHS Gardening Advice section is an excellent resource. You can also find fantastic, localized gardening information from university extension services, such as Penn State Extension — Gardening.
Tags:
Keep reading
🌿 Related Plants You Might Like






PlantSavvyWorld
Editorial team
PlantSavvyWorld is an independent botanical education project. Articles are drafted with AI assistance, then edited and checked against university extension services, botanical garden collections and other published horticultural sources.