

How to Care for Indoor Orchids to Make Them Bloom Again
Written with AI assistance, edited and checked against horticultural sources.
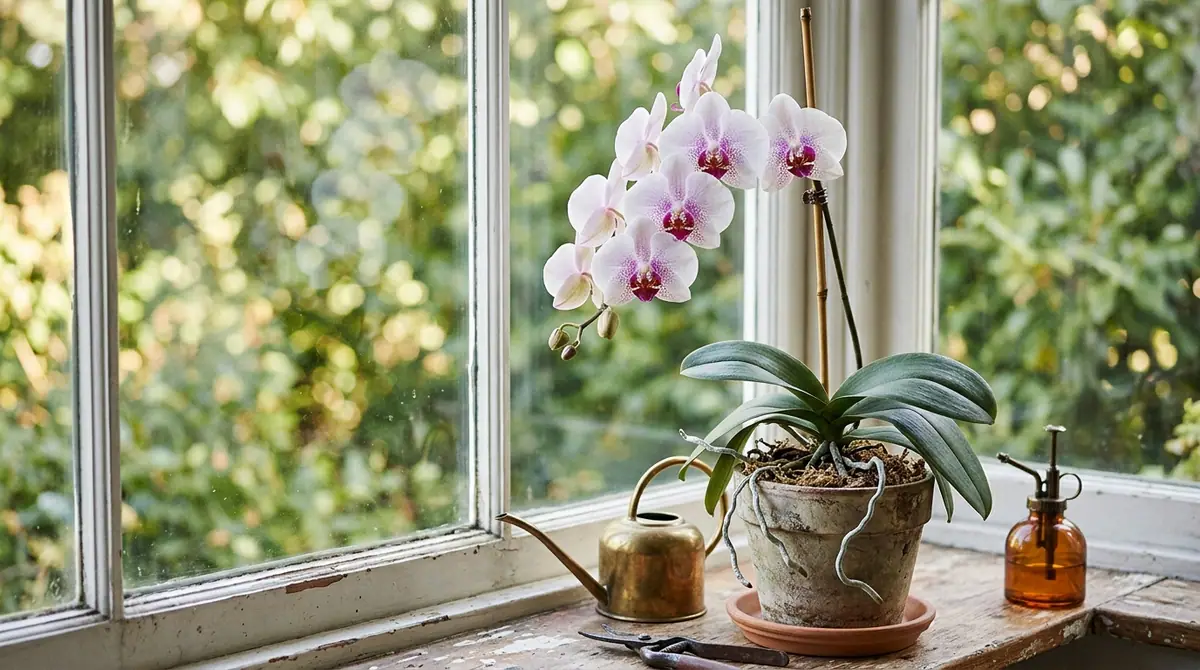
A dusty Phalaenopsis orchid found with limp glossy green leaves, a brittle brown flower spike, and suffocated roots inside a soggy, unvented ceramic pot can be saved by stripping away decaying sphagnum moss, resetting it in an airy bark medium, and subjecting it to a strict 15°F (-9°C) night-to-day temperature differential. Eight weeks later, a tiny green mitten-shaped tip pushes out from the third node down, eventually bursting into a spray of fifteen magenta blooms. Orchids are not fragile divas; they are highly evolved survivors waiting for wild jungle canopy conditions to be replicated.
1. Botanical Overview & Natural Habitat

In their natural habitat, an orchid’s roots are entirely exposed to the ambient air. They are wrapped in a spongy, dead-cell layer called the velamen, which acts as a biological sponge. When tropical downpours hit, the velamen instantly drinks up moisture, turning a silvery-gray or white root into a vibrant, translucent emerald green. As the forest canopy dries out between rainstorms, the velamen dries out just as quickly, preventing the root core from rotting.
Understanding this root biology changes everything about how you water and pot them. Unlike my other favorite trailing tropicals, such as the Lipstick Plant (Aeschynanthus Radicans) Complete Care & Bloom Guide, which appreciate steady, moisture-retentive potting mixes, orchids will suffocate if planted in dense, earth-based soils. Their leaves store energy via crassulacean acid metabolism (CAM) photosynthesis in some species, or standard C3 pathways, but the absolute engine of the plant is its root system.
When you purchase an orchid from a big-box store, it is often jammed into a tight plastic sleeve filled with tightly packed sphagnum moss that stays wet for weeks. In the wild, roots are bathed in constant, gentle air circulation. If you want your orchid to flush out a secondary spike of flowers, you must mimic the dry-wet cycle of the equatorial tree canopy. For further reading on epiphyte morphology and physiological adaptations, consult the Royal Horticultural Society Orchid Guidelines.
2. Essential Environmental & Care Requirements
Recreating a tropical tree branch inside a modern, climate-controlled home requires balancing four non-negotiable environmental vectors: light, temperature, humidity, and airflow.
Light
Indoor orchids thrive in bright, indirect light. In nature, they sit beneath multi-layered forest canopies, filtering out the scorching midday sun while soaking up gentle morning rays. Place your orchid within 2 to 3 feet (60 to 91 cm) of an east-facing window, or a bright south- or west-facing window protected by a sheer white linen curtain. If the leaves feel warm to the touch through the glass, the light is too intense and will cause sunburns (manifesting as bleached, purple-tinged, or scorched black patches). If the leaves are a deep, dark, forest green, the plant is starved of light and will never muster the metabolic energy required to initiate a bloom spike. Healthy foliage should be a vibrant, glossy, yellow-green apple color.
Temperature
Most tropical orchids prefer daytime ambient temperatures between 65°F and 80°F (18°C to 27°C), dropping by 10°F to 15°F (6°C to 8°C) at night. This nocturnal temperature drop is the primary environmental trigger that tells the plant's meristematic tissue to switch from vegetative leaf growth to reproductive spike initiation. If your indoor thermostat stays locked at a steady 72°F (22°C) year-round, your orchid may grow lush leaves indefinitely while refusing to flower.
Humidity and Airflow
Indoor heating and air conditioning strip moisture from the air, often driving relative humidity below 30%. Orchids require a minimum ambient humidity of 50% to 70%. Grouping plants together or placing your orchid pot on a wide pebble tray filled with water (ensuring the water line sits strictly below the bottom of the pot to prevent root rot) will help. Crucially, pair this humidity with gentle air movement. Stagnant air invites fungal pathogens like Botrytis, which ruins developing flower buds. An oscillating fan running on its lowest setting in a room keeps the stomata functioning cleanly.
| Parameter | Optimal Condition | Common Mistake | Why It Matters |
|---|---|---|---|
| Light | Bright, indirect (East window or shaded South/West) | Direct midday sun or deep shade | Prevents leaf scorch while ensuring enough energy for flower spikes |
| Temperature | 68°F–78°F (20°C–26°C) day, 58°F–65°F (14°C–18°C) night | Constant indoor temperatures | Nighttime drops trigger the hormonal shift needed for blooming |
| Watering | Drenched thoroughly when velamen turns silvery-gray | Sinking pot in standing water or watering on a strict calendar | Prevents root suffocation while maintaining proper hydration |
| Media | Coarse orchid bark, perlite, and charcoal mix | Standard potting soil or old, degraded moss | Mimics tree bark airflow, allowing roots to breathe and absorb nutrients |
💡 Pro-Tip: If your home lacks natural light during winter months, supplement with a full-spectrum LED grow light placed 12 to 18 inches (30 to 45 cm) above the foliage for 12 to 14 hours daily. This sustains the continuous energy production needed to fuel long-lasting floral displays.
3. Step-by-Step Cultivation, Feeding & Propagation
When an orchid finishes blooming, its flower spike will either dry up entirely or remain green. If it stays green, leave it alone; secondary branches often emerge from dormant nodes along the spike. If it turns brown and crisp, it is time to intervene. For general houseplant collectors branching out into specialized foliage, consider balancing your indoor jungle with colorful accents like those detailed in The Complete Guide to Coleus Plants: 50+ Varieties, Care, Propagation & Landscaping, but remember that orchids demand a far more deliberate, hands-off maintenance rhythm.
Follow this step-by-step protocol to reset, feed, and coax your indoor orchid into a repeat bloom:
- Assess and Unpot: Gently slide the orchid out of its container. Shake away the old medium. If the plant was in tightly packed sphagnum moss that has turned into a soggy sponge, pull it away from the roots carefully.
- Prune Dead Tissue: Using a pair of sterile pruning shears sterilized in isopropyl alcohol, trim away any dead, papery, brown, or mushy roots. Healthy roots are firm, plump, and green or silver. Leave firm roots alone, even if they are stubborn and growing outside the pot.
- Select the Right Vessel: Choose a clear plastic pot with wide drainage holes at the base and slotted ventilation holes along the sides. Clear pots allow light to reach the chlorophyll-containing roots of Phalaenopsis while letting you inspect root health at a glance.
- Repot in Coarse Bark: Center the orchid in the pot, holding it slightly elevated. Pour a chunky orchid medium—composed of graded-fir bark, horticultural charcoal, and coarse perlite—around the roots. Tap the pot gently on your workbench to settle the pieces into the gaps, but do not pack it down tightly; air pockets are essential.
- Establish the Watering Rhythm: Do not water immediately if you made fresh cuts on the roots; let them callous for 24 hours. Otherwise, take the pot to the sink and run lukewarm water through the bark for 60 seconds until the roots turn a bright, solid green. Allow every single drop of excess water to drain out before returning the pot to its decorative outer cachepot.
- Implement a Feeding Schedule: During the active growing season (spring and summer), feed your orchid every two weeks using a balanced, water-soluble orchid fertilizer (such as a 20-20-20 formulation) diluted to one-quarter strength. Remember the golden rule among master growers: "Weekly, weakly." Flush the pot with pure water once a month to wash away accumulated mineral salts.
- Trigger the Spike: As autumn arrives, allow the nighttime ambient temperature to drop naturally to 55°F–60°F (13°C–15°C) for 4 to 6 weeks. Maintain this cycle alongside your bright, indirect light, and watch for a thick, mitten-tipped green shoot emerging from between the lower leaf joints.
⚠️ Important Caution: Never use ice cubes to water your tropical orchids. Pouring freezing water over a plant native to the equatorial lowlands creates severe thermal shock, destroying cellular walls in the root tissue and inviting opportunistic root rot pathogens. Always use room-temperature water.
4. Common Problems, Pests & Troubleshooting
Even with careful cultivation, environmental shifts can cause distress. Here is how to diagnose and correct the most common issues plaguing indoor orchid collections:
Root Rot
- Symptoms: Leaves lose turgor pressure and become wrinkled and leathery. Roots inside the pot are brown, flat, hollow, and smell faintly of sulfur or decay.
- Cause: Overwatering, compacted old medium that holds moisture indefinitely, or a decorative pot with zero drainage holes.
- Correction: Unpot the plant immediately. Cut away all rotted root tissue with sterilized shears. Dust remaining healthy roots with cinnamon (a natural antifungal agent) or powdered sulfur. Repot into fresh, coarse bark and reduce watering frequency, ensuring the velamen turns completely silver before the next soak.
Bud Blast
- Symptoms: Developing flower buds turn yellow, shrivel up, and drop off the spike before ever opening.
- Cause: Sudden drafts of cold air, proximity to ripening fruit (which releases ethylene gas), drastic humidity drops, or sudden temperature fluctuations.
- Correction: Relocate the orchid away from exterior doors, drafty windows, heating vents, and kitchen fruit bowls. Keep ambient humidity stable above 50%.
Scale Insects and Mealybugs
- Symptoms: Sticky, clear residue (honeydew) on the leaves or table surface; cottony white masses tucked into the leaf axils or along the base of the flower spike.
- Cause: Low airflow, dry indoor air, or introducing a new, unquarantined plant into your collection.
- Correction: Dip a cotton swab in 70% isopropyl alcohol and physically dab every visible insect. For heavy infestations, spray the entire plant with horticultural insecticidal soap or neem oil, making sure it does not pool in the crown of the plant where new leaves emerge.

5. Frequently Asked Questions
Should I cut the orchid stem off after it blooms?
It depends entirely on how the stem reacts to the end of the bloom cycle. If the flower spike turns completely brown, yellow, and brittle, cut it off cleanly near the base of the plant using sterilized shears, as it will not produce more flowers. However, if the stem remains green and plump, leave it intact. You can cut it back to just above the second or third node (the small bumps along the stem) from the base to encourage the plant to branch out and produce a secondary flush of flowers or a branching spray. For deeper academic insight into orchid meristem development, check the American Orchid Society Culture Sheets.
How do I know when my orchid actually needs water?
Never water your orchid on a rigid calendar schedule like "every Tuesday." Instead, evaluate the root color and pot weight. If your orchid is in a clear plastic pot, look at the roots: if they are plump and vibrant green, do not water. If they have faded to a silvery-white or pale gray, it is time to drench them. Additionally, lift the pot; a dry orchid pot will feel remarkably lightweight compared to a freshly watered one.
Why are my orchid's leaves turning yellow and falling off?
Yellowing leaves are a sign of natural aging if it is only the lowest, oldest leaf at the absolute base of the plant shriveling away while new leaves emerge at the top. However, if multiple leaves are turning yellow, mushy, or dropping simultaneously, it indicates severe stress. This is almost always caused by overwatering that has destroyed the root system, leaving the plant unable to take up water and nutrients, though it can occasionally point to chemical fertilizer burn or intense sunburn.
Can I grow orchids in water culture instead of bark?
While some hobbyists experiment with "water culture" (keeping bare orchid roots suspended above or partially in water), it goes against the plant's natural epiphytic evolutionary biology. In the wild, roots are adapted to brief, heavy soakings followed by rapid drying and constant air exposure. Submerging roots permanently in stagnant water deprives them of oxygen, inevitably leading to anaerobic rot, root death, and structural collapse. For long-term health, reliability, and repeat blooming, a coarse bark medium remains the gold standard.
Related Guides
- Can Orchids Live Outside
- Indoor Plant Leaves Curling Inward
- Why your Cucumber Leaves Are Turning Yellow and How to Fix Them
- Best Shade Loving Plants for Indoor Planters and Dark Rooms
- Why My Hydrangea Doesn't Bloom
📋 Table of Contents ▼ Click to expand
Tags:
Keep reading
🌿 Related Plants You Might Like






PlantSavvyWorld
Editorial team
PlantSavvyWorld is an independent botanical education project. Articles are drafted with AI assistance, then edited and checked against university extension services, botanical garden collections and other published horticultural sources.