

How to Make Organic Compost for Vegetable Gardens at Home
Written with AI assistance, edited and checked against horticultural sources.
1. Botanical Overview & Natural Habitat
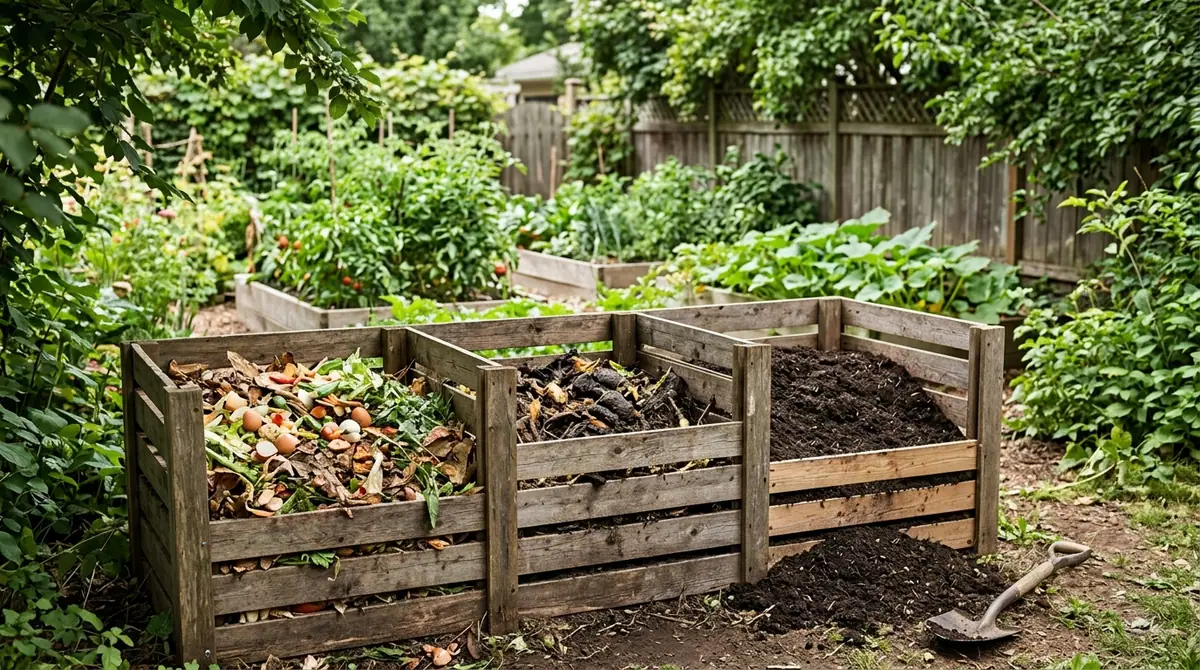
Last April, while slicing open a dense, root-bound 3-gallon pot of heirloom Cherokee Purple tomatoes that had stalled in production, I reached down and grabbed a handful of homemade black gold from my three-bin system. The texture was crumbly like chocolate cake, smelling faintly of a damp forest floor after a warm spring rain. Within fourteen days of top-dressing those struggling tomato plants with that living organic matter, the pale lower leaves greened up, and a flush of vigorous new side shoots emerged. That is the biological power of truly balanced garden compost.

Composting is fundamentally a biochemical decomposition process driven by aerobic microorganisms. These organisms require four core elements to thrive: carbon (energy), nitrogen (protein synthesis), water (cellular transport), and oxygen (cellular respiration). When managed correctly, mesophilic bacteria initiate the breakdown, raising internal pile temperatures from ambient up to 105°F to 113°F (40°C to 45°C). Thermophilic (heat-loving) bacteria and fungi then take over, driving temperatures between 130°F and 160°F (54°C to 71°C). This high-heat phase is botanically crucial: it neutralizes weed seeds, eradicates common vegetable plant pathogens like Fusarium and Verticillium wilt spores, and breaks down complex lignins into stable humus that improves cation exchange capacity (CEC) in your garden beds.
2. Essential Environmental & Care Requirements
Maintaining an efficient home composting system requires balancing physical, chemical, and biological parameters. If any single variable falls out of range, the microbial community slows down, and your pile will stall or turn anaerobic.
| Parameter | Optimal Condition | Common Mistake | Why It Matters |
|---|---|---|---|
| Carbon-to-Nitrogen (C:N) Ratio | 30:1 by weight | Adding too many kitchen scraps (high N) or dry leaves alone (high C) | A balanced ratio fuels microbial population explosions without emitting foul odors or slowing down decomposition. |
| Moisture Content | 40% to 60% (feels like a wrung-out sponge) | Letting the pile dry out completely or keeping it waterlogged | Water is the transport medium for microbes; too little halts metabolism, while excess water forces out oxygen. |
| Aeration & Oxygen | Interstitial air spaces > 35% | Compacting the pile or never turning it | Aerobic bacteria require free oxygen to respire and generate heat; lack of oxygen shifts the pile to anaerobic putrefaction. |
| Particle Size | 0.5 to 2 inches (1.2 to 5 cm) | Throwing in whole melon rinds or massive branches | Smaller surface areas allow fungi and bacteria to colonize and break down organic structures exponentially faster. |
To master the C:N ratio, you must categorize your inputs accurately. Carbon-rich "browns" include shredded dry leaves, straw, untreated wood shavings, shredded cardboard, and dried corn stalks. Nitrogen-rich "greens" include fresh grass clippings, raw vegetable kitchen scraps, coffee grounds, and fresh garden waste.
💡 Pro-Tip: Never rely on visual guessing for moisture. Scoop a handful of compost from the center of your active pile and squeeze it firmly. If water drips out freely, it is too wet (add dry shredded cardboard immediately). If it falls apart like dry sand upon opening your hand, it is too dry (water it thoroughly with a hose while turning). It should hold its shape as a damp clump without releasing free droplets.
For further academic backing on soil organic matter dynamics and nutrient cycling, consult the comprehensive guides provided by the Cornell University Composting Trash to Treasure Guide.
3. Step-by-Step Cultivation, Feeding & Propagation
Creating nutrient-dense, weed-free compost for your vegetable beds is a predictable, repeatable process. Follow this exact protocol to transform raw organic waste into finished humus within 60 to 90 days.
- Select and Prepare the Site: Choose a level, well-drained spot in partial shade or full sun that is easily accessible with a garden hose. Set up a 3-foot by 3-foot by 3-foot (approx. 1 meter cubed) bin constructed from wire mesh, untreated rot-resistant cedar, or repurposed wooden pallets, ensuring direct contact with bare earth so beneficial soil microbes and earthworms can migrate upward.
- Lay the Foundation Layer: Build a 4-inch to 6-inch (10 cm to 15 cm) coarse base layer using chunky twigs, small branches, and thick corn stalks. This structural layer prevents bottom compaction and maintains vital airflow channels at the base of the pile.
- Layer Browns and Greens: Add a 4-inch (10 cm) layer of carbon-rich browns (shredded leaves and straw), followed by a 2-inch (5 cm) layer of nitrogen-rich greens (vegetable scraps and green yard waste). Sprinkle a thin dusting of garden soil or finished compost between layers to inoculate the mass with native microbes.
- Monitor and Adjust Moisture: As you build the pile up to the 3-foot height threshold, water every 6 inches (15 cm) of material until it reaches the wrung-out sponge consistency. Cap the top with a 3-inch (7 cm) layer of carbon materials or a breathable tarp to prevent heavy rainfall from waterlogging the system.
- Monitor Internal Temperatures: Insert a long-stem compost thermometer into the dead center of the pile. Within 4 to 7 days, temperatures should spike to between 130°F and 160°F (54°C to 71°C). If the temperature drops below 100°F (38°C) within the first month, the pile is likely too dry or lacks nitrogen.
- Aerate via Turning: Turn the pile every 7 to 10 days during the active thermophilic phase. Using a pitchfork, flip the outer dry material into the center and the hot core material to the outside. This redistributes moisture, introduces fresh oxygen, and ensures uniform decomposition.
- Cure and Screen: After 60 to 90 days, the pile will cool down to ambient temperature, shrink to half its original volume, and transform into dark, earthy-smelling humus. Let it cure undisturbed for an additional 14 to 30 days, then pass it through a 0.25-inch wire hardware cloth screen to remove any lingering woody fragments before applying it to your vegetable beds.
⚠️ Important Caution: Never add meat, dairy, fats, oils, pet waste, or diseased vegetable plants (such as late blight-infected tomato vines or clubroot-infested brassica roots) to a home compost pile. These materials attract vertebrate pests like rats and raccoons, harbor human pathogens, or introduce persistent plant diseases that low-temperature backyard piles cannot reliably sterilize.
To explore additional science-backed methodologies on organic waste management and soil health, visit the Royal Horticultural Society (RHS) Composting Guide.
4. Common Problems, Pests & Troubleshooting
Even experienced gardeners encounter imbalances in their compost systems. Identifying the root cause quickly prevents structural failure or foul odors.
The Pile Emits a Strong Ammonia or Rotten Egg Odor
- Cause: The pile is anaerobic, meaning it lacks oxygen. This typically happens when too many wet, nitrogen-rich greens are added at once, or the pile is compacted and waterlogged.
- Solution: Immediately stop adding kitchen scraps. Turn the entire pile with a pitchfork to introduce oxygen, and fold in 2 to 3 buckets of dry, coarse carbon sources such as shredded cardboard or dry autumn leaves to absorb excess moisture and open up air pockets.
The Pile Remains Cold and Will Not Decompose
- Cause: Insufficient nitrogen (too many browns), lack of moisture, or the overall pile volume is too small (less than 3 cubic feet, preventing heat retention).
- Solution: Broaden the physical footprint of the pile to at least 3 feet cubed. Mix in high-nitrogen activators like fresh grass clippings, organic blood meal, or fresh manure, and water the entire mass thoroughly.
Unwanted Pests (Rats, Mice, Flies) Are Attracted to the Bin
- Cause: Exposed food waste on the surface of the pile or the inclusion of prohibited items like meat scraps, cheese, or cooking oil.
- Solution: Bury all fresh vegetable scraps at least 10 inches (25 cm) deep within the center of the pile, or cover every kitchen waste addition with a 4-inch cap of carbon-rich brown material. Secure your bin with fine wire mesh hardware cloth on the bottom and sides if burrowing rodents persist.

5. Frequently Asked Questions
Can I compost citrus peels and coffee filters for my vegetable garden?
Yes, absolutely. Citrus peels (lemons, oranges, limes) break down completely, though their thick rinds and natural oils slow down the process slightly. Chop them into smaller 1-inch pieces before tossing them in. Coffee filters, paper tea bags (ensure they are staple-free and plastic-free), and used coffee grounds are exceptional nitrogen-rich green additions that earthworms actively seek out.
How do I know when my compost is fully finished and safe for seedlings?
Finished compost is dark brown or black, has a crumbly, uniform texture, and smells sweet and earthy like a forest floor. You should not be able to recognize any original food scraps or yard waste, except for a few persistent woody twigs. To verify it is safe for delicate vegetable seedlings, perform a "bag test": seal a handful of moist compost inside a zip-top plastic bag for 48 hours. If you open it and smell a sour or ammonia odor, it is still immature and will burn plant roots. If it smells fresh, it is ready.
Should I use commercial compost starters or accelerators?
In most residential gardens, commercial compost starters are entirely unnecessary. Native soil microbes, bacteria already present on vegetable scraps and garden leaves, and earthworms colonize the pile naturally within 48 hours of assembly. If you want to accelerate the initial decomposition phase, simply shovel in a single trowel of finished garden compost or fresh garden soil every time you build a new layer.
What is the ideal size for a backyard compost pile?
The biological sweet spot for a backyard compost pile is 3 feet by 3 feet by 3 feet (approximately 1 cubic meter). This specific volume provides enough mass to insulate metabolic heat generated by thermophilic bacteria, driving internal temperatures up to 160°F (71°C) to kill weed seeds and pathogens, while still allowing oxygen to diffuse naturally into the core without requiring forced mechanical aeration. Piles smaller than 2 feet cubed dry out and fail to heat up, while piles larger than 5 feet cubed often become compacted and turn anaerobic in the center.
Related Guides
- Best Companion Plants for Organic Vegetable Gardens
- Benefits of Using Mulch in Organic Vegetable Gardening
- Why Gardens Are Important Kdagardenation
- How to Water and Maintain Carnivorous Plants at Home
- How to Start a Hydroponic Gardening System at Home
- Best Soil Thermometer for a Head Start in your Vegetable Garden
📋 Table of Contents ▼ Click to expand
Tags:
Keep reading
🌿 Related Plants You Might Like






PlantSavvyWorld
Editorial team
PlantSavvyWorld is an independent botanical education project. Articles are drafted with AI assistance, then edited and checked against university extension services, botanical garden collections and other published horticultural sources.