

Benefits of Using Mulch in Organic Vegetable Gardening
Written with AI assistance, edited and checked against horticultural sources.
1. Botanical Overview & Natural Habitat
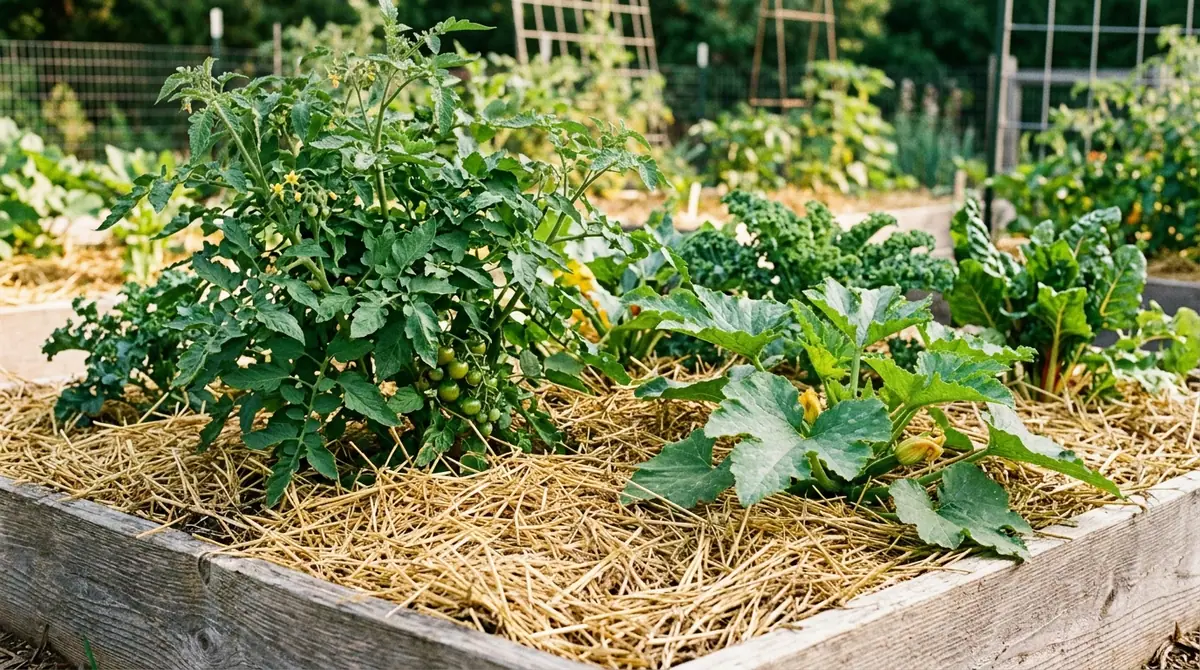
Last July, under a relentless 98°F (36.6°C) afternoon sun in my Zone 7b trial garden, I stuck a soil thermometer 3 inches (7.6 cm) deep into two adjacent beds of heirloom 'Brandywine' tomatoes. The bare soil bed registered a scorching 94°F (34.4°C) at root level—a temperature that halts nutrient uptake and causes blossom drop. The bed beside it, insulated by a 3-inch (7.6 cm) layer of shredded hardwood bark, read a cool, biologically active 78°F (25.5°C). That 16-degree differential is the invisible engine of organic vegetable success.
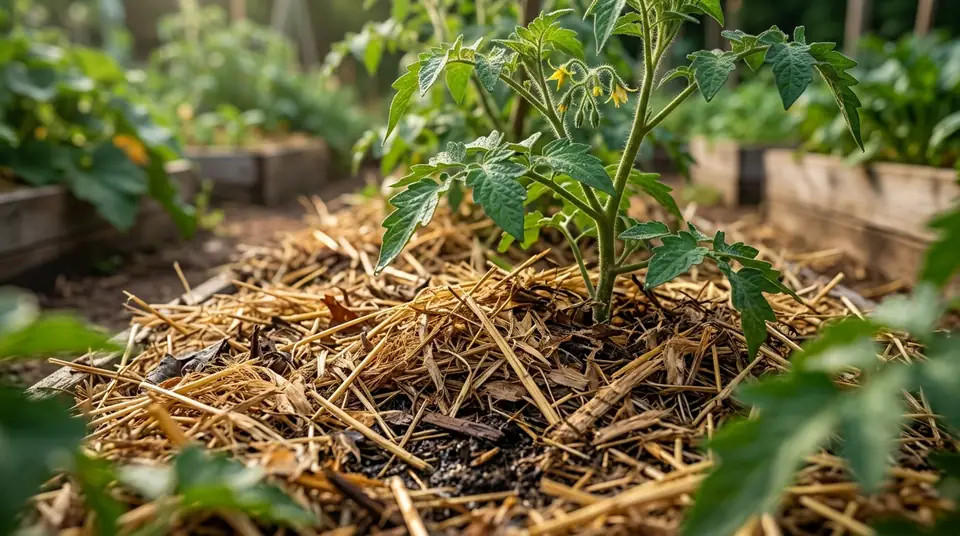
Botanically speaking, applying organic mulch alters the rhizosphere—the narrow zone of soil directly influenced by root secretions and associated soil microorganisms. By insulating the soil, mulch prevents the rapid evaporation of moisture and stabilizes thermal fluctuations. This creates an optimal environment for mycorrhizal fungi, earthworms (Lumbricus terrestris), and beneficial bacteria like Rhizobium to thrive. These organisms break down complex carbon structures into bioavailable nitrates, phosphates, and potassium ions that vegetable crops require for cellular expansion and fruit set. Without mulch, the top 1 to 2 inches (2.5 to 5 cm) of garden soil undergo extreme freeze-thaw cycles in spring and baking-drying cycles in summer, drastically reducing microbial biomass and forcing plants into a state of chronic physiological stress.
2. Essential Environmental & Care Requirements
Maximizing the benefits of organic mulch requires aligning material selection with specific environmental parameters, soil types, and crop architectures. Different vegetables have distinct root depths and moisture requirements, meaning a one-size-fits-all approach to mulching will stunt your yields.
| Parameter | Optimal Condition | Common Mistake | Why It Matters |
|---|---|---|---|
| Application Depth | 2 to 3 inches (5 to 7.6 cm) settled depth | Piling mulch >4 inches (10 cm) thick | Excess depth chokes out atmospheric oxygen and creates an anaerobic, water-logged root zone. |
| Collar Clearance | 1 to 2 inches (2.5 to 5 cm) away from stems | Piling mulch directly against plant stalks ("volcano mulching") | Direct contact traps moisture against stems, inviting collar rot, fungal pathogens, and voles. |
| Carbon-to-Nitrogen Ratio | C:N ratio between 20:1 and 30:1 for finishing materials | Using uncomposted, high-carbon sawdust directly on heavy feeders | Microbes consume available soil nitrogen to break down carbon, causing severe foliar chlorosis. |
| Moisture Level at Application | Soil must be thoroughly saturated (field capacity) | Applying mulch over bone-dry soil during a drought | Dry mulch acts like an umbrella, shedding subsequent light rains and preventing moisture from reaching roots. |
When selecting organic mulches, your choice dictates the chemical and biological trajectory of your garden beds. Straw (free of weed seeds, ideally wheat or oat) is exceptional for Solanaceous crops like peppers and tomatoes because it reflects sunlight, keeps fruit clean, and breaks down slowly over a 90-to-120-day growing season. Shredded fall leaves—often called leaf mold—offer a rich fungal network and supply trace minerals, making them ideal for brassicas. Grass clippings are high in nitrogen but must be applied in thin layers under 1 inch (2.5 cm) to prevent them from matting into an impermeable, anaerobic sheet.
💡 Pro-Tip: Always source your organic straw or hay from certified weed-free suppliers. Persistent systemic herbicides like aminopyralid can survive the digestive tracts of livestock and the composting process, lurking in cheap mulch to severely distort and kill tomato and bean crops months later. For trusted guidance on regional soil management and amendment safety, consult the USDA National Organic Program standards.
3. Step-by-Step Cultivation, Feeding & Propagation
Applying organic mulch incorrectly can lock up soil nutrients or smother tender seedlings. Follow this precise protocol to integrate mulching into your annual vegetable garden rotation for maximum soil health and pest suppression.
- Perform a Comprehensive Weed Sweep: Clear the bed of all perennial weeds like quackgrass (Elymus repens) and bindweed (Convolvulus arvensis). Mulch suppresses annual weed seeds by blocking light, but established perennials will simply punch right through a 3-inch (7.6 cm) barrier.
- Amend and Irrigate the Soil: Broadcast your foundational organic fertilizers—such as blood meal, bone meal, or aged compost—into the top 2 inches (5 cm) of soil. Water the bed deeply until moisture reaches a depth of 8 inches (20 cm), ensuring the soil profile is at field capacity before sealing it with mulch.
- Establish Plant Spacing: Transmit your vegetable starts or direct-sow your seeds into the cleared, amended bed according to their specific spacing requirements (e.g., 18 inches [45 cm] apart for bush beans, 24 inches [60 cm] apart for indeterminate tomatoes).
- Apply the Carbon Layer: Lay down your chosen organic mulch material. For fine materials like shredded leaves, apply a 2-inch (5 cm) layer. For coarser materials like chopped straw or bark chips, apply a 3-inch (7.6 cm) layer.
- Maintain Collar Clearance: Pull the mulch back from the base of every plant, leaving a clear 1-to-2-inch (2.5 to 5 cm) ring of bare soil around the main stem to ensure unimpeded air circulation.
- Monitor and Replenish Seasonally: Inspect the beds every 45 to 60 days. As soil microbes consume and incorporate the lower layers of organic matter, top off the bed with a fresh 1-inch (2.5 cm) maintenance layer to sustain weed suppression and moisture retention.
⚠️ Important Caution: Never apply fresh, uncomposted wood chips or sawdust directly into your vegetable seedbeds or around young annual crops. As soil bacteria rush to decompose the high-carbon material, they temporarily strip the soil of available nitrogen, inducing sudden nitrogen deficiency, stunted growth, and yellowing leaves in your vegetables. Reserve wood chips strictly for permanent pathway surfaces.
4. Common Problems, Pests & Troubleshooting
Even the most carefully managed organic mulch systems encounter biological imbalances. Recognizing the early warning signs of mulch-induced issues prevents catastrophic crop failure.
Slug and snail infestations (Deroceras reticulatum) are the most frequent drawback of organic mulching, particularly in cool, damp maritime climates or during prolonged rainy spells. Mulch provides a dark, humid daytime refuge for mollusks to hide from avian predators. If you notice irregular, smooth-edged holes in your lettuce and hostas, transition your mulch zone immediately adjacent to plant stems to a barrier of crushed eggshells or diatomsaceous earth, and hand-pick pests at dusk using beer traps.
Another common issue is rodent nesting. Voles (Microtus pennsylvanicus) and mice frequently tunnel beneath thick layers of straw or wood mulch during autumn and winter, feeding on the cambium layer of fruit tree roots and taproot vegetables like carrots and parsnips. To mitigate this, keep mulch pulled back at least 6 to 8 inches (15 to 20 cm) from the trunks of perennial woody crops and root vegetables during late fall, and maintain clean perimeters around your vegetable plots.
Fungal proliferation can also cause alarm. You may occasionally discover bright yellow slime mold (Fuligo septica) or bird's nest fungi (Cyathus) erupting through wood-based mulches after a heavy rain. Do not panic; these saprophytic organisms are completely harmless to your living vegetables. They are simply doing the heavy lifting of breaking down complex lignin and cellulose in the mulch, signaling a highly fertile and biologically active soil food web.
5. Frequently Asked Questions
Does mulch attract termites to my vegetable garden?
Organic mulches—especially wood-based products—do provide a carbon food source and shelter for subterranean termites, but standard vegetable garden mulching rarely causes structural infestations in nearby homes. Termites prefer moist, decaying wood in direct contact with soil structures and foundations. To mitigate any risk, keep all wood-based mulches at least 12 inches (30 cm) away from your home's wooden structural siding, and utilize non-wood mulches like straw, shredded leaves, or grass clippings inside vegetable beds located close to human dwellings.
Can I put mulch right over weeds?
You can suppress small, newly germinated annual weed seedlings by smothering them beneath a 3-inch (7.6 cm) layer of mulch, but this method fails against established perennial weeds. Weeds with aggressive root systems, taproots, or underground rhizomes—such as dandelions, thistle, and bermuda grass—will easily penetrate a standard organic mulch layer. Always hand-pull or completely eradicate perennial weeds before laying down your organic mulch.
When is the best time of year to apply mulch to vegetable beds?
The ideal timing depends on your climate zone and cropping cycle, but generally, apply mulch twice a year: in mid-spring after the soil has naturally warmed up to at least 60°F (15.5°C) and you have transplanted warm-season crops, and again in mid-autumn after harvesting summer crops to protect the soil from winter erosion and compaction. Applying mulch to cold, frozen spring soil traps frost in the ground, delaying root expansion and seedling development.
How often do I need to replace organic mulch?
Organic mulches are dynamic biological inputs that continuously decompose and integrate into the soil profile. Fast-decaying materials like straw and grass clippings degrade within 3 to 5 months and require top-dressing or complete replacement twice a season. Slower-decaying materials like shredded hardwood bark or leaf mold last 12 to 18 months. Instead of completely stripping old mulch away, simply rake back any unrotted debris and apply a fresh 1-to-2-inch (2.5 to 5 cm) maintenance layer on top at the start of each new growing season.
Related Guides
- How to Make Organic Compost for Vegetable Gardens at Home
- Best Companion Plants for Organic Vegetable Gardens
- Using Well Water in the Garden a Good Idea
- Mulch for Peonies
- Mulch Bagged vs Bulk
📋 Table of Contents ▼ Click to expand
Tags:
Keep reading
🌿 Related Plants You Might Like






PlantSavvyWorld
Editorial team
PlantSavvyWorld is an independent botanical education project. Articles are drafted with AI assistance, then edited and checked against university extension services, botanical garden collections and other published horticultural sources.