

How to Start a Hydroponic Gardening System at Home
Written with AI assistance, edited and checked against horticultural sources.
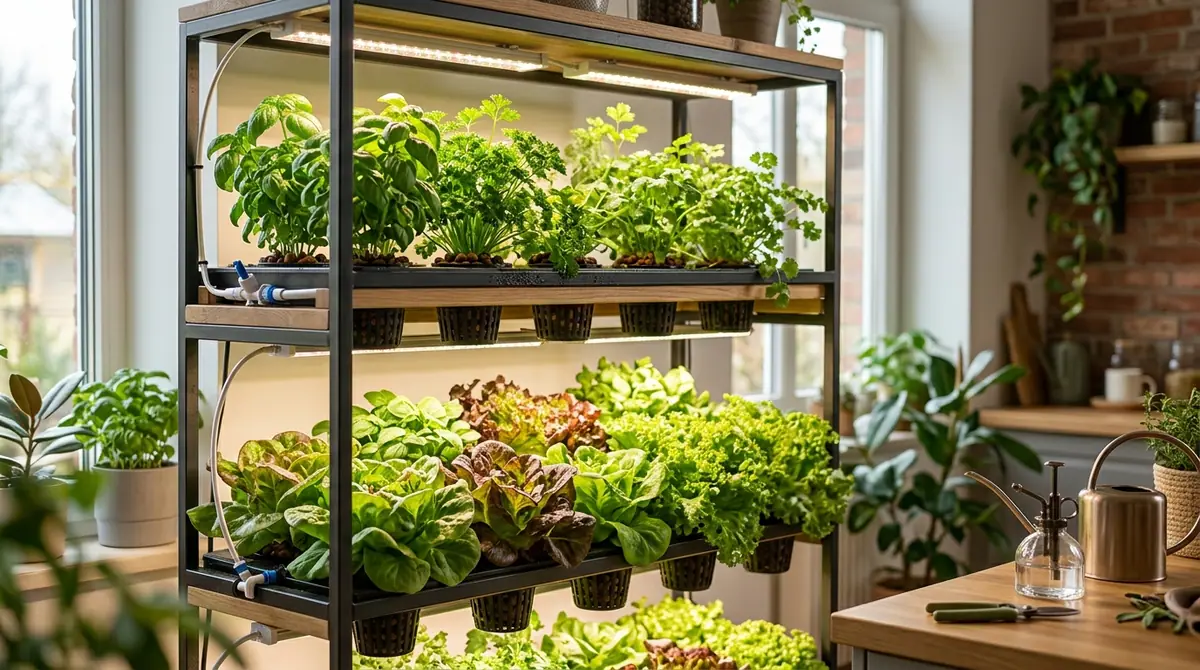
A leggy, sad-looking basil plant often fails to thrive in the dim light of a north-facing windowsill. Using a plastic storage tote filled with water, a cheap aquarium air stone, and a handful of herb seedlings suspended in net pots with clay pebbles allows thick, pearly-white roots to explode into the nutrient solution within fourteen days, outpacing growth rates achieved in conventional containers.
1. Botanical Overview & Natural Habitat

Without the physical resistance of soil, plants redirect that saved energy entirely toward vegetative mass and reproductive output. Photosynthesis accelerates because the stomata on the leaves remain fully open, drinking in carbon dioxide while the vascular system drinks in water and dissolved salts without drought stress.
For a deeper dive into the science of plant nutrition, the Cornell University Controlled Environment Agriculture program offers exceptional, peer-reviewed research on nutrient uptake kinetics in soilless environments.
2. Essential Environmental & Care Requirements
Maintaining a thriving indoor hydroponic setup requires strict control over your environmental variables. Because you are eliminating the natural buffering capacity of soil, minor fluctuations in water chemistry or air temperature can quickly cause systemic shock.
| Parameter | Optimal Condition | Common Mistake | Why It Matters |
|---|---|---|---|
| Water Temperature | 65°F – 68°F (18°C – 20°C) | Allowing water to exceed 75°F (24°C) | Warm water holds drastically less dissolved oxygen, causing root rot (Pythium). |
| pH Level | 5.5 – 6.5 | Letting pH drift outside 5.0–7.0 | Extreme pH locks out crucial macronutrients like phosphorus, iron, and calcium. |
| Electrical Conductivity (EC) | 1.2 – 2.0 mS/cm | Over-concentrating the nutrient solution | High EC causes osmotic pressure, pulling water out of roots and burning tips. |
| Photoperiod | 14 – 18 hours daily | Providing zero dark period | Plants need a resting phase to process metabolic sugars and complete structural growth. |
| Ambient Humidity | 50% – 70% | Dropping below 40% in winter | Low humidity causes excessive transpiration, leading to tip burn and calcium deficiencies. |
💡 Pro-Tip: Always adjust your pH after you have added and thoroughly mixed your concentrated liquid fertilizers into the water reservoir. Fertilizers naturally acidify the water, so adjusting beforehand is a waste of time.
3. Step-by-Step Cultivation, Feeding & Propagation
Building a Deep Water Culture (DWC) system at home is straightforward, highly effective, and requires no specialized plumbing. Follow this step-by-step sequence to get your first garden running.
- Procure and Prepare the Reservoir: Acquire an opaque, food-grade plastic storage tote with a tight-fitting lid (holding 5 to 10 gallons / 19 to 38 liters). Opaque plastic is non-negotiable; light penetration will instantly trigger rampant green algae growth that steals nutrients from your crops.
- Install Aeration Hardware: Drill a small hole near the upper rim of the tote for your airline tubing. Place a heavy weighted aquarium air stone at the bottom of the basin, connect it to a dual-outlet air pump outside the tote, and run it continuously to keep dissolved oxygen levels saturated above 6 ppm.
- Cut Net Pot Holes in the Lid: Using a hole saw drill attachment, cut circular holes into the lid matching the outer diameter of your net pots (typically 2 to 3 inches / 5 to 7.5 cm in diameter), spacing them at least 8 inches (20 cm) apart to prevent crowding at maturity.
- Prepare the Propagation Medium: Soak sterile rockwool cubes or expanded clay pebbles in pH-adjusted water (pH 5.5) for 30 minutes. Insert a pre-germinated seedling or unrooted cutting into the medium, ensuring the base of the stem makes firm contact with the substrate.
- Mix the Nutrient Solution: Fill the reservoir with filtered water, leaving a 1-inch (2.5 cm) air gap between the surface of the water and the bottom of the suspended net pots. Mix in your hydroponic base nutrients according to the manufacturer's vegetative dilution rate, targeting an initial EC of 1.0 to 1.2 mS/cm.
- Adjust Chemistry and Deploy: Test the water using a calibrated digital pH pen and adjust using pH Up or pH Down until it reads precisely 6.0. Snap the lid onto the reservoir, insert your potted seedlings, and position your full-spectrum LED grow lights 12 to 18 inches (30 to 45 cm) above the canopy.
⚠️ Important Caution: Never let your reservoir water level drop so low that the roots lose contact with the moisture below. Once a root system establishes itself into the water, dropping the level too fast will dehydrate the lower roots and shock the plant.
4. Common Problems, Pests & Troubleshooting
Even in a sterile indoor environment, issues can arise. Knowing how to diagnose them quickly saves crops.
- Brown, Slimy Roots (Pythium Root Rot): If your roots turn a dull brown, emit a foul swampy odor, and feel slimy, you have root rot. This is almost always caused by water temperatures climbing above 72°F (22°C). Immediately sterilize the system with a mild hydrogen peroxide flush (1 teaspoon of 3% H2O2 per gallon of water), lower the reservoir temperature using frozen water bottles, and add a beneficial bacteria inoculant like Bacillus subtilis.
- Interveinal Chlorosis (Yellow Leaves with Green Veins): When the tissue between the leaf veins turns pale yellow while the veins stay green, your pH is likely creeping too high (above 6.8), locking out available iron and magnesium. Check your pH meter calibration, drop the solution back down to 5.8, and foliar-feed with a chelated micronutrient spray.
- Algae Blooms: Green slime coating your clay pebbles or floating in the water indicates light is leaking into your reservoir or nutrient container. Wrap the exterior of clear or translucent bins in reflective tape or blackout fabric, and ensure all net pot gaps are tightly sealed with growing media.

5. Frequently Asked Questions
Do I need to buy expensive LED grow lights, or will regular house lamps work?
Standard household LED bulbs lack the specialized PAR (Photosynthetically Active Radiation) spectrum and lumen intensity required to drive vigorous plant growth. While they might keep a houseplant alive, food crops like tomatoes, peppers, and leafy greens require dedicated horticultural full-spectrum LED grow lights emitting a balanced mix of red and blue wavelengths to produce edible yields.
How often should I completely change the water in my hydroponic reservoir?
You should completely drain, scrub, and refill your nutrient reservoir every 14 days. Over two weeks, plants selectively absorb specific ions faster than others, creating a chemical imbalance and salt buildup in the remaining water that will eventually cause nutrient toxicity.
Can I grow root vegetables like carrots and potatoes in a home hydroponic system?
Technically yes, but it is exceptionally difficult and generally impractical. Hydroponics is optimized for above-ground crops like lettuce, herbs, strawberries, tomatoes, and cucumbers. Tubers and taproots require dense, restrictive media to form properly, and pulling a carrot out of a net pot usually damages the fragile root structure.
What is the difference between organic and synthetic nutrients in hydroponics?
Synthetic nutrients are mineral-based, instantly water-soluble, and directly absorbed by plant roots without requiring soil microbe breakdown. Organic hydroponic fertilizers rely on complex biological compounds and beneficial bacteria to break down organic matter; however, in a sterile water reservoir, organic matter frequently rots, clogs pumps, and causes explosive bacterial contamination.
Related Guides
- How to Setup a Drip Irrigation System for Raised Beds
- How to Water and Maintain Carnivorous Plants at Home
- How to Sharpen Garden Tools Properly at Home
- How to Make Organic Compost for Vegetable Gardens at Home
- How to Dechlorinate Tap Water for Free at Home
📋 Table of Contents ▼ Click to expand
Tags:
Keep reading
🌿 Related Plants You Might Like






PlantSavvyWorld
Editorial team
PlantSavvyWorld is an independent botanical education project. Articles are drafted with AI assistance, then edited and checked against university extension services, botanical garden collections and other published horticultural sources.