

How to Sharpen Garden Tools Properly at Home
Written with AI assistance, edited and checked against horticultural sources.
1. Botanical Overview & Natural Habitat
Pruning a stubborn, woody Rosa rugosa cane with loppers that act as a dull crushing instrument rather than a precision blade causes a ragged tear in the plant tissue. This exposes the cambium layer to fungal spores, leading to a localized dieback that can set a shrub back an entire growing season, demonstrating that plant health begins at the workbench, rather than the soil.

To understand why sharpening matters, we must look at how plant tissue responds to injury. When you cut a stem at a precise 45-degree angle, 0.25 inches (0.64 cm) above a lateral bud, clean cell walls seal rapidly through callus tissue formation. A dull blade shears the outer bark while bruising the inner xylem and phloem, causing cell death 0.05 inches (0.13 cm) or deeper beyond the cut line. By mastering how to sharpen garden tools properly at home, you are directly supporting the physiological integrity of every specimen in your landscape.
2. Essential Environmental & Care Requirements
Maintaining your cutting equipment requires a predictable routine, much like watering schedule management for drought-sensitive species. Steel is a dynamic material that responds to environmental stressors like humidity, soil acids, and plant sap sugars. If left unmanaged, these elements trigger rapid oxidation (rust), which pits the steel and ruins the factory bevel.
| Parameter | Optimal Condition | Common Mistake | Why It Matters |
|---|---|---|---|
| Storage Humidity | Below 50% relative humidity | Storing tools in damp sheds or greenhouses | Moisture accelerates rust formation and degrades metal integrity. |
| Sharpening Angle | 20 to 25 degrees from the flat | Guessing angles or flattening the bevel | Incorrect angles cause the edge to roll or chip immediately upon impact. |
| Cleaning Frequency | After every heavy use session | Wiping only with a dry rag | Sap and soil acids chemically bond to steel, causing pitting. |
| Lubrication Type | Mineral oil or camellia oil | Using cooking oils or motor oil | Plant-based cooking oils go rancid and gummy; motor oil contains toxic detergents. |
💡 Pro-Tip: Keep a heavy-duty bucket filled with coarse builder's sand and 1 quart (0.95 liters) of boiled linseed oil near your potting bench. Plunging your spade, trowel, and pruner blades into this oily sand mixture three times after every gardening session cleans off stubborn clay, strips away sticky sap, and leaves a micro-thin rust-preventative coating instantly.
Environmental storage is just as critical as the sharpening process itself. Keep your tools hanging vertically on wall racks rather than stacked in piles where edges can knock against one another. If you live in a coastal region with high salt air, apply a wax-based protectant to your steel surfaces every 30 days to prevent atmospheric corrosion.
3. Step-by-Step Cultivation, Feeding & Propagation
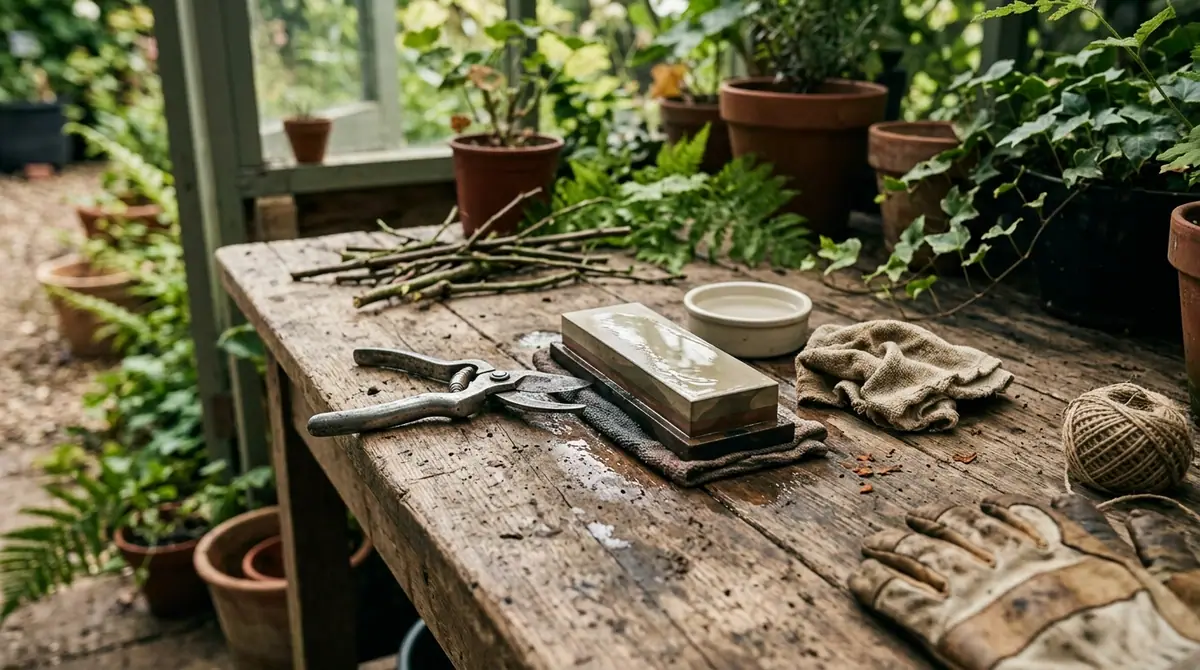
Sharpening your own tools at home is a meditative craft that saves money and guarantees superior performance compared to drop-off sharpening services. Before you begin, gather your supplies: a medium-grit diamond whetstone (typically 400 grit), a fine-grit stone (1000 grit), a stiff wire brush, denatured alcohol, coarse steel wool (Grade 0000), and a protective pair of cut-resistant work gloves.
Follow this sequential protocol to restore any bypass pruner, lopper, or shears to razor-sharp status:
- Disassemble and Clean: Remove the central pivot bolt using a properly sized wrench or screwdriver. Soak the metal components in warm water with a few drops of dish soap for 10 minutes to loosen dried plant sap and organic debris. Scrub vigorously with the wire brush and steel wool until all rust and residue are completely gone. Wipe down all parts with denatured alcohol to remove lingering grease.
- Inspect the Bevel: Examine the cutting edge under a bright LED light. Locate the factory bevel—the angled side of the blade. Most garden hand pruners are ground to a precise 20-degree bevel. Note that bypass pruners only have a bevel on one side of the cutting blade; the flat side must remain completely untouched to maintain a shearing scissor action.
- Establish the Stroke: Hold your diamond whetstone firmly in one hand or secure it on a non-slip rubber mat. Apply a few drops of honing oil or water to the stone's surface to suspend metal filings. Match the original factory angle by resting the bevel flat against the stone, then tilting the spine up just slightly to hit the exact 20-degree pitch.
- Hone the Edge: Using firm, consistent pressure, push the blade forward and across the stone in a sweeping motion, moving from the heel of the blade to the tip. Maintain the exact same angle throughout the stroke. Repeat this forward motion 10 to 15 times, always stroking away from the cutting edge to prevent biting into the abrasive surface.
- Deburr the Flat Side: Flip the blade over so the completely flat, non-beveled side rests flush against your fine 1000-grit stone. Give the flat side 2 to 3 light, flat passes to shear off the microscopic wire edge (burr) that formed during bevel grinding. Never tilt this flat side upward, or you will ruin the tight shearing contact required between the blades.
- Reassemble and Test: Wipe all metal components clean of metal slurry, apply a drop of fresh mineral oil to the pivot screw and moving joints, and reassemble the tool. Adjust the tension nut so the blades glide past each other smoothly without binding or leaving a gap. Test your work by cutting a single sheet of printer paper or a tender shoot from a Salix (willow) branch; the cut should be completely silent and effortless.
For comprehensive guidelines on maintaining agricultural and horticultural implements, consult the University of Minnesota Extension publication archives on small tool maintenance.
4. Common Problems, Pests & Troubleshooting
Even experienced gardeners encounter issues when they first transition to sharpening their own equipment. Recognizing these missteps prevents permanent damage to expensive implements.
- Issue: The tool still chews or folds paper instead of slicing it.
- Cause: You likely rounded over the apex of the bevel by lifting your hand too high during the stroke, or you failed to remove the microscopic burr on the flat side.
- Solution: Return to the 400-grit stone, reset your 20-degree angle carefully, and grind until a fresh, uniform edge emerges before finishing with the 1000-grit stone.
- Issue: Brown, crusty oxidation spots reappear within 48 hours of sharpening.
- Cause: Microscopic moisture or plant acids remained trapped in the metal pores, or you stored the tool in an unventilated toolbox without a protective oil barrier.
- Solution: Scour the blade with Grade 0000 steel wool and mineral oil, wipe totally dry, and store it in an environment where relative humidity remains consistently low.
- Issue: The pruners feel loose or pinch stems sideways after reassembly.
- Cause: The pivot bolt was over-tightened or under-tightened, or the spring washer was installed upside down.
- Solution: Refer to structural diagrams provided by authoritative resources such as the Royal Horticultural Society tool care guides to ensure correct hardware stacking order and proper pivot tension.
⚠️ Important Caution: Never use high-speed motorized bench grinders or angle grinders to sharpen delicate garden shears or pruners. The intense friction generates localized heat that quickly exceeds 400°F (204.4°C), permanently annealing the high-carbon steel, destroying its temper, and rendering the blade permanently soft and incapable of holding an edge.

5. Frequently Asked Questions
How often should garden pruners and loppers be sharpened?
As a general rule of thumb, you should touch up your cutting tools after every 8 to 10 hours of active use, or at least twice a year—once during spring cleanup and once during fall pruning season. If you are cutting through diseased wood, sanitize your blades immediately after every cut with a 10% bleach solution or isopropyl alcohol, and inspect the edge for micro-chipping.
Can I use a kitchen knife sharpener on my garden tools?
No. Standard electric or manual kitchen knife sharpeners are designed for thin, double-beveled blades (typically set at 15 degrees) and will completely ruin the robust, single-beveled cutting geometry required for heavy-duty garden bypass pruners, loppers, and hedge shears. Always use dedicated sharpening stones or diamond files matched to the proper angle.
What is the best oil to use for preventing rust on garden tools?
Light mineral oil, food-grade white mineral oil, or specialized camellia oil are the absolute best choices for protecting garden tool steel. Avoid vegetable oils like canola, olive, or corn oil because they oxidize, polymerize, and turn into a sticky, varnish-like gum that traps moisture and accelerates pitting corrosion.
Do I need to use water or oil on my sharpening stones?
It depends entirely on the type of stone you own. Diamond whetstones and traditional waterstones require water (often mixed with a drop of dish soap to reduce surface tension) to float away metal filings and prevent the stone from glazing over. Oil stones, such as natural Arkansas stones, require specialized honing oil to keep metal pores from clogging the abrasive matrix. Never mix the two systems on the same stone.
Related Guides
- Best Tools for Removing Deep Rooted Garden Weeds
- Best Gardening Apron with Pockets for Harvesting Tools 2020
- How to Water and Maintain Carnivorous Plants at Home
- How to Start a Hydroponic Gardening System at Home
- How to Make Organic Compost for Vegetable Gardens at Home
- How to Dechlorinate Tap Water for Free at Home
📋 Table of Contents ▼ Click to expand
Tags:
Keep reading
🌿 Related Plants You Might Like






PlantSavvyWorld
Editorial team
PlantSavvyWorld is an independent botanical education project. Articles are drafted with AI assistance, then edited and checked against university extension services, botanical garden collections and other published horticultural sources.