

Hibiscus Seeds How to Plant
Written with AI assistance, edited and checked against horticultural sources.
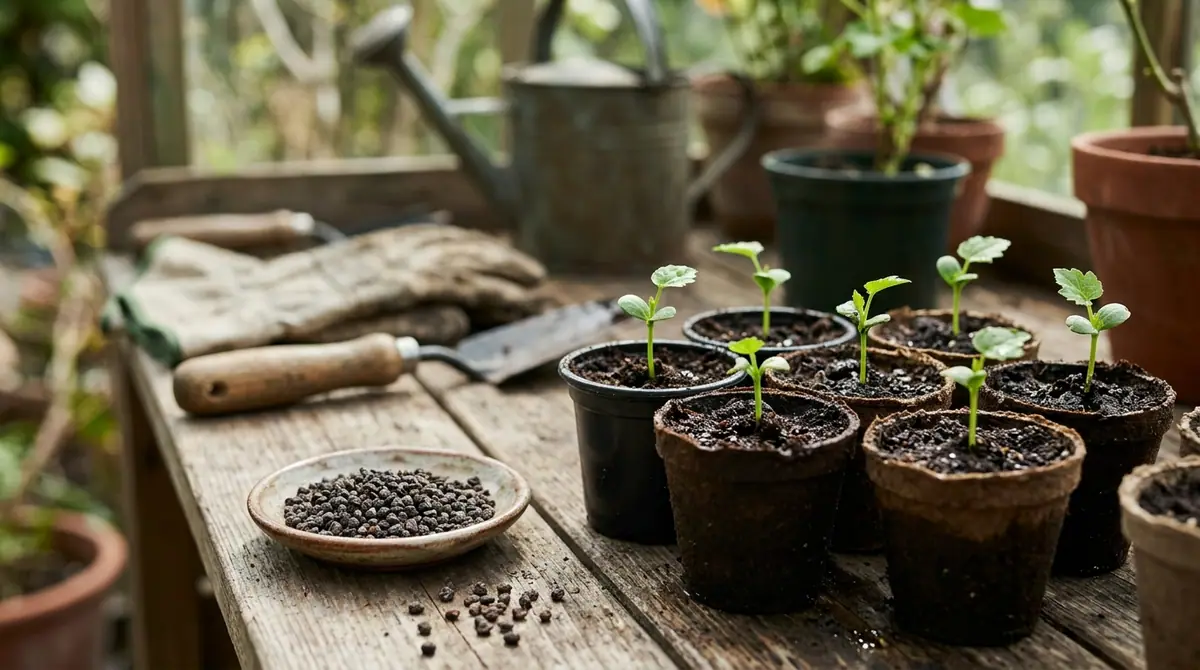
I was kneeling in my propagation shed last March, holding a pinch of dark, kidney-shaped seeds harvested from my prize Hibiscus moscheutos, when a gardener texted me in a panic because her tropical hibiscus cuttings had all dropped their buds overnight. I reminded her then of what I tell every landscape design gardener who stands in a nursery: growing hibiscus from seed is an entirely different discipline than rooting stem cuttings. It is an exercise in patience, micro-climate control, and biological timing. When you master how to plant hibiscus seeds, you aren't just sprouting annual flowers; you are unlocking a genetic lottery that can yield startling new petal colorations, robust hardiness, and decades of tropical splendor in your garden. Welcome to PlantSavvyWorld's definitive manual on starting hibiscus from seed.
1. Botanical Overview & Natural Habitat

Generally, we divide garden hibiscus into two primary camps: tropical hibiscus (Hibiscus rosa-sinensis) and hardy perennial hibiscus (such as Hibiscus moscheutos, the swamp rose mallow, and Hibiscus syriacus, the woody rose of Sharon). Tropical species thrive year-round in USDA Zones 9 through 11, reveling in high humidity, consistent moisture, and temperatures that rarely dip below 50°F (10°C). Hardy species, by contrast, evolved in North American wetlands and river floodplains, surviving winter dormancy down to USDA Zone 4 by dying back completely to the crown and sending up entirely new stalks each spring.
The physical seed of a hibiscus is protected by a remarkably hard, woody seed coat (testa). In nature, this adaptation ensures that seeds do not germinate during unseasonably warm winter thaws, which would expose vulnerable seedlings to fatal frost. Instead, the seed coat relies on natural weathering, microbial action, or scarification to break down. When you bring these seeds into a controlled propagation setup, you must artificially replicate or improve upon these natural environmental cues to achieve high germination rates.
I often pair perennial hibiscus with cool-season vegetables in transitional garden borders, much like how I plan When to Plant Brussel Sprouts in Zone 7 to maximize space before the summer heat arrives. Similarly, if you are setting up winter propagation stations indoors, timing your indoor starts mirrors the careful scheduling required for When to Plant Carrots in Zone 8a. For regional outdoor planting adjustments, the principles of soil temperature management also apply when figuring out When to Plant Beets in Utah or managing early spring root crops like When to Plant Beets in Kansas.
2. Essential Environmental & Care Requirements
Hibiscus seeds and subsequent seedlings demand strict environmental parameters. If you falter on temperature, moisture, or light during the first thirty days, damp-off fungi or root stunting will decimate your crop.
Light is the primary driver of photosynthesis and robust stem development. Seedlings require 14 to 16 hours of bright light daily. If you are starting seeds indoors in late winter—a timeline that often coincides with when home gardeners look up When to Plant Bok Choy Zone 7—you must position your seed trays 2 to 3 inches (5 to 7.5 cm) beneath high-output LED grow lights.
Soil composition dictates oxygen availability to the radical root tip. Hibiscus cannot tolerate stagnant, anaerobic media. The ideal pH sits between 6.0 and 6.5, leaning slightly acidic to maximize iron and micronutrient uptake.
| Parameter | Optimal Condition | Common Mistake | Why It Matters |
|---|---|---|---|
| Germination Temperature | 75°F to 85°F (24°C to 29°C) | Letting soil drop below 70°F (21°C) | Low warmth slows biochemical triggers, causing seed rot before the radicle emerges. |
| Sowing Depth | 0.25 to 0.5 inches (0.6 to 1.3 cm) | Burying deeper than 1 inch (2.5 cm) | Hibiscus seeds require minor light cues and lack energy reserves to push through dense soil. |
| Soil pH | 6.0 to 6.5 (slightly acidic) | Using heavy native clay above 7.5 pH | Alkaline soils lock out essential iron, inducing chlorosis and stunted growth. |
| Moisture Level | Uniformly damp, like a wrung-out sponge | Allowing surface soil to dry out completely | Newly emerged radicles dehydrate and die within hours in dry, airy media. |
To dive deeper into the physiological classifications and regional adaptability of mallow species, consult the Royal Horticultural Society Hibiscus Guide.
3. Step-by-Step Cultivation, Feeding & Propagation
Growing hibiscus from seed requires surgical precision. Follow this exact sequence to turn hard, dormant capsules into thriving nursery stock.
💡 Pro-Tip: Always inspect your harvested seeds under a 10x jeweler's loupe. Discard any seeds that feature tiny pinhole scars; these are the entry tunnels of the hibiscus seed beetle, and they will never germinate.
- Scarification: Take each hibiscus seed and gently nick the hard outer seed coat using a pair of sterile nail clippers or rub the seed gently between two sheets of 120-grit sandpaper. Stop the moment you notice a slight color change in the seed coat (revealing the lighter inner layer); do not puncture the inner embryonic tissue.
- Imbibition (Soaking): Drop the scarified seeds into a cup of warm water maintained at 85°F (29°C) for 12 to 18 hours. Seeds that sink to the bottom are viable and fully hydrated; discard any floaters that remain buoyant.
- Media Preparation: Fill clean seed-starting trays or 3-inch (7.6 cm) biodegradable pots with a sterile, finely milled soil-less mix composed of 50 percent sphagnum peat moss and 50 percent horticultural perlite. Moisten the mix thoroughly until excess water drains from the bottom.
- Sowing: Press each seed into the media at a depth of 0.25 to 0.5 inches (0.6 to 1.3 cm). Gently tamp the soil down to ensure optimal seed-to-soil contact, which is vital for moisture transfer.
- Thermal Management: Place the seed trays atop a propagation heating mat set to 80°F (27°C). Cover the trays with a clear plastic humidity dome to trap moisture, keeping relative humidity between 80 and 90 percent.
- Germination Watch: Check the trays daily. Germination typically occurs within 7 to 21 days. The moment the first green loop (hypocotyl) breaks the soil surface, remove the humidity dome immediately and place the tray directly under your grow lights.
- First Feeding: Once the seedlings develop their first true set of leaves (approximately 21 days post-germination), feed them weekly with a balanced, water-soluble organic fertilizer diluted to one-quarter strength (such as a 10-10-10 formula).
For outdoor vegetable companion planning while your hibiscus seedlings mature indoors, check out regional benchmarks like When to Plant Pumpkins in Southern California.
4. Common Problems, Pests & Troubleshooting
Even experienced growers encounter setbacks when starting hibiscus from seed. Diagnosing symptoms early prevents total crop loss.
Leggy, Spindly Seedlings: If your seedlings stretch upward past 2 inches (5 cm) with weak, translucent stems, they are starving for light. Move your grow lights down so they sit precisely 2 inches (5 cm) above the canopy, and ensure they run for 16 hours a day.
Damping-Off Fungus: If seedlings suddenly pinch at the soil line and topple over, you are dealing with Pythium or Rhizoctonia fungi. This is triggered by stagnant air, overwatering, and unsterilized media. Discard infected pots immediately, increase air circulation with a small oscillating fan, and let the soil surface dry slightly between waterings.
Yellowing Seedling Leaves (Chlorosis): When the first true leaves turn pale yellow while veins remain green, your soil pH is likely creeping too high, locking out iron and magnesium. Flush the potting mix with distilled water adjusted to a pH of 5.8, and follow up with a chelated iron foliar spray.
Pest Infestations: Indoor seedlings are prime targets for fungus gnats and aphids. Allow the top 1 inch (2.5 cm) of your potting mix to dry completely between waterings to disrupt the fungus gnat lifecycle, and introduce yellow sticky cards around the base of the containers.

5. Frequently Asked Questions
Can I collect seeds from my hybrid hibiscus and expect them to look like the parent plant?
No. Because the vast majority of modern hybrid hibiscus (both tropical and hardy) are complex open-pollinated or controlled crosses, seeds saved from them will not come true to type. You will get a genetic mosaic, resulting in entirely new flower colors, plant heights, and growth habits. If you want an exact clone of a specific plant, you must propagate via stem cuttings rather than seeds.
How long do hibiscus seeds remain viable in storage?
Stored correctly in a cool, dark, airtight container at 35°F to 40°F (2°C to 4°C), hibiscus seeds maintain high viability for up to 3 to 5 years. However, germination rates naturally decline by roughly 10 to 15 percent each year past the initial harvest date.
Do hibiscus seeds require light to germinate?
While hibiscus seeds can germinate in the dark, a small amount of ambient light actually stimulates higher, more uniform germination rates. This is why sowing them at a shallow depth of 0.25 to 0.5 inches (0.6 to 1.3 cm) rather than burying them deep in the dark is critical to success.
Can I plant hibiscus seeds directly outdoors in the garden?
You can direct-sow hardy perennial hibiscus seeds outdoors, but only after all danger of spring frost has passed and soil temperatures consistently reach 70°F (21°C). For tropical hibiscus, direct-sowing outdoors is generally unsuccessful in temperate climates; they must be started indoors under controlled heat and light weeks before the final frost date.
Related Guides
📋 Table of Contents ▼ Click to expand
Tags:
Keep reading
🌿 Related Plants You Might Like






PlantSavvyWorld
Editorial team
PlantSavvyWorld is an independent botanical education project. Articles are drafted with AI assistance, then edited and checked against university extension services, botanical garden collections and other published horticultural sources.