

When to Plant Brussel Sprouts in Zone 7
Written with AI assistance, edited and checked against horticultural sources.
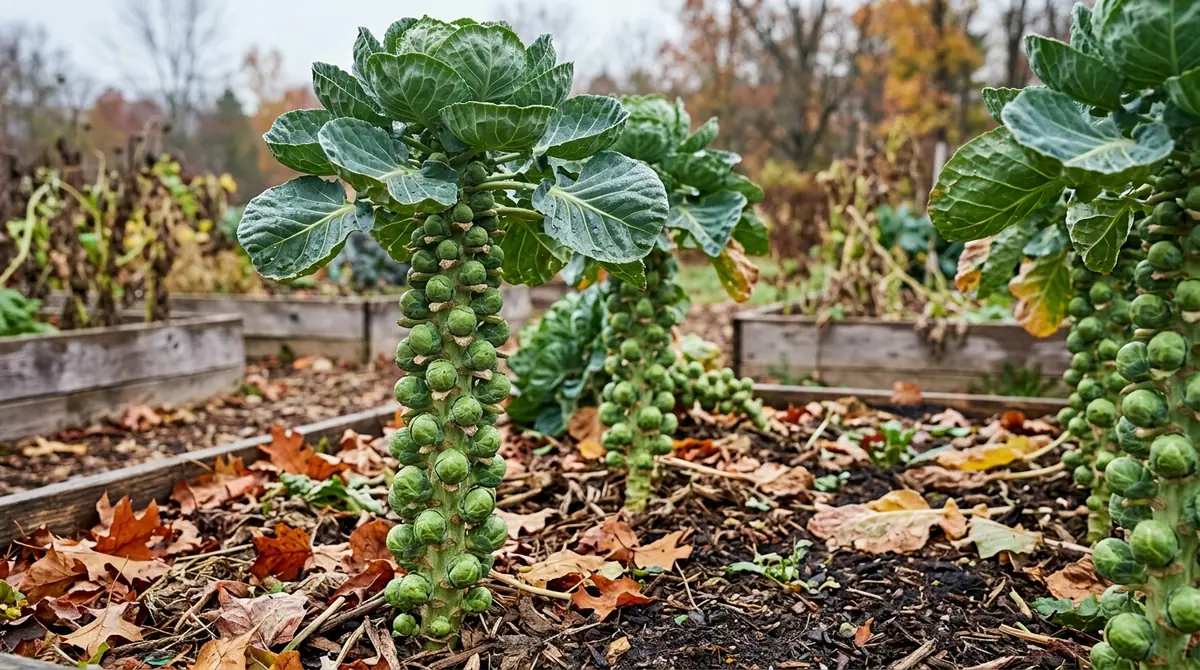

1. Botanical Overview & Natural Habitat
Brussels sprouts (Brassica oleracea var. gemmifera) are heavy-yielding members of the Brassicaceae (mustard) family, sharing a direct lineage with wild cabbages native to the mild, damp coastal cliffs of maritime Western Europe. Unlike their single-headed brassica cousins, Brussels sprouts develop dozens of edible, miniature head-like buds—technically known as axillary buds—that form sequentially in the axis between the leaf petioles and the main vertical stem, which regularly reaches heights of 24 to 36 inches (60 to 90 cm).
Understanding their evolutionary background explains why they behave the way they do in our zone 7 gardens. They are quintessential cool-season biennials grown as annuals. They crave conditions that mimic a cool, foggy Northern European autumn: steady moisture, deep nutrient-rich soil, and sustained temperatures between 60°F and 65°F (15°C to 18°C). When temperatures consistently surge above 75°F (24°C), vegetative growth stalls, the plants become leggy, and any developing sprouts become loose, bitter, and prone to aphid infestations.
Conversely, when temperatures dip into the 32°F to 45°F (0°C to 7.2°C) range, the plant slows its upward growth and begins synthesizing cryoprotectant sugars and amino acids. This biochemical reaction is nature's antifreeze, and it is precisely what turns a grassy, sulfurous sprout into a culinary delicacy. If you have ever experienced timing mishaps with other cool-season crops—such as timing when to transplant cilantro seedlings before summer heat turns them to seed—you will recognize this exact thermal sensitivity in Brussels sprouts.
2. Essential Environmental & Care Requirements
Growing phenomenal Brussels sprouts in zone 7 requires strict attention to a handful of non-negotiable environmental baselines. Because these plants have a long maturity timeline—typically 80 to 100 days from transplanting—they must navigate the shoulder seasons of our climate.
| Parameter | Optimal Condition | Common Mistake | Why It Matters |
|---|---|---|---|
| Soil pH | 6.0 to 7.5 | Planting in acidic soil (< 6.0) | Low pH invites clubroot disease and locks out essential calcium. |
| Sunlight | 6 to 8 hours daily | Shading by taller summer crops | Insufficient light leads to loose, unmarketable sprouts and weak stems. |
| Moisture | 1 inch (2.5 cm) weekly | Inconsistent wet/dry cycles | Drought stress causes loose sprouts; water-logging rots the taproot. |
| Temperature | 60°F–65°F (15°C–18°C) | Planting too late in spring | Heat exposure stops head formation and triggers bolting. |
Soil preparation is the absolute foundation of success here. Brussels sprouts are heavy feeders with substantial structural demands; a mature stalk acts like a green column that must support pounds of dense buds against autumn windstorms. They require a rich, loamy medium amended generously with aged compost or well-rotted manure.
For additional regional horticulture data tailored to our hardiness band, consult the Virginia Cooperative Extension publications on cool-season vegetable production, which provide rigorous, research-backed guidelines for regional soil amendments.
3. Step-by-Step Cultivation, Feeding & Propagation
Because zone 7 features both a spring and a summer-into-fall growing window, your strategy depends on your target harvest date. For the vast majority of zone 7 gardeners, the fall crop yields the superior flavor and quality because the plants mature into the cooling weather of October and November.
To hit the fall harvest sweet spot, you should start your seeds indoors 4 to 6 weeks before your estimated last spring frost date (typically mid-to-late March for a July transplant), OR start them directly outdoors in a nursery bed in late June for a mid-to-late July transplant.
Here is the exact step-by-step protocol for establishing your fall Brussels sprout crop from transplants:
- Sow Seeds Indoors or in Flats: Plant seeds 0.5 inches (1.3 cm) deep in a sterile, peat-based seed-starting mix. Maintain soil temperatures between 70°F and 75°F (21°C to 24°C) until germination occurs within 5 to 10 days.
- Harden Off Gradually: Once seedlings reach 4 to 6 inches (10 to 15 cm) tall with 3 to 4 true leaves, transition them outdoors over 7 to 10 days, slowly increasing their exposure to direct sunlight and wind. This process mirrors the care needed when managing when to transplant flower seedlings to prevent transplant shock.
- Prepare and Amend the Bed: Select a site with full sun. Work in a balanced organic fertilizer and agricultural lime if your soil test indicates a pH below 6.5.
- Transplant at Proper Spacing: Dig holes spaced 18 to 24 inches (45 to 60 cm) apart within rows, with 30 inches (75 cm) between rows. Bury the transplants slightly deeper than they grew in their pots—up to the first set of true leaves—to encourage a sturdy, anchored root system.
- Apply Mulch and Water Deeply: Apply a 2 to 3-inch (5 to 7.5 cm) layer of organic straw or shredded bark mulch around the base to suppress weeds and stabilize soil moisture. Water immediately with 1 inch (2.5 cm) of water.
- Side-Dress and Top the Plant: When the lower sprouts reach the size of a marble (usually 4 weeks before your anticipated final harvest), side-dress the base with a high-nitrogen organic fertilizer like blood meal or feather meal. Crucially, cut out the growing tip (the apical meristem) at the very top of the stalk to redirect all the plant's energy downward into swelling the lower and middle sprouts.
💡 Pro-Tip: Never skip the "topping" process in late autumn. Removing the terminal bud 4 weeks before your first hard freeze forces the plant to stop upward vegetative growth and channel all its photosynthetic energy into sizing up the lower buttons uniformly.
4. Common Problems, Pests & Troubleshooting
Growing brassicas in zone 7 comes with a predictable lineup of biological challenges. Because these plants occupy the garden for an extended duration, they are prime targets for specialized insect pests.
- Aphids (Cabbage Aphid): These small, gray-green insects congregate in dense colonies inside the tight folds of developing sprouts and under leaves. Combat them early with forceful sprays of water or insecticidal soap. Avoid heavy synthetic nitrogen applications, which create soft, succulent leaf tissue that invites aphid outbreaks.
- Cimported Cabbageworm and Diamondback Moth Larvae: The velvety green caterpillars of white butterflies chew ragged holes in leaves and bore into the sprouts. Row covers installed immediately after transplanting offer exceptional mechanical protection. Alternatively, apply Bacillus thuringiensis (Bt), a natural soil bacterium that targets caterpillar digestive tracts safely without harming beneficial pollinators.
- Loose, Open Sprouts: If your sprouts look like tiny, open rosebuds rather than tight spheres, the culprit is almost always heat stress or insufficient soil fertility. Ensure your plants experienced their main head-forming phase during temperatures averaging below 70°F (21°C).
- Stalk Lodging (Falling Over): Heavy autumn winds combined with top-heavy stalks can cause plants to lean or snap at the root line. Hilling soil around the base of the stem during cultivation, or staking individual tall varieties, prevents this physical failure.
⚠️ Important Caution: Do not plant Brussels sprouts in beds where other members of the cabbage family (broccoli, kale, cauliflower, or radishes) grew within the last three to four years. Crop rotation is your only reliable defense against soil-borne pathogens like clubroot (Plasmodiophora brassicae) and black rot (Xanthomonas campestris), which persist indefinitely in garden soil.

5. Frequently Asked Questions
Can I grow Brussels sprouts in zone 7 for a spring harvest?
Yes, but the window is extremely tight. You must start seeds indoors in January and transplant them outdoors in late February to early March, as soon as the soil can be worked. If warm spring weather arrives abruptly, the plants will bolt to flower before the sprouts can size up. For most zone 7 gardeners, the fall crop is far more reliable and flavorful.
What is the absolute best variety of Brussels sprout for zone 7?
Look for hybrid varieties known for uniformity and cold tolerance, such as 'Jade Cross', 'Dazzler', or 'Churchill'. If you prefer heirloom varieties, 'Long Island Improved' is a classic choice that performs reliably across the mid-Atlantic and Pacific Northwest regions of zone 7, producing compact stalks packed with nutty-flavored sprouts.
How do I know when my Brussels sprouts are ready to harvest?
Sprouts are ready to harvest when they reach 1 to 2 inches (2.5 to 5 cm) in diameter, feel hard and tightly closed when squeezed, and possess a deep green color. Always harvest from the bottom of the stalk upward by snapping or cutting the sprout downward against the stem. Leave the upper leaves intact unless you are ready to harvest the entire stalk.
Will light frost actually ruin my Brussels sprouts?
Not at all—light frost is actually beneficial. Temperatures dipping down to 28°F to 32°F (-2.2°C to 0°C) trigger the conversion of starches into sugars within the plant cells, dramatically improving the flavor and eliminating bitter notes. You can safely leave established plants in the ground through light freezes well into winter.
Related Guides
- What Hardiness Zone is Sacramento
- What Planting Zone is Sacramento Ca
- What Zone is Columbus Ohio
- What Planting Zone is Virginia in
- Zone 9 Plants Full Sun
📋 Table of Contents ▼ Click to expand
Tags:
🌿 Related Plants You Might Like






PlantSavvyWorld
Editorial team
PlantSavvyWorld is an independent botanical education project. Articles are drafted with AI assistance, then edited and checked against university extension services, botanical garden collections and other published horticultural sources.