

Step By Step Guide to Grafting Fruit Trees for Beginners
Written with AI assistance, edited and checked against horticultural sources.
1. Botanical Overview & Natural Habitat
Grafting is an ancient botanical partnership that mimics nature's own repair mechanisms, such as natural grafting or inarching, where neighboring branches rubbing together in heavy winds wear away outer bark and fuse their exposed vascular cambium layers together.

The biological engine driving this entire union is the vascular cambium. This is a microscopic, single-cell-thick layer of meristematic tissue situated directly between the inner bark (phloem) and the wood (xylem). When you make clean, matching cuts on both the scion and rootstock and bind them tightly together, the undifferentiated cells of the cambium race to divide, bridging the gap with callus tissue. This callus eventually differentiates into new vascular pathways, allowing water and mineral nutrients to flow upward from the roots while carbohydrates flow downward from the canopy. If your cuts do not align this cambium layer, the tissues remain isolated, the scion starves, and the graft fails. This same mastery of plant propagation and tissue manipulation is just as crucial when planning structural plantings, much like selecting resilient specimens when exploring 15 Best Trees for Driveways That Won't Crack Concrete.
2. Essential Environmental & Care Requirements
Successful fruit tree grafting depends heavily on controlling temperature, moisture, and timing. The optimal window for bench grafting or field grafting is late winter to very early spring, typically between February and April in the Northern Hemisphere. During this period, both your scion wood and rootstock must be in a state of deep physiological dormancy. If the scion buds have already broken dormancy and begun to swell, they will respire and exhaust their stored carbohydrates before the cambium layer has time to form a vascular bridge.
Temperature plays a monumental role in callus formation. While the ambient air temperature should remain cool (typically between 40°F to 55°F / 4°C to 13°C) to keep the scion dormant, the healing union itself requires warmth to stimulate cell division. In bench grafting scenarios, professional propagators often store newly grafted whips in a callus box filled with moist sawdust or peat moss kept at a steady 70°F to 80°F (21°C to 27°C) for 14 to 21 days before planting them out. For detailed regional timing and frost-date tracking, consult the Royal Horticultural Society Grafting Guide.
Moisture management is the final pillar of environmental control. Exposed woody tissues dry out rapidly when exposed to spring winds or indoor humidity levels below 50%. You must seal all cut surfaces using grafting wax, tree-wound sealer, or Parafilm to prevent desiccation. Furthermore, you must protect the rootstock's root system from freezing temperatures while avoiding waterlogged conditions that cause root rot.
| Parameter | Optimal Condition | Common Mistake | Why It Matters |
|---|---|---|---|
| Timing | Late winter / early spring (dormant phase) | Grafting after buds have swelled and broken | Active scions exhaust stored energy before cambium can fuse |
| Cambium Alignment | Perfect bark-to-bark contact on at least one side | Mismatching bark lines, centering wood-to-wood | Vascular tissues cannot bridge without cambial contact |
| Callusing Temperature | 70°F to 80°F (21°C to 27°C) at the union | Exposing the entire tree to extreme heat too early | Warmth stimulates the scion to leaf out before roots can supply water |
| Moisture Control | Parafilm or grafting wax sealing all exposed cuts | Leaving cut tips unsealed | Evaporation desiccates the scion wood before vascular union occurs |
3. Step-by-Step Cultivation, Feeding & Propagation
Gather your tools before you begin: a razor-sharp grafting knife (which you should hone to a scalpel-like edge), grafting rubber bands or heavy-duty nursery twine, pruning shears, and sealing wax or Parafilm. Ensure your knife is sanitized with isopropyl alcohol between every single cut to prevent the transmission of bacterial and fungal pathogens like fire blight.
💡 Pro-Tip: Never compromise on knife sharpness. A dull blade requires excessive downward pressure, increasing your chances of slipping and slicing your fingers, and it crushes plant cells rather than slicing them cleanly, which severely delays callus bridging.
Step 1: Procure and Store Scion Wood
Collect dormant, pencil-thick, one-year-old wood from healthy, disease-free trees during December or January. Cut lengths measuring 8 to 12 inches (20 to 30 cm) containing at least 3 to 4 viable vegetative buds. Label them clearly, wrap them in slightly damp paper towels, seal them inside a polyethylene bag, and store them in a refrigerator at 34°F to 38°F (1°C to 3°C) until grafting day.
Step 2: Prepare the Rootstock
Select a dormant rootstock of a compatible species. Using your pruning shears, cut the rootstock straight across at a height of 2 to 4 inches (5 to 10 cm) above the root flare. Make sure your cut is smooth and free of jagged bark tears.
Step 3: Cut the Scion and Rootstock (Whip-and-Tongue Method)
Select a scion piece that matches the diameter of your rootstock as closely as possible. Make a long, smooth, sloping downward cut (about 1 to 1.5 inches / 2.5 to 3.8 cm long) through the bottom of the scion. Repeat this exact matching slope on the top of the rootstock. Next, cut a small downward-pointing "tongue" into the middle of the sloping cut on the scion, and a corresponding upward-pointing tongue into the rootstock.
Step 4: Interlock and Align the Tissues
Slide the scion's tongue into the rootstock's tongue so that they interlock securely like puzzle pieces. Slide them laterally until the green cambium layer on at least one side makes unbroken contact from top to bottom. Even if the overall diameters differ slightly, getting a flush alignment on one side is mandatory for success.
Step 5: Secure and Seal the Union
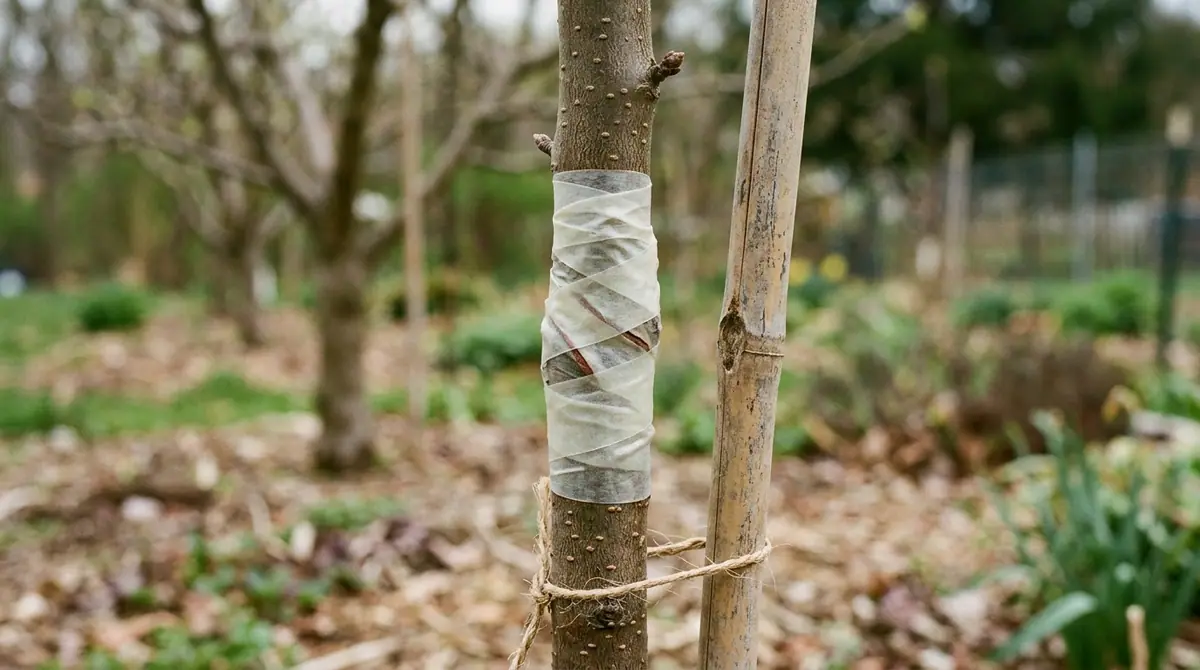
Wrap the interlocked union tightly with a grafting rubber band or specialized nursery tape to maintain constant pressure and prevent the pieces from shifting. Immediately wrap the entire scion (including the tip) and the union area with Parafilm or brush on an even coat of grafting wax. This seals in moisture and keeps airborne pathogens out while remaining flexible enough to stretch as the tree grows.
Step 6: Aftercare and Field Planting
Plant your newly grafted whip into a deep container or directly into a nursery row, burying the roots to their original soil line while keeping the graft union at least 2 inches (5 cm) above the soil level. Water thoroughly to settle the soil around the roots. For indoor or greenhouse growing setups, similar attention to light exposure and humidity is required when managing delicate specimens, echoing the environmental controls detailed in our Holiday Plants Care Guide: How to Force Poinsettias to Rebloom & Holiday Cacti ID.
⚠️ Important Caution: Never bury your graft union below the soil line. If the scion makes direct contact with the damp soil, it will root on its own roots, completely bypassing the carefully chosen rootstock and resulting in a standard-sized, unruly tree instead of the intended dwarf or semi-dwarf specimen.
4. Common Problems, Pests & Troubleshooting
Even experienced horticulturists occasionally experience graft failure. When troubleshooting a failed union, slice open the failed graft with your knife and examine the internal tissues. If the wood inside is brown, water-soaked, and dead, your scion wood likely froze or dried out during refrigerator storage. If the scion is green and plump on the outside but completely unattached to the rootstock, your cambium layers missed each other, or movement during the callusing phase broke the fragile bridge cells before they could keratinize and harden.
Fungal pathogens present another major hazard during the delicate healing phase. Botrytis cinerea (gray mold) can attack unsealed cut surfaces if humidity is too high and air circulation is nonexistent. Prevent this by ensuring your callusing environment has gentle, indirect air movement.

5. Frequently Asked Questions
Can I graft any fruit tree onto any other fruit tree?
No, grafting is bound by botanical compatibility rules. Generally, you can only graft a scion onto a rootstock within the same genus (e.g., apple onto apple, pear onto pear, peach onto plum under specific conditions). Pome fruits (apples and pears) cannot be successfully grafted onto stone fruits (peaches, cherries, and plums) because their vascular systems are biologically incompatible.
When is the absolute best time of year to graft fruit trees?
The ideal window is late winter to early spring, just as the rootstock and scion are waking from dormancy but before buds begin to swell. In most temperate hardiness zones (USDA zones 5 through 8), this falls between March and mid-April.
How long does it take for a fruit tree graft to heal?
Initial callus tissue forms within 14 to 21 days when kept at optimal temperatures of 70°F to 80°F (21°C to 27°C). A complete, structurally sound vascular union takes roughly 4 to 6 weeks, at which point you will notice new green leaves expanding rapidly from the scion buds.
Do I need to remove the grafting tape?
It depends on the material used. Modern nursery rubber bands and Parafilm degrade naturally under ultraviolet sunlight within 4 to 8 weeks and do not need to be manually removed. However, if you used non-degradable electrical tape, string, or plastic ties, you must gently slice through them vertically with your grafting knife 6 to 8 weeks post-grafting to prevent girdling as the trunk expands in diameter.
Related Guides
- How to Prune Apple Trees for Maximum Fruit Yield
- Best Organic Pest Control Methods for Backyard Fruit Trees
- Best Dwarf Fruit Trees to Grow in Small Backyards
- No Till Gardening Method Step By Step Guide
- How to Grow Tomatoes in Containers Step By Step Guide
- How to Identify and Treat Common Fruit Tree Diseases
📋 Table of Contents ▼ Click to expand
Tags:
Keep reading
🌿 Related Plants You Might Like






PlantSavvyWorld
Editorial team
PlantSavvyWorld is an independent botanical education project. Articles are drafted with AI assistance, then edited and checked against university extension services, botanical garden collections and other published horticultural sources.