

How to Prune Apple Trees for Maximum Fruit Yield
Written with AI assistance, edited and checked against horticultural sources.
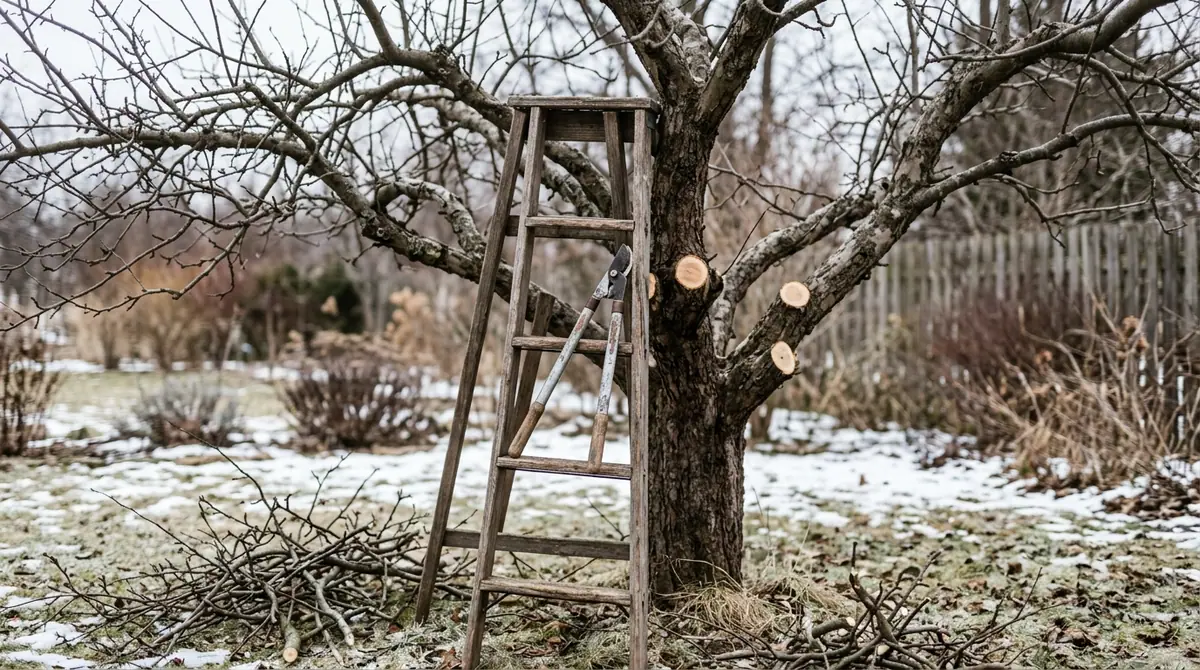
I stood in my orchard in late February, holding a pair of bypass pruners that had been in my family for three decades, staring at a twelve-year-old 'Honeycrisp' that looked less like a fruit tree and more like a dense, impassable bird’s nest. The interior wood was dying in perpetual shadow, and the previous autumn’s harvest consisted of a few bruised, golf-ball-sized apples hugging the outermost sunlit tips. That winter, I committed to a restorative, aggressive structural cut, removing nearly forty percent of the canopy. By August, sunlight was finally hitting the lower branches, and the resulting harvest yielded bushels of crisp, evenly colored fruit. Pruning is not an act of destruction; it is a biological dialogue between the grower and the tree's apical dominance.
1. Botanical Overview & Natural Habitat

Cultivated apples (Malus domestica) retain this architectural blueprint, but selective breeding has refined their fruiting mechanisms. Understanding how an apple tree forms fruit is the prerequisite to wielding pruning tools effectively. Apple trees produce fruit on specialized short, stubby shoots known as spurs. These spurs can remain productive for 10 to 12 years, but their vigor declines as they age and become shaded.
The primary structural components you must recognize before cutting are:
- The Leader: The central vertical stem of the tree (though modified in open-center systems).
- Scaffold Branches: The primary structural limbs originating from the trunk, ideally spaced 8 to 12 inches (20 to 30 cm) apart vertically to distribute weight and light.
- Suckers: Vigorous shoots emerging from the rootstock below the graft union; these must be removed immediately as they represent the rootstock, not your fruiting variety.
- Water Sprouts: Vertical, whiplike shoots that grow straight up from scaffold branches, usually stimulated by over-pruning or storm damage.
Lateral buds along one-year-old wood differentiate into either vegetative shoots or floral buds. Floral buds are generally plumper, rounder, and slightly fuzzy compared to the pointed, sleek vegetative buds. Pruning directly dictates the ratio of vegetative growth to floral initiation by altering hormone distribution, specifically auxin, which is synthesized at shoot tips and suppresses the growth of lower lateral buds.
2. Essential Environmental & Care Requirements
Maximizing fruit yield through pruning is entirely dependent on meeting the tree's fundamental environmental thresholds. If a tree is stressed by improper soil or water metrics, pruning wounds heal slowly and invite pathogens.
Apples require full sun—defined as a minimum of 6 to 8 hours of direct sunlight daily. Shaded leaves fail to photosynthesize enough carbohydrates to fuel fruit development, resulting in premature fruit drop and poor sugar accumulation.
Soil must be well-drained, loamy, with a pH between 6.0 and 7.0. Heavy clay soils cause root asphyxiation during wet spring months, while sandy soils starve the tree of essential micronutrients like boron and calcium, which directly cause physiological disorders like bitter pit.
Temperature fluctuations dictate your pruning window. You must prune during true dormancy, ideally when ambient temperatures are consistently above 20°F (-6°C) but before bud break in early spring. Pruning during sub-freezing weather causes brittle wood to shatter rather than slice cleanly, leaving jagged wounds that resist callus formation.
| Parameter | Optimal Condition | Common Mistake | Why It Matters |
|---|---|---|---|
| Soil pH | 6.0 to 7.0 | Ignoring soil acidity | Low pH locks up phosphorus and calcium, stunting spur development and fruit set. |
| Pruning Timing | Late winter (dormant) | Pruning in late autumn | Autumn pruning leaves fresh wounds exposed to freezing damage and fungal entry before dormancy sets in. |
| Branch Angle | 45 to 60 degrees from trunk | Allowing narrow crotches (< 30 degrees) | Narrow angles trap bark inside the joint, creating weak structural unions that split under heavy fruit loads. |
| Canopy Penetration | Sunlight reaching inner branches | Leaving dense interior tangles | Inner wood starved of light stops producing flower buds, shifting all yield to the outer canopy periphery. |
💡 Pro-Tip: When evaluating a branch angle, look for the "branch bark ridge"—a raised line of bark running along the upper juncture where the branch meets the trunk. Always cut just outside this ridge to preserve the tree's natural chemical defense zone, which accelerates wound closure by up to 40%.
3. Step-by-Step Cultivation, Feeding & Propagation
Pruning for maximum fruit yield follows a disciplined, architectural sequence. Whether you are managing a backyard espalier or large standard trees, the rules of light interception remain constant. For property layouts where space is tight, combining structural fruit tree management with smart landscape choices—such as selecting specimens from guides like 15 Best Trees for Driveways That Won't Crack Concrete—ensures your orchard and hardscaping coexist harmoniously.
Step 1: Sanitize and Inspect Your Tools
Before making a single cut, sterilize your bypass pruners, loppers, and pruning saw with a 70% isopropyl alcohol solution or a 10% bleach-to-water ratio. Disease transmission between trees is the leading cause of preventable orchard decline.
Step 2: Remove the "3 Ds" (Dead, Damaged, and Diseased)
Scan the entire tree and eliminate any wood that shows signs of fungal infection (such as black rot or cankers), storm breakage, or winter dieback. Cut back into healthy, living tissue at least 2 to 3 inches (5 to 7.5 cm) below the visible sign of damage.
Step 3: Eliminate Water Sprouts and Suckers
Locate all vertical water sprouts shooting straight up from the main scaffold limbs. Cut them flush to the branch collar, leaving no stub. Next, inspect the base of the trunk and clip off any rootstock suckers flush with the soil line or root junction.
Step 4: Open the Center (The "Bird Can Fly Through" Test)
Step back 10 feet (3 meters) from the tree. Identify crossing, rubbing, or inward-growing branches that crowd the center of the canopy. Remove entire branches back to their point of origin on a larger scaffold limb to ensure an open architecture where air circulates freely and sunlight penetrates the core.
Step 5: Thin and Shorten the Fruiting Spurs
Examine the remaining lateral branches. If fruiting spurs are densely packed (closer than 2 to 4 inches / 5 to 10 cm apart), thin them out. This prevents biennial bearing—a frustrating cycle where a tree produces a massive crop of tiny fruit one year, and zero fruit the next. Shorten overly long, pendulous branches by heading them back to a strong outward-facing lateral bud.
⚠️ Important Caution: Never remove more than 25% to 30% of a living tree's canopy in a single growing season. Exceeding this threshold triggers a massive hormonal stress response, forcing the tree to expend its carbohydrate reserves pumping out dense thickets of vegetative water sprouts rather than producing flowers.
4. Common Problems, Pests & Troubleshooting
Even with meticulous pruning, apple trees face biological challenges that require immediate diagnosis.
Biennial Bearing Cycle: If your tree produces heavy crops in alternating years, your pruning was likely too conservative. To correct this, perform heavy spur thinning during the "on" year (when the tree is laden with fruit) in early summer, manually thinning excess fruit clusters to one apple per cluster, spaced 6 inches (15 cm) apart. This preserves enough energy for floral bud differentiation for the following season.
Apple Scab (Venturia inaequalis): This fungal pathogen appears as olive-green, velvety spots on leaves and scabby, cracked lesions on fruit. Pruning mitigates this by increasing airflow, which dries morning dew rapidly. Combine pruning with clearing all fallen leaves in autumn; for comprehensive regional spray schedules, consult the Penn State Extension Fruit Production Guide.

5. Frequently Asked Questions
What is the best month of the year to prune apple trees for maximum fruit yield?
The ideal window is late winter, typically between February and early March, depending on your hardiness zone. By this time, the worst of the severe winter freezes have passed, but the tree remains deeply dormant before sap begins moving and buds swell. Pruning at this juncture gives you maximum visibility of the branch structure without leaves obscuring your view.
Should I use pruning sealer or paint on large cuts?
No. Modern arboricultural science has proven that wound paints and sealers do not prevent decay or disease entry; in fact, they often trap moisture and fungal spores against the exposed cambium layer, accelerating rot. Apple trees possess natural compartmentalization mechanisms that allow wounds over 1 inch (2.5 cm) in diameter to callus over cleanly on their own when cut correctly outside the branch collar.
How do I fix an apple tree that hasn't been pruned in 10 years?
Do not attempt to restore an overgrown tree in a single season, or you will shock the tree into vegetative overgrowth. Instead, spread the restoration over three years. In year one, remove all dead, diseased, and crossing wood, plus no more than one or two large, poorly placed scaffold limbs. In years two and three, gradually open the interior canopy and reduce the height by heading back to strong lateral branches.
Why are my apple tree branches growing straight up instead of making fruit?
Those vertical shoots are water sprouts, usually triggered by excessive nitrogen fertilization, heavy root pruning, or an overly aggressive pruning cut the previous year. They consume energy without producing flowers. To fix this, prune them out entirely at the base during your next dormant pruning cycle, and avoid high-nitrogen fertilizers that stimulate excessive vegetative growth at the expense of fruit production.
Related Guides
- Step By Step Guide to Grafting Fruit Trees for Beginners
- Best Organic Pest Control Methods for Backyard Fruit Trees
- Best Dwarf Fruit Trees to Grow in Small Backyards
- How to Prune Fiddle Leaf Fig Plant
- When to Prune Perennials
- How to Identify and Treat Common Fruit Tree Diseases
📋 Table of Contents ▼ Click to expand
Tags:
Keep reading
🌿 Related Plants You Might Like






PlantSavvyWorld
Editorial team
PlantSavvyWorld is an independent botanical education project. Articles are drafted with AI assistance, then edited and checked against university extension services, botanical garden collections and other published horticultural sources.