

No Till Gardening Method Step By Step Guide
Written with AI assistance, edited and checked against horticultural sources.
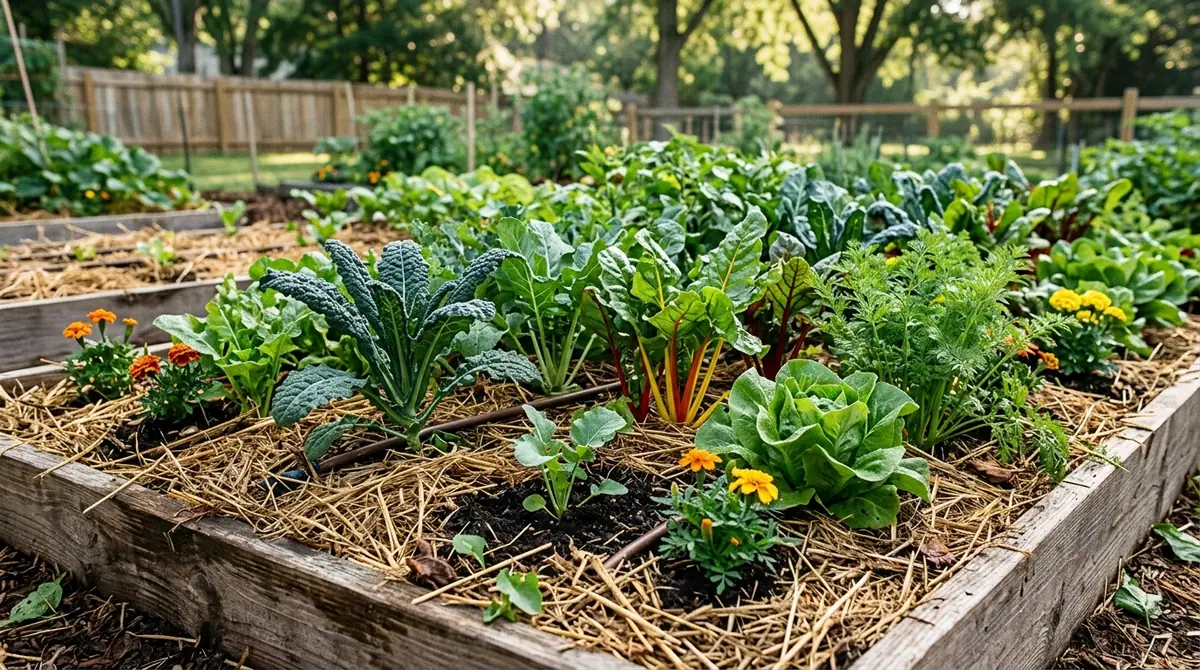
It was a blistering July afternoon behind my suburban studio when I finally lost patience with my rototiller. The 205cc engine had sputtered, died, and coated my shins in a mist of stale two-stroke exhaust for the third time that week. Looking down at the pulverized, dusty powder of what used to be a vibrant garden bed, I realized I was actively murdering my soil. Every time I turned the earth over, I was exposing ancient weed seeds to sunlight, shattering the delicate fungal networks of mycorrhizae, and baking the top 6 inches (15 cm) of organic matter into a concrete-like crust. That was the day I turned off the machine, put down the shovel, and embraced the no till gardening method step by step guide principles that transformed horticultural practice forever.
1. Botanical Overview & Natural Habitat

When we till, we disrupt this intricate stratification. Soil is composed of distinct horizons: the O-horizon (organic litter), the A-horizon (topsoil rich in humus), and the B-horizon (subsoil). Tilling inverts these layers, plunging aerobic microorganisms into an anaerobic, oxygen-starved environment 8 inches (20 cm) down, while dragging dormant weed seeds from the deep dark up to the sunlit surface where they can finally germinate.
By contrast, the no-till gardening method respects the vertical zoning of the soil ecosystem. It preserves soil aggregates—tiny clumps of sand, silt, and clay bound together by root exudates and fungal glumes like glomalin. These aggregates create microscopic pore spaces that allow roots to breathe and water to infiltrate at rates of 2 inches (5 cm) or more per hour, preventing the catastrophic runoff seen in compacted, tilled plots.
2. Essential Environmental & Care Requirements
Transitioning to a no-till system requires shifting your focus from manipulating the dirt to feeding the biology within it. You are no longer managing a mechanical medium; you are managing a living habitat.
| Parameter | Optimal Condition | Common Mistake | Why It Matters |
|---|---|---|---|
| Soil Temperature | 60°F to 75°F (15°C to 24°C) for microbial activity | Planting into frozen or cold, waterlogged soil (<45°F / 7°C) | Microbes and earthworms remain dormant in cold soils, stalling nutrient cycling. |
| Organic Matter | 5% to 8% composition in the top 6 inches (15 cm) | Relying solely on raw, uncomposted wood chips | High carbon materials can temporarily tie up available soil nitrogen if mixed in. |
| Moisture Content | 50% to 60% water-filled pore space (damp sponge) | Over-saturating or letting beds dry completely bone-dry | Beneficial fungi and bacteria require a thin film of moisture to move and feed. |
| Soil Cover | 100% surface coverage using mulch or cover crops | Leaving bare soil exposed to direct sun and heavy rain | Ultraviolet radiation kills surface microbes, and raindrops smash soil aggregates. |
For a deeper dive into managing specialized plant environments, you can cross-reference our care principles with the structured advice found in the Holiday Plants Care Guide: How to Force Poinsettias to Rebloom & Holiday Cacti ID.
💡 Pro-Tip: Never walk directly inside your no-till growing beds. Even a single footprint exerts up to 15 pounds per square inch (psi) of pressure, crushing the macro-pores that earthworms and roots worked weeks to construct. Design your permanent growing beds to be no wider than 30 to 36 inches (75 to 90 cm) so you can easily reach the center from permanent, uncompressed pathways on either side.
3. Step-by-Step Cultivation, Feeding & Propagation
Converting a conventional, tilled garden or a patch of lawn into a thriving no-till system requires a deliberate sequence. Follow this step-by-step protocol to establish your permanent beds without breaking a sweat or a shovel blade.
- Map and Measure Your Footprint: Outline your permanent growing beds using stakes and mason twine. Keep pathways narrow, roughly 18 inches (45 cm) wide, and design your beds to be 30 to 36 inches (75 to 90 cm) across. Do not dig up this area; we will build right on top of it.
- Lay the Suppression Layer (Sheet Mulching): Lay down two to three overlapping layers of unprinted, heavy-duty corrugated cardboard or 5 to 10 sheets of black-and-white newspaper directly over existing grass or weeds. Overlap the edges by at least 6 inches (15 cm) to prevent light from leaking through.
- Saturate the Barrier: Thoroughly soak the cardboard layer with water until it is dripping wet. This initiates the decomposition process and ensures earthworms can easily bore upward through the damp paper later.
- Apply the Compost Layer: Shovel a 2 to 3-inch (5 to 7.5 cm) layer of rich, weed-free, finished compost directly on top of the wet cardboard. This layer will serve as your immediate planting medium for seeds and transplants.
- Add the Surface Mulch: Top the compost with 2 to 4 inches (5 to 10 cm) of carbon-rich mulch, such as shredded straw, leaf mold, or fine wood chips. Keep this mulch pulled back 1 inch (2.5 cm) from the stems of young plants to prevent crown rot.
- Plant Directly into the Matrix: To sow seeds or plant starts, pull back the surface mulch to reveal the compost layer. Part the damp compost, slice a small "X" into the underlying cardboard if planting deep-rooted crops, and drop your seed or transplant directly into the bio-rich zone.
- Maintain Continuous Living Roots: Once your harvest is complete, never pull out plant roots. Cut stems off at the soil surface with a hori-hori knife and leave the roots in place to decompose underground, creating natural feeding channels for future crops. For rigorous academic insights on soil structure and carbon sequestration, consult the USDA Natural Resources Conservation Service Soil Health Division.
⚠️ Important Caution: Never use municipal green waste compost or wood chips from arborists who sprayed trees with persistent broadleaf herbicides like clopyralid. These chemical residues can survive the composting process and severely deform or kill tomatoes, peppers, and beans for up to 3 seasons. Always source your bulk organic matter from verified, trusted organic suppliers.
4. Common Problems, Pests & Troubleshooting
Even in a balanced no-till system, you will occasionally run into biological imbalances. Here is how to diagnose and correct them without reaching for the tiller.
- Slugs and Pill Bugs Accumulating: Because no-till systems maintain a moist, cool surface mulch layer, gastropods and isopods love to hide out during the day. Solution: Pull mulch back 3 inches (7.5 cm) from the immediate plant base during damp spring weeks. Use organic iron phosphate bait sparingly if populations threaten young brassica seedlings.
- Nitrogen Deficiency (Yellowing Lower Leaves): If you added too much raw wood carbon directly into your topsoil layer instead of keeping it strictly on top as mulch, soil microbes will temporarily scavenge available nitrogen to break down that carbon. Solution: Apply a concentrated liquid drench of fish hydrolysate or feather meal tea to rapidly boost surface nitrogen levels.
- Persistent Perennial Weeds (Bermuda Grass, Bindweed): Aggressive runners can occasionally pierce through cardboard layers. Solution: Do not till them up (which multiplies fragments). Instead, spot-smother persistent patches using a double layer of woven landscape fabric or silage tarp weighted down with bricks for 60 to 90 days to starve them of light entirely. For comprehensive plant pathology and pest identification protocols, refer to the Royal Horticultural Society Pest Management Guide.

5. Frequently Asked Questions
Can I do no-till gardening in heavy clay soil?
Yes, absolutely. In fact, no-till is the fastest way to fix heavy clay. Instead of trying to break up dense clay with a tiller (which only pulverizes it into a fine dust that packs down harder after the first rain), you sheet mulch right on top of it. Earthworms and deep-rooting cover crops like daikon radish will tunnel down through the clay, opening up thousands of micro-channels and converting the mineral-rich base into workable topsoil within one to two seasons.
How do I control weeds without tilling the soil?
Weed control in a no-till system relies entirely on prevention via smothering. By maintaining a continuous 3 to 4-inch (7.5 to 10 cm) layer of mulch over your beds, you block the sunlight required for dormant weed seeds to germinate. If a weed does manage to break through the surface, pull it out by hand when the soil is damp, or sever it just below the soil line with a sharp hoe, leaving the root system behind to feed the soil biology.
Do I ever need to add fertilizer to a no-till bed?
You will feed the soil, not the plant directly. Because no-till builds an active, self-sustaining soil food web, nutrients are recycled efficiently. However, heavy-feeding crops like tomatoes, squash, and brassicas still require supplemental nutrition. Top-dress your beds annually with a 1-inch (2.5 cm) layer of vermicompost or aged manure in early spring before planting. The earthworms will naturally pull these nutrients down into the root zone without any mechanical mixing required.
How long does it take for a no-till garden to become productive?
Your no-till garden will be productive immediately if you use the sheet-mulching method with a top layer of quality compost. However, the true structural and biological benefits—such as enhanced drought resilience, stable aggregate formation, and massive earthworm populations—typically peak around years two and three as the underlying soil horizons stabilize and organic matter content increases.
Related Guides
- Mittleider Gardening Method More Food from your Garden
- Step By Step Guide to Grafting Fruit Trees for Beginners
- How to Grow Tomatoes in Containers Step By Step Guide
📋 Table of Contents ▼ Click to expand
Tags:
Keep reading
🌿 Related Plants You Might Like






PlantSavvyWorld
Editorial team
PlantSavvyWorld is an independent botanical education project. Articles are drafted with AI assistance, then edited and checked against university extension services, botanical garden collections and other published horticultural sources.