

Plumeria Potting Soil
Written with AI assistance, edited and checked against horticultural sources.
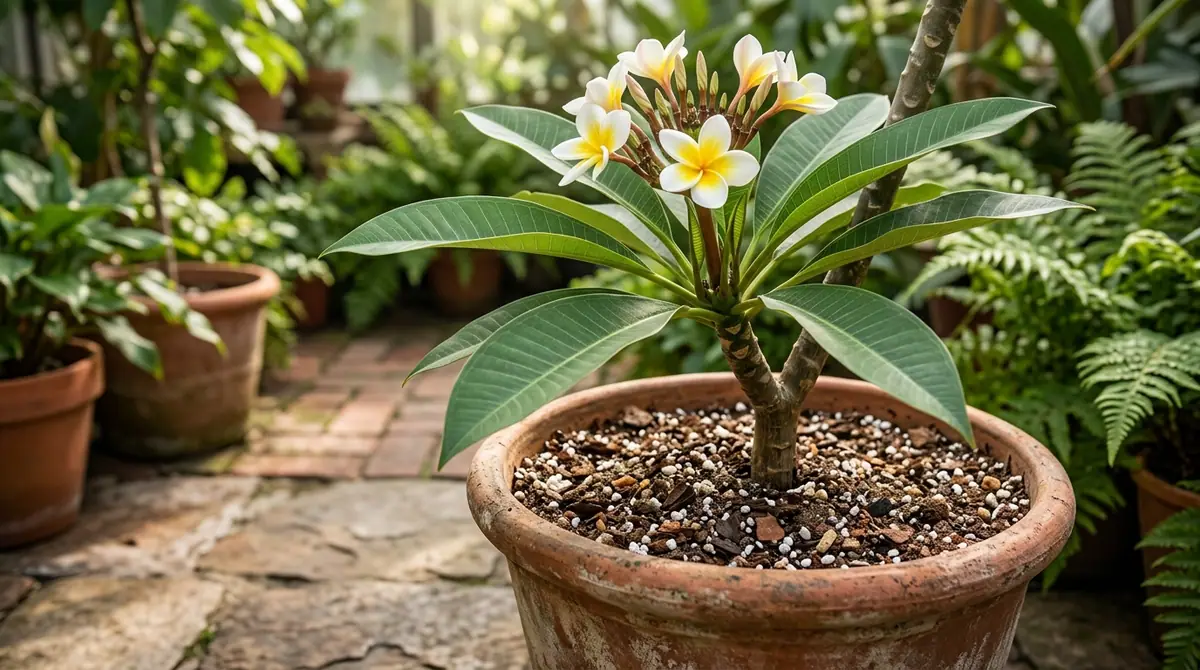
I was down on my knees in my zone 9 test garden last July, weeping over the rotted, blackened stem of what used to be a magnificent three-foot 'Celadine' plumeria, when the truth finally hit me. I had treated it like a thirsty tropical fern, potting it up in a heavy, moisture-retentive peat mix straight from a big-box store. Plumerias—with their sculptural, succulent branches and thick, water-storing stems—do not forgive a soggy root zone. That heartbreak cost me a beloved specimen, but it forced me to spend the next decade obsessively dialing in the exact physics and chemistry of the ultimate plumeria potting soil.

1. Botanical Overview & Natural Habitat
To understand why standard potting soil kills plumerias, we have to look at their native ecology. Members of the dogbane family (Apocynaceae), Plumeria species (most commonly Plumeria rubra and Plumeria obtusa) are native to the seasonally dry tropical and subtropical forests of Central America, Mexico, the Caribbean, and Venezuela.
In their natural habitat, plumerias grow on rocky hillsides, coastal cliffs, and open woodlands where the soil is exceptionally well-drained, coarse, and mineral-rich. They experience a distinct wet season where they receive torrential downpours, followed by a prolonged dry season where they drop their leaves and enter dormancy.
Botanically, plumerias possess thick, succulent stems that store water and nutrients to survive these dry spells. Their root systems are equally specialized; they are fleshy, brittle, and highly sensitive to oxygen deprivation. When you confine a plumeria to a container, you replicate its natural environment only if your potting medium mimics that rocky, porous hillside. If the medium packs down, holds onto water, and lacks interstitial air spaces, the roots suffocate within 48 to 72 hours of a heavy watering. Once root tissue suffocates and dies, opportunistic pathogens like Phytophthora and Pythium invade, leading to stem rot and structural collapse.
2. Essential Environmental & Care Requirements
Creating the right soil medium is only half the battle. Plumerias have strict environmental thresholds that dictate how that soil performs.
Temperature is the primary driver of root metabolism. Plumeria roots remain dormant until soil temperatures consistently reach or exceed 65°F (18°C). If you want to know precisely when to move your containerized plumerias outdoors in the spring, I recommend tracking subterranean warmth using a reliable tool; you can reference my guide on the Best Soil Thermometer for a Head Start in your Vegetable Garden for accurate measuring techniques. Growth accelerates rapidly when air temperatures hover between 80°F and 90°F (27°C–32°C) and soil stays warm.
| Parameter | Optimal Condition | Common Mistake | Why It Matters |
|---|---|---|---|
| Soil pH | 6.5 to 7.0 (Slightly acidic to neutral) | Using heavily acidic peat-based mixes (<5.5) | Low pH locks out essential macronutrients like phosphorus and calcium. If you aren't sure where your mix stands, you can learn How to Test Garden Soil Ph Without a Kit easily. |
| Drainage Rate | Water must exit drainage holes within 10–15 seconds | Using fine-textured potting soil or garden dirt | Slow drainage starves roots of oxygen, triggering anaerobic fungal pathogens. |
| Organic Matter | 30% to 40% maximum (compost, aged bark) | Planting in 100% rich compost or peat | High organic matter breaks down over time, compacting and retaining excess moisture. |
| Inorganic Aeration | 60% to 70% (perlite, pumice, coarse sand) | Relying solely on fine sand or vermiculite | Pumice and coarse perlite create permanent, non-collapsing macro-pore spaces for oxygen exchange. |
Sunlight exposure is equally non-negotiable. Plumerias demand a minimum of 6 hours of direct, unfiltered sunlight daily. Without it, growth becomes leggy, stems soften, and flower buds fail to develop—a phenomenon known as inflorescence blast.
Watering frequency must follow a strict "soak and dry" cycle. During the active growing season (late spring through early fall), soak the potting medium thoroughly until water runs freely from the container's drainage holes, then allow the top 2 to 3 inches (5 to 7.5 cm) of soil to dry out completely before watering again. Once autumn temperatures drop below 55°F (13°C) and leaves yellow and drop, reduce watering drastically to prevent rot during dormancy.
💡 Pro-Tip: When mixing your own plumeria soil, always pre-moisten your perlite or pumice outdoors while wearing an N95 dust mask. Inhaling perlite dust irritates respiratory passages, and dry perlite will float to the top of your mix when watered, segregating your heavy components at the bottom and ruining your drainage profile.
3. Step-by-Step Cultivation, Feeding & Propagation
Repotting and establishing a plumeria requires precision. Follow this step-by-step protocol to ensure your container-grown specimen thrives for decades.
- Select the Right Container: Choose a pot made of a breathable material like terra cotta or unglazed ceramic, measuring 12 to 14 inches (30 to 35 cm) in diameter for a standard 3-foot cutting. Ensure the pot features at least one large drainage hole at the base. Avoid plastic pots if you live in a humid climate, as they trap moisture in the root zone too long.
- Formulate the Custom Soil Blend: In a large trug or wheelbarrow, combine 4 parts coarse horticultural pumice (or large-grade perlite), 2 parts aged pine bark fines (ranging from 1/4 inch to 1/2 inch in size), and 1 part high-quality organic compost or worm castings. This creates an open, granular matrix that mimics a volcanic hillside.
- Prepare the Root Ball: Gently remove your plumeria from its nursery container. Use your fingers or a hori-hori knife to tease apart any circling or matted roots. Inspect the root system for any soft, brown, or foul-smelling roots and sanitize your shears with isopropyl alcohol to prune them back to healthy, firm white tissue.
- Establish the Planting Depth: Place a layer of broken pottery shards or window screen over the drainage hole to prevent soil loss. Add a base layer of your custom soil mix, positioning the plumeria so the soil line matches its previous depth—typically 2 to 3 inches (5 to 7.5 cm) deep. Burying the stem too deeply invites collar rot.
- Backfill and Settle: Fill in around the root ball with your soil blend, tamping down gently with your hands every few inches to eliminate large air pockets without compressing the medium. Leave a 1-inch (2.5 cm) water ring at the top of the pot.
- Initial Watering and Placement: Water the newly potted plumeria thoroughly to settle the soil particles around the roots. Place the pot in a warm, bright location out of direct, scorching afternoon sun for the first 14 days while it recovers from transplant shock.
- Initiate Feeding Protocol: Wait 30 days after repotting before applying any fertilizer. Once roots are established, feed every 14 days during the active growing season (May through August) with a high-phosphorus water-soluble fertilizer (such as a 10-50-10 ratio) to encourage heavy floral blooming. For more detailed fertilizer guidance, consult the University of Florida IFAS Extension publication on tropical ornamental care.
⚠️ Important Caution: Never use garden soil, topsoil, or clay-heavy earth in a plumeria pot. Garden soil contains native microorganisms and compaction-prone clay particles that compact rapidly in containers, suffocating roots and introducing soil-borne pathogens. Always use a sterile, coarse, soil-less medium.
4. Common Problems, Pests & Troubleshooting
Even with an optimal potting mix, environmental stress or poor management can invite issues. Here is how to diagnose and correct them before they prove fatal.
- Root Rot (Stem Softness): If the lower stem feels spongy, squishy, or shriveled, your soil is retaining too much moisture. Unpot the plant immediately. Slice away all rotted, brown root and stem tissue using a sterile blade until you hit pristine, latex-exuding white wood. Dust the cut with powdered sulfur or cinnamon, let it callus in a dry, shaded spot for 7 to 14 days, and repot it in a much coarser, faster-draining mix.
- Chlorosis (Yellowing Leaves with Green Veins): This typically indicates iron or magnesium deficiency caused by an incorrect soil pH that locks out nutrients. Test your soil and adjust the pH toward neutrality (6.5 to 7.0). Apply a chelated iron drench or a balanced micronutrient foliar spray to fast-track recovery.
- Spider Mites and Mealybugs: These sap-sucking pests thrive in hot, dry conditions, often attacking stressed container plants. Inspect the undersides of leaves and the leaf axils for fine webbing or cottony white masses. Wipe affected areas with a 70% isopropyl alcohol solution on a cotton swab or spray thoroughly with horticultural neem oil during the cool evening hours.

5. Frequently Asked Questions
Can I use regular potting soil for plumeria?
No. Standard commercial potting soils are formulated for moisture retention and typically feature high percentages of peat moss and fine compost. These ingredients pack down tightly over time, suffocating the fleshy, oxygen-hungry roots of a plumeria and leading to fatal stem and root rot.
How often should I change the soil in my potted plumeria?
Container-grown plumerias should be repotted and given fresh soil every 2 to 3 years. Over time, organic components in the mix break down into fine silt, destroying the crucial air spaces required for root health. Spring—just as the plant begins to break dormancy—is the ideal time for this task.
Why are the tips of my plumeria leaves turning brown?
Brown leaf tips are usually caused by three factors: fluoride or chlorine toxicity from tap water, inconsistent watering (allowing the plant to dry out completely for too long), or fertilizer salt buildup in the soil. Flush your potting medium thoroughly with distilled or rainwater once a month to wash away accumulated mineral salts.
Do plumerias prefer deep or shallow pots?
Plumerias prefer wider pots over excessively deep ones. Their root systems tend to spread outward rather than straight down. Choosing a wider container allows for better evaporation of surface moisture and ensures the lower root zone does not remain waterlogged for extended periods.
Related Guides
- Plumeria Potting Mix
- Best Soil for Plumeria
- Hoya Potting Mix
- Rooting Plumeria Cuttings
- Plumeria Rooting Hormone
📋 Table of Contents ▼ Click to expand
Tags:
Keep reading
🌿 Related Plants You Might Like






PlantSavvyWorld
Editorial team
PlantSavvyWorld is an independent botanical education project. Articles are drafted with AI assistance, then edited and checked against university extension services, botanical garden collections and other published horticultural sources.