

Hoya Potting Mix
Written with AI assistance, edited and checked against horticultural sources.
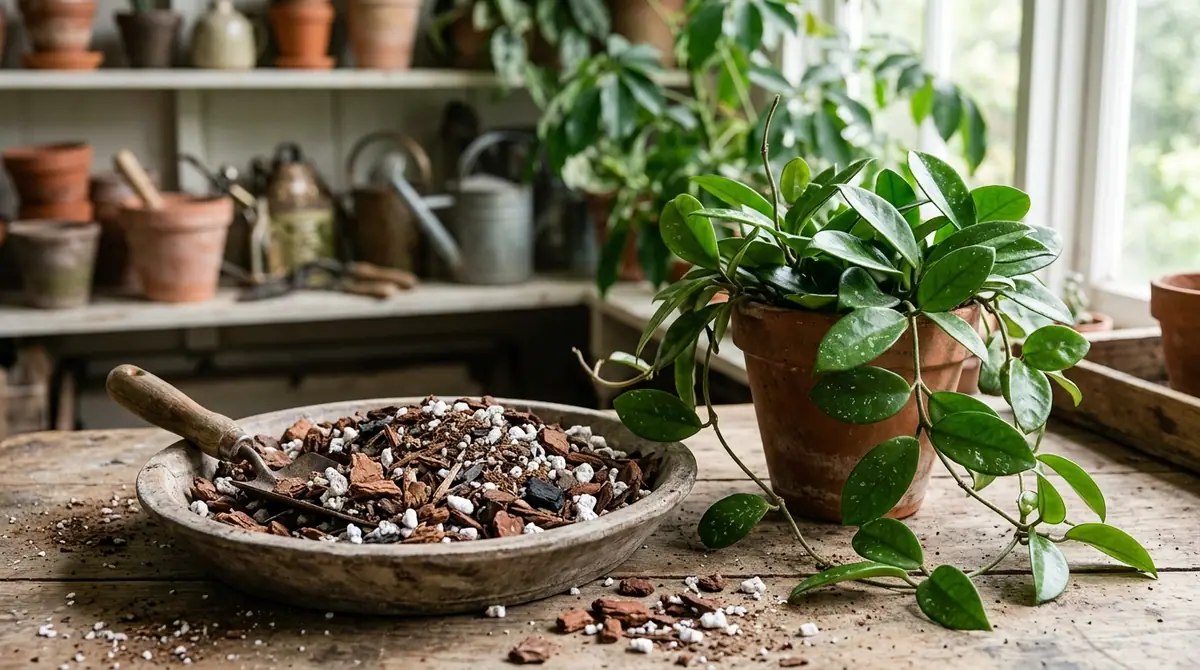
When Hoya carnosa 'Compacta' is grown in generic peat-based potting soil from a big-box store, the root system is entirely reduced to soggy, thread-like strands. This happens because houseplant mix is designed to hold water for thirsty monsteras rather than breathe around the specialized, semi-epiphytic root systems of wax plants, necessitating an airy, bark-bound microclimate that mimics Southeast Asian treetops.

1. Botanical Overview & Natural Habitat
Most cultivated Hoyas are native to the tropical and subtropical regions of Asia and Oceania, stretching from India and Southern China down through Malaysia, Indonesia, the Philippines, and into Australia and the Pacific Islands. In their natural ecosystems, the vast majority of these species are epiphytes or lithophytes. Epiphytes grow non-parasitically upon the trunks and branches of trees, while lithophytes anchor themselves directly into crevices of bare rock.
Neither group lives in soil. Instead, their roots cling to rough bark or nestle into pockets of decomposing organic matter—leaf litter, bird droppings, and decaying wood fragments—flushed constantly by warm tropical rains and immediately dried by passing air currents.
Botanically, Hoya roots possess a thick, spongy outer epidermis known as the velamen, identical in function to the roots of many orchids. This specialized layer rapidly absorbs atmospheric moisture and dissolved nutrients during precipitation events, but it requires near-instantaneous drying to prevent fungal pathogens from invading the tissue. When you pot a Hoya in dense, heavy, moisture-retentive media, you suffocate this velamen layer, starving the root cells of oxygen and precipitating rapid root rot. Understanding this native architecture is the foundation for designing any successful hoya potting mix.
2. Essential Environmental & Care Requirements
To keep Hoyas thriving, every factor in their environment must work in concert with your potting mix. If your substrate drains rapidly, your watering frequency, ambient humidity, and temperature must complement that dynamic.
| Parameter | Optimal Condition | Common Mistake | Why It Matters |
|---|---|---|---|
| Air Temperature | 65°F – 85°F (18°C – 29°C) | Exposing plants below 50°F (10°C) | Cold temperatures combined with moist mix cause immediate cell collapse. |
| Relative Humidity | 50% – 70% | Relying on dry indoor air (<30%) | Low humidity forces roots to pull water faster, stressing the substrate balance. |
| Light Exposure | Bright indirect (2,500 – 5,000 foot-candles) | Deep, dark interior spaces | Insufficient light slows photosynthesis, reducing water uptake and risking root rot. |
| Watering Cycle | Drenched completely, then dried fully down to 0% moisture | Sips of water every day | Hoyas need a wet-dry cycle; constant dampness suffocates the velamen. |
For deep dives into plant physiology and regional care adaptations, consult the Royal Horticultural Society and the University of Florida IFAS Extension.
3. Step-by-Step Cultivation, Feeding & Propagation
Creating the ultimate custom hoya potting mix requires balancing organic nutrition with structural aeration. Never use standard potting soil straight from the bag. Instead, build a chunky, highly porous blend.
Custom Hoya Potting Mix Recipe:
- 4 parts chunky orchid bark (grades ranging from 0.25 to 0.5 inches / 0.6 to 1.2 cm)
- 2 parts high-grade horticultural perlite or pumice (coarse grade)
- 1 part coco coir chips or shredded sphagnum moss
- 1 part professional worm castings (for slow-release micronutrients)
- 0.5 part horticultural charcoal (to absorb impurities and keep the mix sweet)
Step-by-Step Repotting Sequence:
- Select the Right Vessel: Choose a pot only 1 to 2 inches (2.5 to 5.0 cm) wider in diameter than the current root ball. Hoyas bloom much more reliably when slightly root-bound.
- Sanitize Equipment: Sterilize all pruning shears and workspace surfaces with a 70% isopropyl alcohol solution to prevent pathogen transfer.
- Extract and Inspect: Gently ease the Hoya out of its old container. Tease away compacted soil using your fingers or a blunt chopstick. Inspect the root system; trim away any black, mushy, or hollow roots using sterilized shears.
- Establish the Base Layer: Pour a 1-inch (2.5 cm) layer of your chunky custom mix into the bottom of the new pot to guarantee unobstructed drainage holes.
- Position the Plant: Hold the Hoya at the exact same soil depth it previously enjoyed. Burying the stem too deeply invites collar rot.
- Backfill with Chunks: Slowly trickle your custom bark and perlite mix around the root mass. Tap the sides of the container firmly every few inches to settle the chunky components into natural air pockets without crushing them.
- Initial Hydration: Water the newly potted Hoya thoroughly until it runs clear from the drainage holes. This settles the substrate particles around the roots.
💡 Pro-Tip: When mixing your ingredients, spray the dry perlite and coco coir lightly with water using a mist bottle beforehand. This captures dangerous airborne dust particles and keeps your lungs safe from fine irritants while you work.
⚠️ Important Caution: Never add dense garden soil, backyard dirt, or compost to your Hoya mix. These materials pack down tightly, harbor fungal spores, and introduce pest larvae directly into your indoor collection.
4. Common Problems, Pests & Troubleshooting
Even with an exceptional hoya potting mix, environmental stressors can trigger issues. Here is how to diagnose and correct them.
- Yellowing, Edematous Leaves: If lower leaves turn yellow and translucent, your mix is retaining water far too long. Unpot the plant immediately, strip away the wet media, prune rotted roots, and repot into a coarser, higher-bark ratio blend.
- Wrinkled, Dehydrated Leaves: If leaves feel leathery or shriveled despite regular watering, check your mix for hydrophobicity. Old peat or dry coco coir can become completely water-repellent, forcing water to channel down the sides of the pot without wetting the roots. Submerge the entire pot in a basin of water for 30 minutes to rehydrate the medium.
- Mealybugs: These cottony white pests love hiding in the leaf axils and deep crevices of chunky bark mixes. Treat infestations by dabbing insects with 70% isopropyl alcohol on a cotton swab, followed by a systemic or horticultural oil soil drench if the population is severe.
- Root Mealys: White, powdery insects that live entirely underground feeding on roots. If a Hoya looks chronically starved and stunted despite proper care, unpot it and inspect the roots. Wash away the old mix entirely, rinse roots in tepid water, spray with insecticidal soap, and repot into completely fresh media in a sterilized container.

5. Frequently Asked Questions
Can I use regular indoor potting soil for Hoyas?
No. Standard indoor potting soils are formulated with fine peat moss and compost designed to retain heavy moisture for tropical ferns and anthuriums. This density deprives Hoya roots of the oxygen they require, quickly leading to fatal root rot.
How often should I repot a Hoya?
Most Hoyas prefer to be root-bound and only need repotting every 2 to 3 years, typically in early spring as day length and temperatures increase. Look for roots circling heavily out of drainage holes or a noticeable slowdown in growth as your cue to upgrade.
Do Hoyas prefer plastic or terracotta pots?
Both work well if your watering habits match the vessel. Terracotta is porous and allows the potting mix to dry out faster through the walls of the pot, making it ideal for growers who tend to overwater. Plastic pots retain moisture longer, reducing the watering frequency needed in dry indoor environments.
Why is my custom hoya mix floating when I water it?
High ratios of lightweight components like coarse perlite, orchid bark, and dried coco coir naturally tend to float when inundated with a heavy stream of water. To prevent this, water your plants gently using a breaker nozzle or shower wand, or top-dress the surface with a thin layer of heavier decorative gravel or expanded clay pebbles.
Related Guides
📋 Table of Contents ▼ Click to expand
Tags:
Keep reading
🌿 Related Plants You Might Like






PlantSavvyWorld
Editorial team
PlantSavvyWorld is an independent botanical education project. Articles are drafted with AI assistance, then edited and checked against university extension services, botanical garden collections and other published horticultural sources.