

Hoya Soil
Written with AI assistance, edited and checked against horticultural sources.
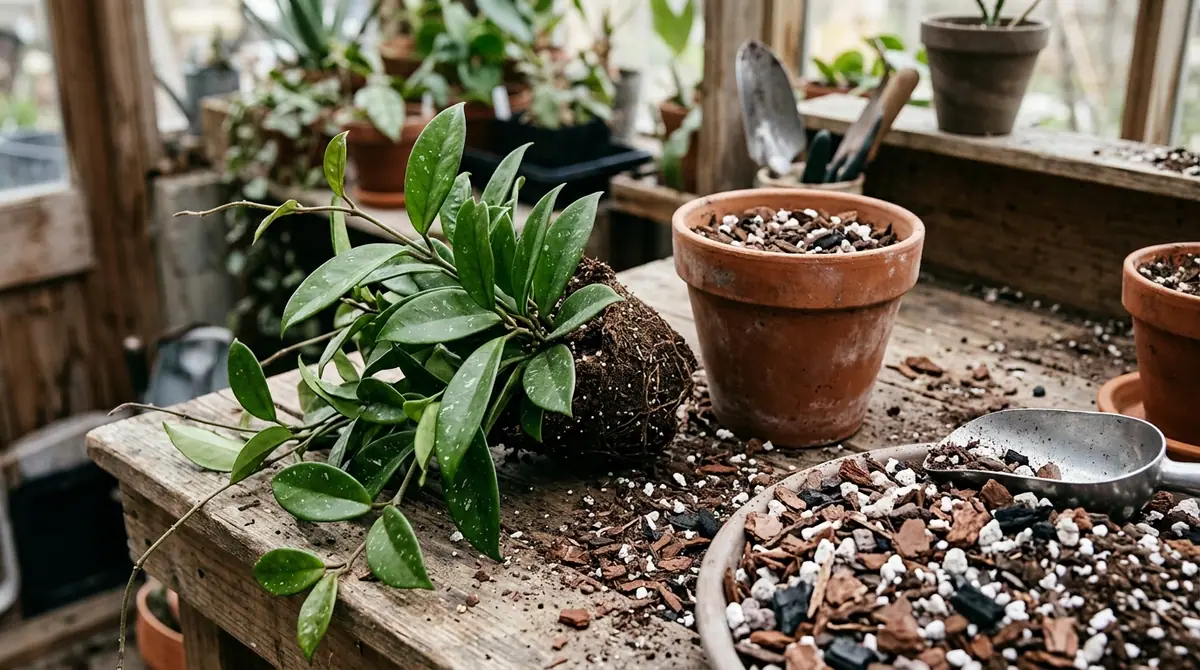
I was down on my knees in the conservatory last May, tugging gently at a stubborn Hoya carnosa 'Krimson Queen' whose stems had stalled out for nearly six months, when the root ball slid right out of its nursery pot and smelled faintly of swamp water. The heavy, peat-based potting mix I had inherited from a greenhouse trade was holding onto moisture like a sponge, suffocating the delicate, semi-succulent root hairs that evolved to grip rough tree bark in the humid canopy of Southeast Asia. That was the afternoon I threw out every bag of standard houseplant soil in my shed and committed entirely to custom-blending an aerated, coarse-chunk substrate specifically engineered for the wax plant genus—a shift that transformed my struggling collection into a cascade of cascading vines and porcelain-like blooms.
1. Botanical Overview & Natural Habitat

In their native habitats, Hoyas scramble up the trunks of rainforest trees or anchor themselves into the crevices of moss-draped limestone cliffs. Their roots are exposed to the open air, receiving sporadic, high-nutrient flushes of warm tropical rainwater followed by rapid, wind-driven drying. Because they do not sit in dense earth, their root systems have evolved thick, specialized outer layers called velamen—similar to orchids—which absorb moisture and nutrients instantly before drying out completely within hours.
When you place a wild-adapted epiphyte into a dense, moisture-retentive peat mix indoors, you trap stagnant water around these delicate tissues. The roots suffocate, microbial pathogens like Pythium and Phytophthora take hold, and the plant experiences rapid root rot. Cultivating a thriving Hoya indoors requires mimicking this porous, high-oxygen epiphytic matrix. For broader insights into optimizing substrate chemistry and balancing nutrients for specialized root systems, you can consult resources like the Royal Horticultural Society.
2. Essential Environmental & Care Requirements
Replicating an arboreal canopy environment indoors means paying strict attention to how your custom hoya soil interacts with ambient temperature, humidity, and watering frequency.
Hoyas thrive when ambient temperatures remain consistently between 65°F and 80°F (18°C to 27°C). If temperatures drop below 55°F (13°C), metabolic processes slow dramatically, and a damp soil mix becomes lethal because the roots cannot take up moisture. Relative humidity should ideally sit between 50% and 70%, though many species adapt well to standard household humidity provided their root zone oxygen levels remain high.
When it comes to watering, the golden rule of hoya cultivation is the " soak and dry" method. Your soil mix must drain completely within 5 to 10 seconds of watering. If water pools on the surface for more than 3 seconds before filtering through, your substrate is too dense.
| Parameter | Optimal Condition | Common Mistake | Why It Matters |
|---|---|---|---|
| Soil pH | 6.1 to 6.5 (Slightly Acidic) | Using alkaline garden soil (pH > 7.5) | Locks out essential micronutrients like iron and manganese. |
| Drainage Rate | Complete gravity drain in < 10 seconds | Using 100% standard peat moss or coco coir | Suffocates epiphyte roots and causes fatal root rot. |
| Organic Matter | 30% to 40% (Worm castings, orchid bark) | Over-composting with heavy compost | Breaks down into anaerobic sludge over a 6-month period. |
| Air Porosity | 40% to 50% total air space | Packing soil down firmly when potting | Deprives roots of the oxygen needed for cellular respiration. |
For gardeners looking to understand soil chemistry fundamentals before amending their mixes, learning How to Test Garden Soil Ph Without a Kit is an invaluable foundational step.
💡 Pro-Tip: Never rely on the surface appearance of your hoya soil to determine when to water. Because chunky epiphyte mixes dry from the top down while retaining moisture deep in the center, always use a wooden chopstick plunged 3 inches (7.6 cm) into the pot. If it comes out damp or clinging with fine debris, wait another 3 to 5 days.
3. Step-by-Step Cultivation, Feeding & Propagation
Building the ultimate Hoya soil requires a precise recipe of structural aggregates and organic components. My tried-and-true baseline formula consists of 40% chunky orchid bark (grades ranging from 0.25 to 0.5 inches / 0.6 to 1.2 cm), 20% coarse perlite or pumice, 20% horticultural charcoal, and 20% high-quality coco coir or sphagnum moss.
To give your plants the absolute best start when repotting or propagating cuttings, follow this rigorous step-by-step protocol:
- Sanitize and Prepare Components: Measure out your dry ingredients in a large trug. Mix 4 parts orchid bark, 2 parts coarse perlite, 2 parts horticultural charcoal, and 2 parts coco coir thoroughly. Ensure the coco coir has been thoroughly rinsed if it came from a high-salinity block.
- Select the Proper Vessel: Choose a nursery pot that is only 1 to 2 inches (2.5 to 5 cm) wider than the existing root ball. Hoyas bloom much more prolifically when they are slightly root-bound, and oversized pots hold excess moisture. Ensure the pot has multiple bottom drainage holes.
- Establish a Drainage Layer: Place a 0.5-inch (1.3 cm) layer of large clay pebbles or extra-coarse bark at the absolute bottom of the container to keep drainage holes completely unobstructed.
- Position the Plant: Gently tease apart the old, compacted soil from your Hoya's roots using a chopstick. Trim away any dead, papery, or mushy brown roots with sterilized shears. Position the plant so the crown sits level with the rim of the pot.
- Fill and Settle: Pour your custom chunky mix around the root system. Instead of pressing down hard with your hands—which compacts air pockets—tap the sides of the pot firmly against your workbench 4 to 5 times to let gravity settle the coarse particles naturally around the roots.
- Initial Watering and Placement: Water thoroughly with tepid water (around 70°F / 21°C) until it streams freely from the drainage holes. Place the newly potted Hoya in bright, indirect light where ambient temperatures hover around 75°F (24°C) for the next 14 days to encourage rapid callus and root hair formation.
⚠️ Important Caution: Never use garden soil, topsoil, or uncomposted backyard dirt for indoor Hoyas. Field soils carry microscopic fungal spores, parasitic nematodes, and weed seeds that thrive in the warm, humid microclimate of an indoor home, often decimating a prized specimen within 30 days.
4. Common Problems, Pests & Troubleshooting
Even with a scientifically formulated soil mix, environmental stressors can trigger issues. Here is how to diagnose and correct them before they become fatal:
- Oedema and Leaf Blisters: If you notice bumpy, water-soaked corky blisters forming on the underside of your Hoya leaves, your soil is holding moisture too long combined with high humidity and cool night temperatures (below 60°F / 15°C). Cut back watering frequency and increase air circulation with a small oscillating fan.
- Stalled Growth and Pale New Leaves: When a Hoya refuses to push out new vines for 90 days or more despite adequate light, the soil has likely broken down, lost its aeration, or exhausted its micronutrients. Leach the pot thoroughly or repot into fresh, chunky media and initiate a half-strength balanced liquid feeding regimen every 14 days during the active growing season (April through September).
- Mealybugs at the Soil Line: White, cottony masses hiding in the crevices where stems meet the soil line are root or stem mealybugs. They thrive in organic pockets of old, degraded soil. Drench the root zone with a 1:1 mixture of 70% isopropyl alcohol and water, or apply a systemic insecticide granule designed for indoor ornamentals.

5. Frequently Asked Questions
Can I use regular potting soil for a Hoya?
No. Standard potting soil is formulated for terrestrial plants and contains high percentages of fine peat moss and compost that compact tightly over time. This chokes off oxygen to Hoya roots, leading to rapid root rot and plant death. Always use a chunky, fast-draining epiphyte mix containing orchid bark and perlite.
How often should I change my Hoya's soil?
You should completely replace the soil mix every 2 to 3 years. Over time, organic components like orchid bark and coco coir naturally decompose, breaking down into a fine, dense humus that loses its vital air pockets. Spring—just as the plant breaks dormancy—is the ideal time for this refresh.
Do Hoyas like to be root bound?
Yes. Hoyas produce relatively small, delicate root systems relative to their sprawling top-heavy vine growth. They store energy more efficiently and direct resources toward flowering when their roots are slightly restricted. Only pot up when roots are visibly circling the entire inner perimeter of the container and pushing the plant upward.
Why are my Hoya leaves turning yellow and dropping off?
Yellowing, dropping leaves are almost always a symptom of overwatering or soil that remains wet for longer than 7 days. When roots sit in an anaerobic, waterlogged environment, they die back and can no longer transport water and nutrients to the foliage. Check the root ball immediately, trim away rotted sections, and repot into fresh, dry, highly porous substrate.
Related Guides
- Hoya Potting Mix
- How Long for Sunlght to Dry Soil
- Grey Clay Soil
- Best Soil for Plumeria
- Plumeria Potting Soil
📋 Table of Contents ▼ Click to expand
Tags:
Keep reading
🌿 Related Plants You Might Like






PlantSavvyWorld
Editorial team
PlantSavvyWorld is an independent botanical education project. Articles are drafted with AI assistance, then edited and checked against university extension services, botanical garden collections and other published horticultural sources.