

30 Edible Plants to Grow in 5 Gallon Buckets
Written with AI assistance, edited and checked against horticultural sources.
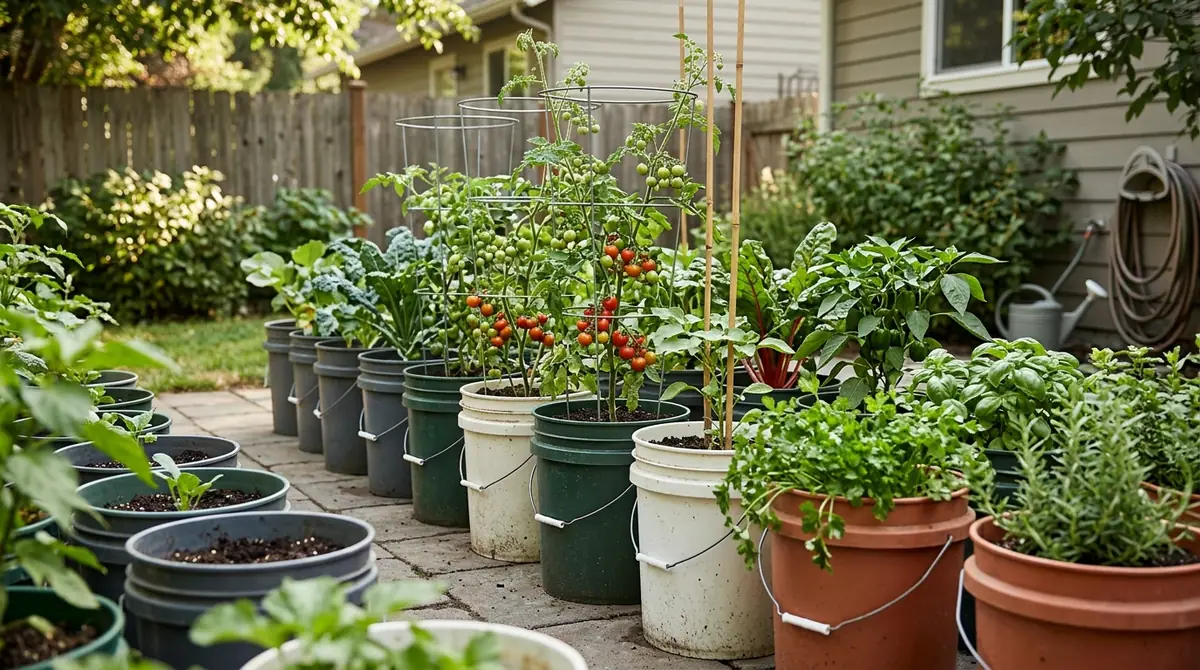
A baking concrete rental balcony utilizing twenty stray food-grade buckets sourced from a local bakery and bags of compost can produce an aggressive cascade of cherry tomatoes, heavy-headed bush cucumbers, and culinary herbs. Container gardening is not a compromise for those without land; for many edible species, a 5-gallon bucket actually provides superior root zone control, faster soil warming in spring, and an absolute defense against subterranean pests like gophers and voles.
1. Botanical Overview & Natural Habitat
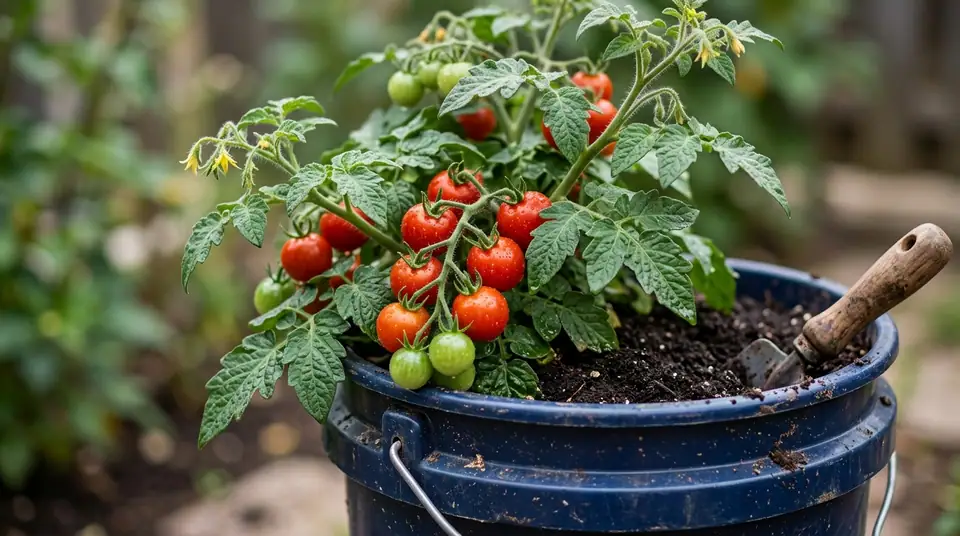
When shifting plants from open earth to a 5-gallon bucket—typically measuring roughly 12 inches (30.5 cm) across the top rim and 15 inches (38 cm) in depth—you are fundamentally altering their root ecology. In the wild, plants like tomatoes (Solanum lycopersicum) or bell peppers (Capsicum annuum) explore expansive soil volumes, anchoring deep taproots or sweeping lateral networks. In a bucket, their root systems are restricted to roughly 0.65 cubic feet (18.4 liters) of growing medium.
To select successful container candidates, we look to three distinct botanical archetypes:
- Compact Determinate and Dwarf Varieties: Bred specifically to halt vertical growth at manageable heights while maintaining heavy fruit loads, preventing the top-heavy instability common in standard varieties.
- Shallow-Rooted Herbaceous Perennials and Annuals: Plants like leafy greens, bulb onions, and many herbs naturally deploy fibrous, dense root masses that occupy the upper 6 to 8 inches (15 to 20 cm) of soil rather than seeking subterranean depths.
- Vining Species with Controlled Habits: Certain crops can be successfully cultivated in buckets provided they are paired with rigorous structural support, such as the vertical methods detailed in our guide on How to Grow Butternut Squash in Small Spaces: Vertical Trellising Secrets.
The 30 edible plants proven to thrive in 5-gallon buckets fall across five distinct culinary and botanical categories:
- Fruiting Vegetables (1-5):
- Dwarf Cherry Tomatoes (e.g., 'Patio Princess')
- Bell Peppers (Capsicum annuum)
- Bush Cucumbers (e.g., 'Spacemaster')
- Eggplants (Solanum melongena - dwarf varieties like 'Fairytale')
- Hot Peppers (e.g., Jalapeños, Habaneros)
- Root and Tuber Crops (6-11):
- Radishes (Raphanus sativus - up to 15 per bucket)
- Bunching Onions / Scallions (Allium fistulosum)
- Garlic (Allium sativum - up to 9 cloves per bucket)
- Carrots (Daucus carota - short-root cultivars like 'Paris Market')
- Beets (Beta vulgaris - up to 6 roots per bucket)
- Bush Sweet Potatoes (leveraging tactics similar to those found in Sweet Potato Companion Plants: 8 Best Garden Friends & 3 Foes to Avoid)
- Leafy Greens and Brassicas (12-18):
- Kale (Brassica oleracea var. acephala - 2 plants per bucket)
- Swiss Chard (Beta vulgaris subsp. cicla - 3 plants per bucket)
- Leaf Lettuce (Lactuca sativa - cut-and-come-again blocks)
- Spinach (Spinacia oleracea)
- Arugula (Eruca vesicaria)
- Bok Choy (Brassica rapa subsp. chinensis)
- Mustard Greens (Brassica juncea)
- Herbs and Aromatics (19-24):
- Basil (Ocimum basilicum - 3 plants per bucket)
- Parsley (Petroselinum crispum)
- Cilantro / Coriander (Coriandrum sativum)
- Mint (Mentha spp. - isolated to prevent invasive garden spread)
- Rosemary (Salvia rosmarinus - requires sharp, fast-draining mix)
- Thyme (Thymus vulgaris)
- Fruits and Perennial Edibles (25-30):
- Alpine Strawberries (Fragaria vesca - adapting indoor methods outlined in How to Grow Strawberries Indoors: From Fruit Seeds to Sweet Berries)
- Dwarf Everbearing Raspberries (Rubus idaeus - 1 cane per bucket)
- Bush Blueberries (Vaccinium corymbosum - requires acidic soil pH 4.5–5.5)
- Dwarf Citrus (e.g., Meyer Lemon on Flying Dragon rootstock)
- Fig Trees (young starts kept dwarfed through root-pruning)
- Ground Cherries (Physalis pruinosa)
2. Essential Environmental & Care Requirements
Managing a closed ecosystem requires strict attention to environmental inputs. Unlike in-ground garden beds, container soil cannot draw moisture from the surrounding water table or rely on earthworms to automatically cycle nutrients.
| Parameter | Optimal Condition | Common Mistake | Why It Matters |
|---|---|---|---|
| Soil pH | 6.0 – 6.8 (except blueberries at 4.5–5.5) | Using native garden topsoil directly from the yard | Heavy native clay compacts instantly in plastic buckets, suffocating roots and halting drainage. |
| Drainage | Minimum of six 1/2-inch (1.3 cm) holes drilled in the base | Leaving buckets solid without escape holes | Water pools at the bottom, creating an anaerobic zone that triggers severe root rot (Pythium species). |
| Sunlight | 6 to 8 hours of direct daily sunlight | Placing shade-loving greens in blazing afternoon sun or fruiting crops in deep shade | Fruiting crops drop blossoms without full sun; greens bolt and turn bitter in excessive heat. |
| Irrigation | Thorough saturation until water runs out the base, applied when top 2 inches (5 cm) are dry | Frequent, shallow surface sips | Shallow watering trains roots to stay near the surface, making the plant entirely vulnerable to midday drying. |
💡 Pro-Tip: When drilling drainage holes in your 5-gallon buckets, do not drill only through the flat bottom. Drill an additional ring of four holes around the lower perimeter, roughly 1 inch (2.5 cm) up from the base. This design creates a tiny subterranean reservoir while ensuring excess stormwater can always escape during heavy downpours.
For authoritative insights on managing container soils and urban microclimates, consult the Royal Horticultural Society (RHS) Container Gardening Guide.
3. Step-by-Step Cultivation, Feeding & Propagation
Growing edible crops in strict confines demands a repeatable operational rhythm. Follow this exact workflow to establish high-yielding 5-gallon bucket systems season after season.
- Sanitize and Modify the Vessel: Scrub used buckets thoroughly with a 10% household bleach solution to eliminate lingering fungal spores or bacterial wilt pathogens. Drill six to ten 1/2-inch (1.3 cm) drainage holes across the bottom and lower sides.
- Formulate the Soilless Substrate: Never use straight topsoil. Combine 60% high-grade organic compost or peat-free potting mix, 20% aged worm castings for immediate biological activity, and 20% perlite or coarse horticultural pumice to guarantee aeration.
- Amend for Nutrient Demands: Mix slow-release organic granular fertilizer (such as a balanced 4-4-4 blend) and a dusting of bone meal or kelp meal directly into the top 6 inches (15 cm) of the potting medium at a rate of 2 tablespoons per bucket.
- Plant at Correct Botanical Depth: Position your chosen starter plant or seed cluster. Ensure tomatoes and peppers are buried slightly deeper than their nursery containers to encourage adventitious root formation along the stem, mirroring techniques discussed in advanced guides on How to Grow Huge Tomato Plants: Pruning, Trenching & Heavy Yields.
- Establish Initial Irrigation: Water the newly planted bucket slowly and deeply until moisture begins draining freely from the base holes. Apply a 1-inch (2.5 cm) layer of shredded straw or untreated wood chips across the surface to dramatically reduce evaporative water loss.
- Implement a Feeding Schedule: Because nutrients leach quickly through container drainage holes, apply a balanced liquid organic fertilizer (such as fish hydrolysate or liquid kelp) every 14 days once active vegetative growth begins. Shift to a high-phosphorus, low-nitrogen bloom fertilizer once flowering initiates in fruiting varieties.
⚠️ Important Caution: Never use non-food-grade plastic buckets or containers that previously held industrial solvents, paints, or harsh chemical cleaning agents. Toxic petrochemicals can leach directly into the potting substrate and accumulate within the edible tissues of your crops. Always verify that your buckets feature the recycling symbol #2 (HDPE) or #5 (PP), or explicitly state "food safe."
4. Common Problems, Pests & Troubleshooting
Even in isolated containers, plants face specific stressors. Spotting these symptoms early saves your harvest.
- Blossom End Rot (Dark, sunken leathery patches on the bottom of tomatoes, peppers, and eggplants):
- Cause: Irregular watering cycles coupled with a temporary calcium deficiency in the developing fruit tissue.
- Solution: Standardize your watering routine so the soil moisture remains consistently damp (not waterlogged). Supplement with a liquid calcium-foliar spray if soil tests indicate a deficiency.
- Edema (Water-soaked, blistered bumps on the undersides of brassica and tomato leaves):
- Cause: High soil moisture paired with cool, humid ambient air and poor air circulation, causing root pressure to burst leaf cells.
- Solution: Move buckets into a sunnier, breezier location and reduce watering frequency until relative humidity drops.
- Aphids and Fungus Gnats:
- Cause: Aphids ride in on nursery starts; fungus gnats thrive in overly wet, un-aerated topsoil layers.
- Solution: Introduce yellow sticky cards around the bucket rims, allow the top 2 inches (5 cm) of soil to dry out completely between waterings to kill gnat larvae, and blast aphid colonies away with a firm jet of water followed by horticultural insecticidal soap.
5. Frequently Asked Questions
Can you really grow root vegetables like carrots and potatoes in a 5-gallon bucket?
Yes, absolutely. For carrots, you must select short or round cultivars (like 'Paris Market' or 'Chantenay') that naturally mature within a length of 6 inches (15 cm). For potatoes and sweet potatoes, a 5-gallon bucket easily accommodates 2 seed potatoes or slips when grown using the "hilling" method—starting with soil filled only halfway up the bucket and gradually adding more soil mix as the green stems grow upward.
How often do I need to water a 5-gallon bucket during peak summer heat?
During mid-summer heatwaves where temperatures consistently exceed 85°F (29°C), large fruiting plants like tomatoes or cucumbers in full sun will require daily watering—and occasionally twice-daily soaking. Always check the soil moisture by inserting your index finger a full 2 inches (5 cm) deep; if it feels dry at that depth, water immediately until saturation occurs.
Do 5-gallon buckets need to be painted or shaded from intense sun?
If you are using black or dark blue industrial buckets, intense summer sunlight can heat the root zone past 95°F (35°C), which literally cooks delicate feeder roots and halts nutrient uptake. Paint the exterior surfaces with light-colored, non-toxic outdoor acrylic paint, or wrap the buckets in burlap to insulate the root zone against extreme thermal spikes.
How many seasons can I reuse the soil inside a 5-gallon bucket?
You can safely reuse container soil for 2 to 3 consecutive seasons if you actively replenish its fertility and structure. At the end of every harvest cycle, dump the bucket contents onto a tarp, pull out all old root masses, and thoroughly mix in 30% fresh compost, worm castings, and organic granular fertilizer to restore microbial life and trace mineral density before replanting.
Related Guides
- Worm Farming and Composting in a 5 Gallon Bucket Its Easy
- Hibiscus Edible Flowers
- Salad Trees Edible Leaves
- Can You Eat Moss Edible Mosses
📋 Table of Contents ▼ Click to expand
Tags:
Keep reading
🌿 Related Plants You Might Like






PlantSavvyWorld
Editorial team
PlantSavvyWorld is an independent botanical education project. Articles are drafted with AI assistance, then edited and checked against university extension services, botanical garden collections and other published horticultural sources.