

Worm Farming and Composting in a 5 Gallon Bucket Its Easy
Written with AI assistance, edited and checked against horticultural sources.
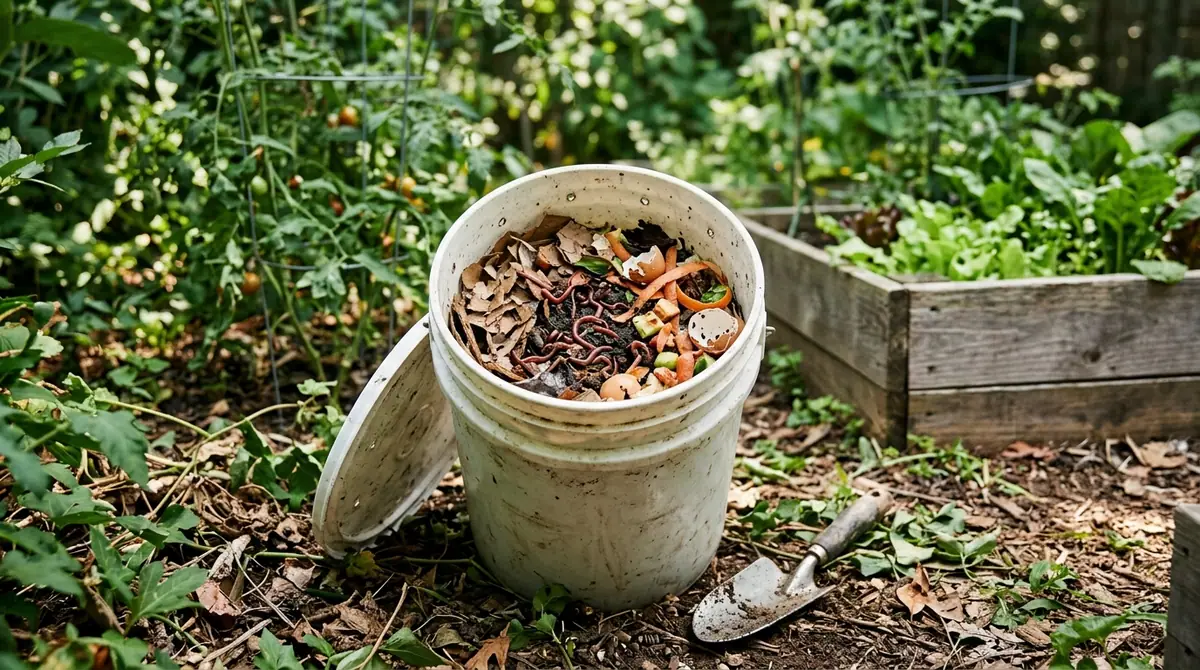
1. Botanical Overview & Natural Habitat

In nature, these organisms thrive where plant debris accumulates and breaks down rapidly. They do not possess lungs; instead, they respire entirely through their moist skin via cutaneous gas exchange. This biological constraint dictates everything about how they process organic waste. Within a 5-gallon (18.9-liter) container, we replicate the upper organic layer of a deciduous woodland floor. The bucket acts as a boundary layer, concentrating heat, moisture, and microbial activity.
When red wigglers consume kitchen scraps and bedding, their muscular gizzards grind the food down with the help of ingested grit. The material then passes through their five pairs of hearts and complex digestive tracts, where beneficial microorganisms inoculate the matter. The resulting vermicompost—often called black gold—is packed with humic acids, plant-available nitrogen, phosphorus, potassium, and beneficial biology that outperforms standard garden compost by orders of magnitude. For a deeper academic dive into vermicomposting biology, you can consult the Cornell University Composting Guide.
2. Essential Environmental & Care Requirements
To keep a 5-gallon bucket worm farm thriving, you must manage five core environmental variables: temperature, moisture, aeration, carbon-to-nitrogen balance, and pH. Because a 5-gallon bucket has a relatively small thermal mass compared to a sprawling outdoor compost pile, it reacts quickly to environmental shifts.
Temperature is your primary monitoring metric. Red wigglers feed and reproduce most efficiently when ambient temperatures remain between 55°F and 77°F (13°C to 25°C). If temperatures drop below 40°F (4.4°C), their metabolism plummets and they enter a semi-dormant state, halting reproduction and slowing consumption down to a crawl. Conversely, if internal bucket temperatures spike above 85°F (29.4°C), the worms will attempt to crawl out or perish rapidly from protein breakdown.
Moisture is equally critical. The bedding must maintain a moisture content of 70% to 80%, which feels like a wrung-out damp sponge in your hand. If you squeeze a handful of bedding and liquid drips freely, it is too wet; if no moisture binds the material together, it is too dry, and the worms will suffocate because their skin must remain moist to absorb oxygen.
| Parameter | Optimal Condition | Common Mistake | Why It Matters |
|---|---|---|---|
| Temperature | 55°F – 77°F (13°C – 25°C) | Placing the bucket in direct summer sun | Extreme heat causes fatal protein breakdown and mass worm die-offs. |
| Moisture | 70% – 80% (Damp sponge consistency) | Drenching the bucket with water | Waterlogged bedding displaces oxygen, causing anaerobic conditions and foul odors. |
| Carbon:Nitrogen | 30:1 (Browns to Greens) | Dumping heavy layers of food scraps alone | Imbalanced ratios trigger pest flies, mold blooms, and putrefaction. |
| pH Range | 6.5 – 7.0 (Neutral) | Adding massive amounts of citrus rinds or onions | Acidic environments inhibit worm digestion and attract acidic-loving vinegar flies. |
💡 Pro-Tip: Keep a dedicated container of dry, shredded cardboard right next to your bucket. Every single time you add wet kitchen scraps, immediately cover them with a handful of those dry browns. This instantly balances the carbon-to-nitrogen ratio and eliminates fruit fly attraction before it starts.
3. Step-by-Step Cultivation, Feeding & Propagation
Setting up a 5-gallon bucket worm farm requires minimal tools: two food-safe 5-gallon plastic buckets, a drill with a 1/4-inch (6mm) drill bit, bedding materials, kitchen scraps, and a starting population of about 250 to 500 red wigglers (Eisenia fetida).
We use a two-bucket nesting method. The inner bucket holds the worms and bedding, with drainage holes drilled in its bottom and lower sides. The outer bucket acts as a catchment basin for any excess liquid, known as worm tea, which can be drawn off via a spigot or simply emptied periodically.
- Drill the Aeration and Drainage Holes: Take the first bucket (your inner working bucket). Using the 1/4-inch drill bit, drill holes spaced 2 inches (5 cm) apart across the entire bottom surface to allow excess moisture to escape. Drill a ring of holes just below the upper rim of the bucket to ensure cross-ventilation of oxygen. Do not drill holes larger than 1/4 inch, or you risk worms escaping.
- Nest the Buckets: Place the drilled inner bucket directly inside the second, intact 5-gallon bucket. Leave about 1 to 2 inches (2.5 to 5 cm) of clearance at the bottom between the two bucket bases.
- Prepare the Bedding: Shred newspaper, brown corrugated cardboard, and unbleached paper bags into strips roughly 1 inch (2.5 cm) wide. Soak this paper in non-chlorinated water, then squeeze it out thoroughly until it reaches that damp-sponge consistency. Fill the inner bucket loosely until it is about 60% full, allowing plenty of air pockets.
- Introduce the Worms: Add a handful of finished garden compost or native soil to introduce grit and beneficial microbes, then gently empty your 1 to 2 pounds (0.45 to 0.9 kg) of red wigglers onto the top of the bedding. Give them 24 hours to burrow down and acclimate to their new habitat.
- Feed in Small Increments: Chop your kitchen scraps—such as coffee grounds, vegetable peelings, crushed eggshells, and fruit cores—into pieces smaller than 1 inch (2.5 cm) to accelerate microbial breakdown. Bury a small handful of scraps under the top layer of bedding. Do not feed again until this initial batch is completely consumed, which typically takes 4 to 7 days for a starting population.
- Manage Harvest Cycles: After 60 to 90 days, the bucket will fill with dark, rich vermicompost. Stop feeding one side of the bucket for two weeks. Add fresh food exclusively to the opposite side. The worms will migrate toward the food, allowing you to harvest the finished compost from the starved side without harming the population. For comprehensive insights into optimizing urban soil systems, refer to the Royal Horticultural Society Soil Management Guide.
⚠️ Important Caution: Never feed your bucket worms meat, dairy, oily foods, pet wastes, or large amounts of citrus and alliums (onions and garlic). Fats and animal proteins turn rancid in small containers, drawing rodents and scavenger insects, while excessive citrus creates an overly acidic environment that destroys worm skin tissue.
4. Common Problems, Pests & Troubleshooting
Even when worm farming and composting in a 5 gallon bucket its easy, minor imbalances can occur due to fluctuating indoor environments or improper feeding habits.
If you notice a sour, sulfurous, or rotting-garbage odor emanating from your bucket, you are facing an anaerobic condition. This happens when too much nitrogen-rich food is added without enough carbon bedding, or when the drainage holes become clogged, causing water to pool. To fix this, immediately stop feeding, sprinkle a handful of agricultural lime or crushed eggshells to buffer the pH, and gently fluff the entire bedding mass with a garden fork to reintroduce oxygen.
If fruit flies (Drosophila melanogaster) or fungus gnats invade your bucket, it is a sign that food scraps are exposed on the surface. Cover all food scraps with a minimum of 2 inches (5 cm) of damp shredded cardboard or a damp piece of burlap fabric cut to the interior diameter of the bucket. You can also place a sticky yellow card inside the lid to trap flying adults.

5. Frequently Asked Questions
Will a 5-gallon bucket worm farm smell bad inside my house?
No. A healthy, well-balanced vermicomposting bucket smells distinctly like a fresh, earthy forest floor after a heavy spring rain. If your bucket smells foul or putrid, it is receiving too much moisture or nitrogen-rich food without adequate carbon bedding. Correcting the carbon-to-nitrogen ratio and improving aeration eliminates odors within 48 hours.
Can I leave my bucket outside during freezing winter temperatures?
Red wigglers cannot survive freezing temperatures. If winter temperatures in your region drop consistently below 35°F (1.6°C), your 5-gallon bucket must be moved indoors, into a heated garage, a basement, or a utility room. Alternatively, wrap the bucket in insulating blankets if temperatures are only mildly cold for short durations.
How much food can 500 red wigglers eat in a week?
A standard starting population of 500 red wigglers (roughly 1/2 pound) consumes approximately 1/4 to 1/2 pound (0.11 to 0.23 kg) of chopped food scraps per week. Their reproduction rate matches their food supply; as they consume more organic matter and breed, the colony size expands to fit the carrying capacity of the 5-gallon bucket.
What is the white stringy stuff moving around in the bedding?
Those are likely potworms (enchytraeids), small translucent or white segmented worms that often coexist with red wigglers in vermicompost systems. While they compete slightly with your red wigglers for food, their presence primarily indicates that your bedding is slightly too acidic or holding too much moisture. Reduce feeding amounts, add dry carbon materials, and sprinkle crushed eggshells to normalize the system.
Related Guides
- Horn Worm Poop
- Easy Succulent Garden Ideas for Beginners Indoors
- 30 Edible Plants to Grow in 5 Gallon Buckets
- Polyculture Farming What is It and Why is It Better Than Monoculture
📋 Table of Contents ▼ Click to expand
Tags:
Keep reading
🌿 Related Plants You Might Like






PlantSavvyWorld
Editorial team
PlantSavvyWorld is an independent botanical education project. Articles are drafted with AI assistance, then edited and checked against university extension services, botanical garden collections and other published horticultural sources.