

When Can You Harvest Peas
Written with AI assistance, edited and checked against horticultural sources.
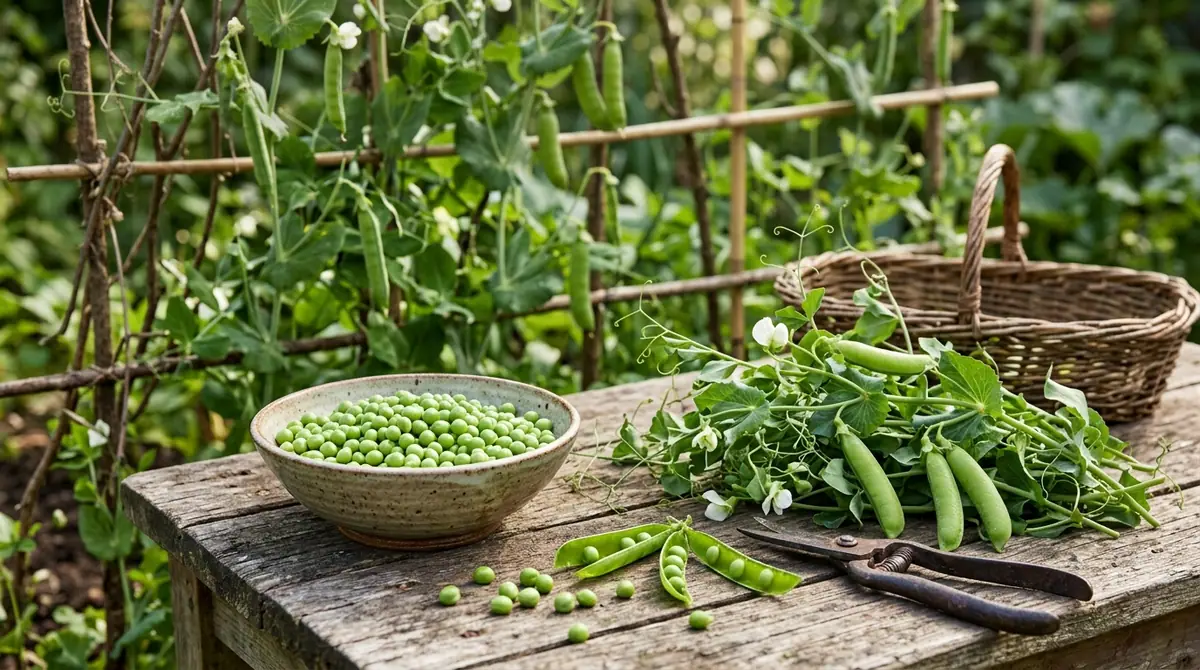
Squeezing a plump English pea pod between thumb and forefinger reveals a signature firm resistance; splitting the seam open with a thumbnail exposes a row of flawless, jade-green spheres. Knowing this precise microsecond of peak sugar content before starch conversion ruins the harvest separates a mediocre gardener from a master grower.

1. Botanical Overview & Natural Habitat
The garden pea (Pisum sativum) is a cool-season annual herbaceous legume belonging to the family Fabaceae. Native to the Mediterranean basin and the Near East, wild peas evolved in climates characterized by cool, wet winters and warm, dry springs. This evolutionary history dictates every physiological response your plants exhibit today, from their frost tolerance to their rapid lifecycle termination when summer heat arrives.
Taxonomically, Pisum sativum is divided into distinct horticultural groups based on edible parts and pod structure:
- English or Shelling Peas (Pisum sativum var. sativum): Grown for their starchy, sweet seeds. The pods are fibrous, tough, and inedible.
- Snap Peas (Pisum sativum var. macrocarpon): Developed to have thick, fleshy, sweet pod walls with minimal parchment layer inside, allowing the entire pod and seeds to be eaten whole.
- Snow Peas (Pisum sativum var. saccharatum): Characterized by flat pods with tender walls where the seeds are barely developed at the time of harvest.
Understanding these variants is critical because the harvest trigger for a snow pea is entirely different from that of a shelling pea. In botanical terms, the pea pod is a legume fruit derived from a single carpel that dehisces (splits) along two longitudinal sutures. From a physiological standpoint, once pollination occurs—largely via self-pollination before the flowers even open—the ovules rapidly develop into seeds while drawing carbohydrates from the vegetative tissues of the vine.
When ambient temperatures consistently exceed 85°F (29.4°C), the plant’s photosynthetic machinery slows down, and enzymatic activity converts simple sugars inside the developing seeds into complex starches. This process transitions your sweet, crisp crop into a mealy, tasteless disappointment within 48 to 72 hours. Monitoring this thermal threshold is the single most important factor in determining when can you harvest peas.
💡 Pro-Tip: Taste test your peas directly in the garden. If the skin is slightly tough or the flavor is flat rather than bursting with botanical sugar, you have waited 24 to 48 hours too long.
For more foundational insights on timing your edible garden transitions throughout the year, you can review our guide on When to Plant Onions in Southern California (Zone 9 & 10 Planting Calendar).
2. Essential Environmental & Care Requirements
To produce high yields of harvestable pods, Pisum sativum requires specific environmental conditions. Because they are native to Mediterranean scrublands, they thrive in full sun to light partial shade, requiring a minimum of 6 hours of direct sunlight daily.
Soil texture and chemistry are paramount. Peas prefer well-draining, loamy soils with a pH between 6.0 and 7.5. Heavy clay soils retain excess moisture, which starves the root zone of oxygen and rapidly invites soil-borne pathogens like Pythium and Fusarium. Conversely, excessively sandy soils drain too quickly, stressing the shallow root system.
Moisture management must be consistent. Peas require about 1 inch (2.5 cm) of water per week, either from rainfall or irrigation. Drought stress during the flowering and pod-set stages will cause blossom drop and dramatically reduce your eventual yield. However, overhead watering should be minimized to prevent foliar fungal diseases like powdery mildew.
| Parameter | Optimal Condition | Common Mistake | Why It Matters |
|---|---|---|---|
| Soil Temperature | 45°F to 65°F (7.2°C to 18.3°C) | Planting too early in frozen mud or too late in hot soil | Cold soils cause seed rot; hot soils inhibit germination entirely. |
| Air Temperature | 55°F to 75°F (12.8°C to 23.9°C) | Exposing vines to sustained heat above 85°F (29.4°C) | Heat accelerates sugar-to-starch conversion and triggers early senescence. |
| Soil pH | 6.0 to 7.5 | Neglecting soil tests in acidic or overly alkaline plots | Extreme pH locks out essential micronutrients like phosphorus and molybdenum. |
| Planting Depth | 1 to 1.5 inches (2.5 to 3.8 cm) | Broadcasting seeds on the surface or burying them 3+ inches deep | Shallow seeds dry out or get eaten by birds; deep seeds exhaust energy reserves before emerging. |
For gardeners coordinating multiple cool-season crops, you might find our regional planting instructions useful, such as those detailed in When to Plant Strawberries in Kansas: Zone 6a/6b Seasonal Calendar.
3. Step-by-Step Cultivation, Feeding & Propagation
Growing peas successfully from seed to harvest requires a methodical approach. Because peas do not tolerate root disturbance well, direct sowing is always superior to transplanting—a lesson I learned early in horticultural practice when managing fragile root systems, a challenge similarly managed in guides like When to Transplant Cucumber Seedlings: Stop Root Shock & Boost Growth.
Here is the exact step-by-step protocol for cultivating and harvesting your pea crop:
- Soil Preparation: Till or broadfork your garden bed in early spring as soon as the soil can be worked. Incorporate a balanced, low-nitrogen organic fertilizer or aged compost. Peas fix their own nitrogen via symbiotic Rhizobium bacteria, so heavy synthetic nitrogen will result in lush green vines with zero flowers.
- Inoculation: Dust your pea seeds immediately before planting with a commercial Rhizobium leguminosarum inoculant powder. This ensures rapid nodulation on the roots for maximum atmospheric nitrogen fixation.
- Sowing: Dig shallow trenches 1 to 1.5 inches (2.5 to 3.8 cm) deep. Space seeds 2 inches (5 cm) apart within rows, leaving 18 to 24 inches (45 to 60 cm) between rows. If using double rows, space them 6 inches (15 cm) apart to accommodate a central trellis.
- Trellising: Install stakes, netting, or a wire cage system immediately after sowing or when seedlings reach 4 inches (10 cm) in height. Climbing cultivars need structural support to prevent fungal issues associated with sprawling vine mats.
- Irrigation & Weeding: Keep the soil evenly moist during germination (which occurs in 7 to 14 days). Hand-weed carefully around young seedlings to avoid damaging their shallow root networks.
- Monitoring Pod Development: Flowering typically begins 50 to 60 days after planting, depending on the cultivar. Pods will swell approximately 20 to 22 days after full bloom.
- The Harvest Protocol:
- For Shelling Peas: Harvest when pods are plump, firm, and bright green, but before individual peas crowd each other so tightly that they square off.
- For Snap Peas: Harvest when pods are round, crisp, and glossy, just as the seeds begin to swell noticeably within the pod wall.
- For Snow Peas: Harvest when the pods have reached full length, but before the seeds inside grow larger than the thickness of a pinhead.
- Harvest Technique: Never pull or yank the pod from the vine, as this can snap the brittle stem or dislodge the entire root system. Hold the vine firmly with one hand and pinch or snip the stem just above the pod's calyx with your thumb and forefinger using your other hand.
⚠️ Important Caution: Picking peas roughly by pulling on the vines will tear the vascular tissue of the plant, introducing entry points for soil-borne pathogens and prematurely ending your harvest window. Always use two hands or clean shears.
For further reading on legume pathology and general horticultural best practices, consult the Royal Horticultural Society (RHS) guidelines on vegetable cultivation.
4. Common Problems, Pests & Troubleshooting
Even with meticulous care, environmental stressors and opportunistic pests can disrupt your harvest timeline. Recognizing symptoms early is essential.
- Powdery Mildew (Erysiphe pisi): Appears as a white, powdery fungal coating on leaves and stems during warm days and cool, humid nights. Management: Ensure proper plant spacing for air circulation, avoid overhead watering, and apply organic sulfur or potassium bicarbonate at the first sign of infection.
- Pea Aphids (Acyrthosiphon pisum): Small, soft-bodied green insects that congregate on tender growing tips and flower buds, sucking sap and transmitting mosaic viruses. Management: Blast colonies off with a strong jet of water from your garden hose or introduce beneficial predatory insects such as ladybugs and lacewings.
- Root Rot Complex (Fusarium and Pythium): Causes stunted, yellowing vines that wilt rapidly during the heat of the day. Pulling up the plant reveals brown, necrotic root tissue. Management: Improve soil drainage, practice a 3-to-4-year crop rotation, and avoid planting in cold, waterlogged soils.
- Blossom Drop: Flowers dry up and fall off without setting pods. This is almost always caused by sudden temperature spikes above 85°F (29.4°C) or erratic soil moisture. Management: Maintain consistent irrigation schedules and use shade cloth if ambient temperatures spike unexpectedly during the flowering window.

5. Frequently Asked Questions
How do I know when snap peas are ready to pick?
Snap peas are ready to harvest when the pods become plump, rounded, and glossy, and you can feel firm, distinct seeds inside when gently squeezed. The pod should snap crisply when bent in half. If the pods look flat or wrinkled, they were picked too early or left on the vine too long.
What happens if you leave peas on the vine too long?
If left on the vine past their prime, shelling and snap peas will convert their internal sugars into starches, becoming mealy, tough, and bitter. The plant will also interpret the presence of mature seeds as the completion of its life cycle, signaling the entire vine to yellow, wither, and stop producing new flowers.
Can you harvest peas more than once?
Yes, determinate and indeterminate pea varieties continue to produce pods over a harvest window that typically lasts 2 to 4 weeks, depending on weather conditions. Harvesting regularly every 2 to 3 days stimulates the plant to set new blossoms and extend its productive lifespan.
How do you store freshly harvested peas to keep them sweet?
Fresh peas begin converting their natural sugars to starch immediately after harvest, losing up to 40% of their sweetness within 24 hours at room temperature. To lock in flavor, do not wash them until you are ready to use them; store unwashed pods in a breathable plastic bag in the crisper drawer of your refrigerator at 32°F to 35°F (0°C to 1.7°C) for up to 5 to 7 days, or blanch and freeze them within hours of picking.
Related Guides
- When to Harvest Garden Peas
- When Are Peas Ready to Harvest
- When to Harvest Fingerling Potatoes
- 5 Ways to Harvest Dill Without Killing the Plant
- When to Plant Purple Hull Peas
📋 Table of Contents ▼ Click to expand
Tags:
Keep reading
🌿 Related Plants You Might Like






PlantSavvyWorld
Editorial team
PlantSavvyWorld is an independent botanical education project. Articles are drafted with AI assistance, then edited and checked against university extension services, botanical garden collections and other published horticultural sources.