

When Are Peas Ready to Harvest
Written with AI assistance, edited and checked against horticultural sources.
1. Botanical Overview & Natural Habitat

To understand harvest timing, you must first separate Pisum sativum into its three primary culinary classifications:
- Garden Peas (English Peas / Shelling Peas): Grown for their starchy, sweet seeds. The pods themselves are tough, fibrous, and inedible. They must be shelled before consumption.
- Snap Peas (Sugar Snap Peas): A natural genetic mutation combining the tender, edible pods of snow peas with the rounded, plump, sweet seed structure of English peas. The entire pod is consumed.
- Snow Peas (Chinese Pea Pods): Flat pods containing underdeveloped, tiny seeds. They are harvested very early while the pod walls remain thin, translucent, and stringless.
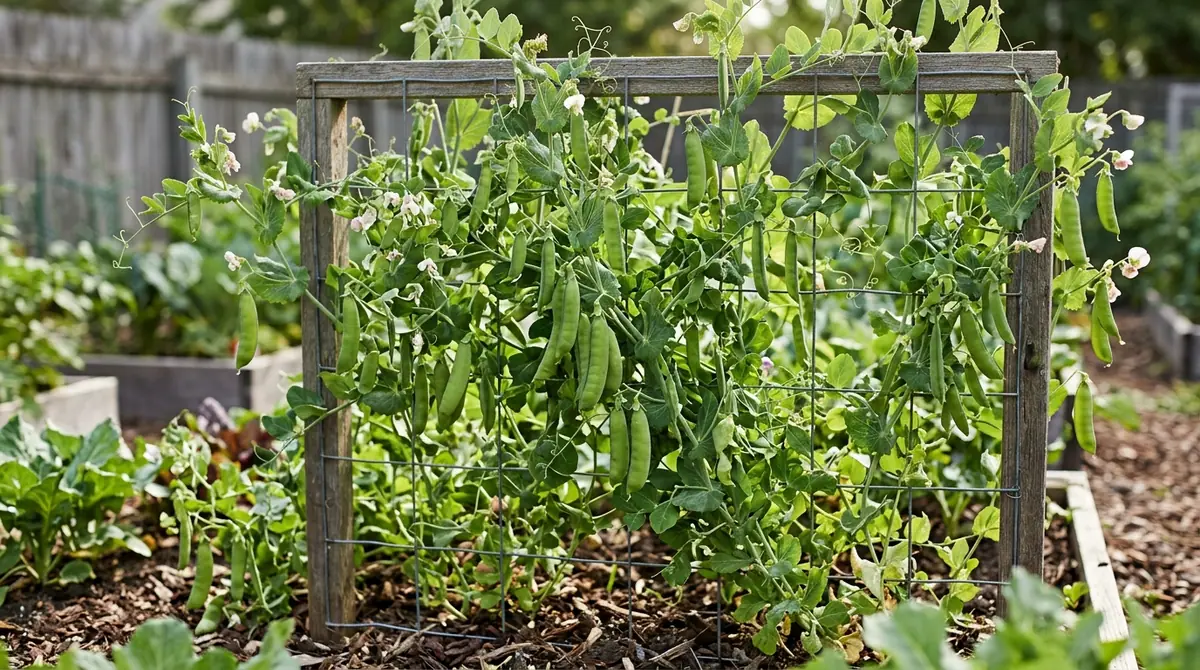
Morphologically, the plant climbs via modified leaves called tendrils that wrap tightly around netting, twine, or adjacent stems. Flowers emerge from leaf axils—typically white or deep purple depending on the heritage cultivar—and rapidly set pods that swell within 18 to 22 days of petal drop. Recognizing the moment these pods reach peak physiological ripeness requires tracking internal sugar concentrations, seed turgor pressure, and pod coloration before environmental stress ruins the crop.
2. Essential Environmental & Care Requirements
Peas are remarkably resilient against frost, making them one of the earliest crops you can direct-sow in the garden. However, their sensitivity to ambient heat is absolute. If you are balancing multiple cool-season projects, you might also consult resources like our guide on When to Plant Onions in Southern California (Zone 9 & 10 Planting Calendar) to coordinate your early-season garden layout.
| Parameter | Optimal Condition | Common Mistake | Why It Matters |
|---|---|---|---|
| Soil Temperature | 45°F to 75°F (7°C to 24°C) | Planting in frozen or overly soggy mud (<40°F / 4°C) | Seed rot occurs rapidly in saturated, cold dirt before germination can initiate. |
| Air Temperature | 60°F to 65°F (15°C to 18°C) | Exposing flowering vines to sustained heat (>80°F / 27°C) | High temperatures cause flower drop, inhibit pod set, and turn developing sugars into bitter starches. |
| Soil pH | 6.0 to 7.5 | Allowing soil to drop below 5.5 | Acidic conditions stunt the development of nitrogen-fixing root nodules and limit phosphorus uptake. |
| Watering Depth | Consistent moisture to 6 inches (15 cm) | Shallow, frequent sprinkling that leaves subsoil dry | Encourages shallow root systems that dry out instantly when spring winds pick up. |
Soil structure matters deeply for peas. They demand loamy, well-draining soil rich in organic matter. Compacted clay suffocates the beneficial bacteria responsible for nitrogen fixation, resulting in yellowing foliage and stunted yields. If your garden demands a multi-season rotation plan, you can compare root development timelines against our advice on When to Transplant Cucumber Seedlings: Stop Root Shock & Boost Growth to ensure your beds transition smoothly from spring legumes to summer cucurbits.
3. Step-by-Step Cultivation, Feeding & Propagation
Growing exceptional peas relies entirely on direct sowing. Peas despise root disturbance, which means starting them indoors in standard cell trays often leads to transplant shock and premature bolting. For gardeners managing diverse microclimates—such as tracking seasonal shifts similar to those outlined in our When to Plant Strawberries in Kansas: Zone 6a/6b Seasonal Calendar—getting the outdoor sowing window right in early spring is non-negotiable.
- Inoculate the Seed: Dust your dry pea seeds with a commercial Rhizobium leguminosarum inoculant right before planting. This ensures the soil has an immediate population of bacteria ready to colonize the emerging root hairs and supply free nitrogen.
- Prepare and Trench: Work aged compost into your garden bed down to a depth of 8 inches (20 cm). Dig a flat-bottomed trench 1 to 2 inches (2.5 to 5 cm) deep and roughly 3 inches (7.5 cm) wide.
- Sow to Depth: Place the seeds along the trench floor spaced 2 inches (5 cm) apart. Firmly press them into the soil to ensure good seed-to-soil contact, then cover with 1 to 1.5 inches (2.5 to 3.8 cm) of fine soil.
- Install Support Infrastructure: Erect your trellis, wire cages, or netting immediately after sowing—not after the vines emerge. Waiting until growth begins risks damaging the delicate root systems and fragile young stems.
- Water and Manage Moisture: Water the trench thoroughly with a gentle rose attachment. Keep the soil evenly moist until seedlings emerge in 7 to 14 days, depending on soil warmth.
- Harvest Strategically: Begin checking your vines daily once flowers fade. Use two hands—pinching the vine stem with one hand while gently snapping the pod free with the other—to avoid tearing the hollow, brittle stems.
💡 Pro-Tip: Never pull or yank a pea pod straight off the vine. The stem of a pea plant is surprisingly hollow and brittle; pulling downwards will often strip a 3-inch section of the main vine or snap it entirely, destroying dozens of future flowers. Always use a shearing motion with your thumb and forefinger directly against the pod stem.
4. Common Problems, Pests & Troubleshooting
Even when you time your planting perfectly, peas face environmental and biological hurdles. Powdery mildew (Erysiphe pisi) is the quintessential pea adversary, appearing as a white, powdery fungus on leaves and stems during humid, stagnant spring weather with warm days and cool nights. Prevent this by spacing rows at least 24 inches (60 cm) apart to guarantee maximum air circulation, and water strictly at the base of the plant in the morning so foliage dries rapidly.
Aphids are another frequent visitor, clustering on the tender shoot tips and sucking plant sap. Blast them off with a sharp jet of water from your hose nozzle, or introduce predatory lady beetles (Coccinellidae) to manage the population naturally.
Root rot (Fusarium solani) poses a severe threat in poorly drained soils, causing the base of the stem to turn dark brown and mushy while the plant collapses overnight. If you spot root rot, remove the affected plants immediately and amend the surrounding soil with coarse horticultural sand and compost before planting anything else in that footprint.
⚠️ Important Caution: Avoid applying high-nitrogen commercial fertilizers to your pea beds. Because peas manufacture their own nitrogen via root nodules, excess soil nitrogen encourages rampant, lush green vine growth at the complete expense of flowers and pods. Stick entirely to phosphorus and potassium-rich amendments like bone meal or wood ash if soil tests indicate a deficiency.

5. Frequently Asked Questions
How do I know when sugar snap peas are ready to pick?
Sugar snap peas are ready when the pods are plump, rounded, and filled with well-formed seeds that look like tiny marbles inside, yet the pod surface remains bright green, glossy, and crisp rather than dull or leathery. If you squeeze a pod gently, it should feel firm and snap crisply under light pressure without bending like rubber.
Can you eat pea pods that have gotten too big and woody?
While they won't poison you, overripe shelling or snap pea pods are fibrous, stringy, and unpleasant to chew. However, you do not need to throw them away. Strip out the tough pods and harvest the starchy, mature green peas hiding inside to use them in hearty soups, purees, or stews where their denser texture can break down completely.
Why are my pea pods flat and empty?
Flat, empty pods usually indicate that pollination failed or that the flowers were blasted by unseasonal heat spikes above 85°F (29°C). High ambient temperatures sterilize the pollen inside the blooms, preventing fertilization. Once temperatures normalize, the vine will often resume setting properly filled pods if it has not yet reached the end of its natural life cycle.
Should I harvest the lowest peas first?
Yes. Pods mature from the bottom of the plant upward because those flowers opened first. Harvesting the lower pods promptly sends a physiological signal to the vine to continue funneling energy into upper blossom sets and new pod development, thereby extending your total harvest window by up to two weeks.
Related Guides
- When Are Peas Ready to Pick
- When Are Peas Ready to Be Picked
- When to Harvest Garden Peas
- When Can You Harvest Peas
- When to Harvest Fingerling Potatoes
📋 Table of Contents ▼ Click to expand
Tags:
Keep reading
🌿 Related Plants You Might Like






PlantSavvyWorld
Editorial team
PlantSavvyWorld is an independent botanical education project. Articles are drafted with AI assistance, then edited and checked against university extension services, botanical garden collections and other published horticultural sources.