

How to Repot Fiddle Leaf Fig
Written with AI assistance, edited and checked against horticultural sources.
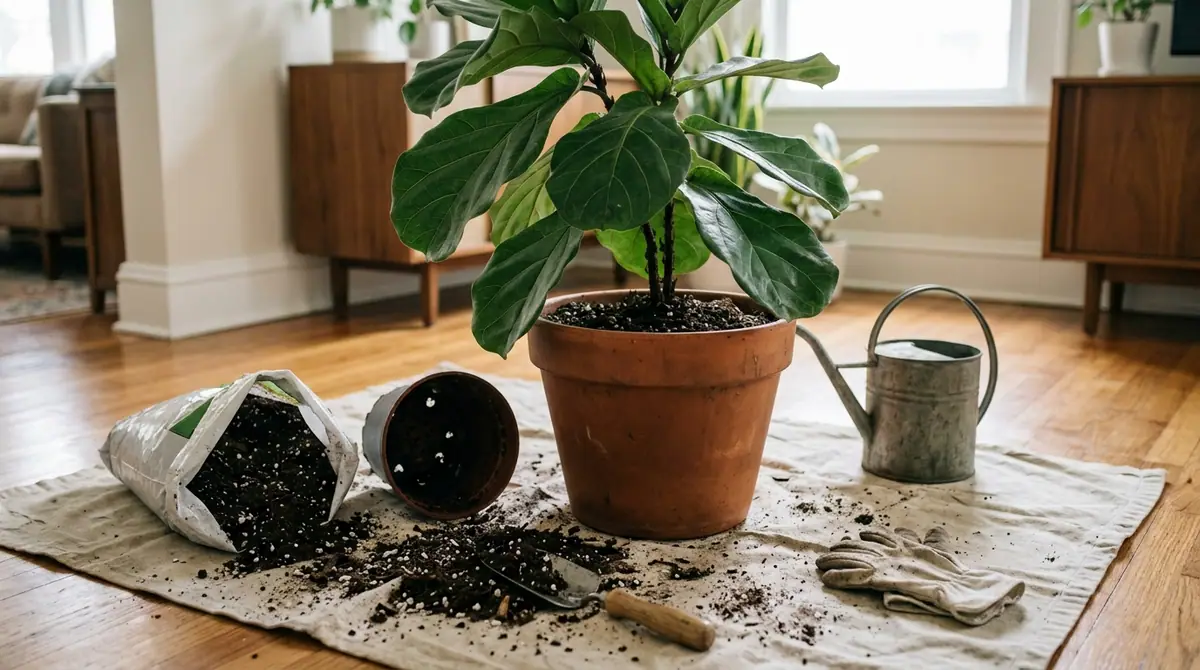
A twelve-foot Ficus lyrata with dramatic, violin-shaped leaves yellowing from the bottom up while thick, white roots coil tightly out of the drainage holes indicates a starving, root-bound, and suffocating plant. Tipping the heavy ceramic vessel on its side often reveals a root ball so densely compacted that it requires a serrated bread knife and twenty minutes of patient teasing to free the living tissue. Repotting a mature Fiddle Leaf Fig is not merely a chore of moving dirt, but a delicate surgical intervention for a tropical tree that demands absolute precision.

1. Botanical Overview & Natural Habitat
The Fiddle Leaf Fig (Ficus lyrata) is an evergreen tree native to the lowland tropical rainforests of western Africa, stretching from Cameroon down to Sierra Leone. In its natural understory and canopy-edge habitat, it frequently begins life as an epiphyte, germinating high in the branches of host trees before sending thick aerial roots down to the forest floor to anchor itself. This dual nature—part epiphyte, part terrestrial giant—explains its complex root physiology.
Taxonomically belonging to the Moraceae (mulberry) family, Ficus lyrata features leathery, heavily veined leaves that can grow up to 18 inches (45 cm) long and 10 inches (25 cm) wide. In the wild, these trees regularly reach heights of 40 to 50 feet (12 to 15 meters). Indoors, growth slows significantly, yet their root systems continue to expand outward and downward in search of moisture and structural stability. Understanding this evolutionary background helps us replicate its native environment—high humidity, dappled yet intense equatorial light, and consistently moist, exceptionally well-aerated soil—inside our homes and offices.
| Parameter | Optimal Condition | Common Mistake | Why It Matters |
|---|---|---|---|
| Soil pH | 6.0 to 6.5 (slightly acidic) | Using heavy native garden soil or alkaline mixes | Nutrient absorption drops drastically outside this range, causing chlorosis. |
| Root Space | 2 to 3 inches (5 to 8 cm) wider pot | Jumping to an oversized pot (e.g., 10" to 16") | Excess wet soil holds moisture too long, directly causing root rot. |
| Light Exposure | Bright, indirect light with 2-4 hours of direct morning sun | Placing in dark corners or direct harsh afternoon rays | Low light stalls root recovery after transplant shock; harsh sun scorches leaves. |
| Ambient Humidity | 50% to 65% relative humidity | Indoor air dropping below 30% in winter | Dry air causes leaf margin browning and weakens overall plant vigor. |
2. Essential Environmental & Care Requirements
Before touching a root or a bag of soil, you must evaluate the environmental conditions your Fiddle Leaf Fig will inhabit post-transplant. Repotting places acute stress on a plant, and deficiencies in light, temperature, or moisture will quickly compound that trauma.
Temperature is the first critical factor. Ficus lyrata thrives in daytime temperatures between 65°F and 85°F (18°C to 29°C), and nighttime temperatures should ideally not drop below 60°F (15°C). Avoid placing your newly repotted tree near drafty windows, air conditioning vents, or heating registers. A sudden temperature fluctuation of more than 10°F (6°C) within a 24-hour period can trigger shock, resulting in abrupt leaf drop.
Light is the engine of root regeneration. Place your fig within 3 to 5 feet (0.9 to 1.5 meters) of an east-facing or unobstructed south-facing window. If natural light is insufficient, supplement with a full-spectrum LED grow light positioned 18 to 24 inches (45 to 60 cm) above the canopy for 12 to 14 hours daily. For broader insights into seedling and plant establishment, consult the detailed horticultural practices outlined by the Royal Horticultural Society.
Watering discipline must shift dramatically after repotting. Because fresh potting mix retains moisture differently than old, degraded soil, stick your index finger a full 2 to 3 inches (5 to 7 cm) deep into the substrate. Water thoroughly only when the top 3 inches (7 cm) are completely dry, saturating the root ball until water runs freely out of the drainage holes. Discard any standing water in the saucer within 15 minutes to prevent anaerobic bacterial growth.
💡 Pro-Tip: When mixing your own soil for Ficus lyrata, combine 60% high-quality peat-based potting soil, 20% coarse horticultural perlite or pumice, and 20% orchid bark. This mimics the loose, aerated canopy debris of its native African rainforests and virtually eliminates the risk of accidental over-saturation.
3. Step-by-Step Cultivation, Feeding & Propagation
Timing is everything. The optimal window to repot a Fiddle Leaf Fig is during the active growing season—late spring through early summer—when daylight hours are long and the plant has maximum metabolic energy to recover. Avoid repotting in late autumn or winter unless it is an absolute emergency (such as severe root rot).
Here is the exact step-by-step protocol for executing a successful transplant:
- Select the Right Vessel: Choose a container that is only 2 to 3 inches (5 to 7 cm) larger in diameter than the current pot. Ensure it features at least one unobstructed drainage hole at the base.
- Prepare the Workspace: Lay down a tarp or drop cloth indoors, or work outside on a shaded patio. Gather your fresh potting mix, clean pruning shears, rubbing alcohol, watering can, and a pair of sturdy gardening gloves.
- De-pot the Specimen: Gently tilt the plant sideways. Tap the sides of the nursery pot or slide a thin trowel around the inner perimeter to break the suction. Support the base of the trunk and ease the root ball out. Never yank the plant by its main stem.
- Inspect and Prune Roots: Use your fingers to gently tease apart the outer root mass if it is root-bound. Inspect for dark, mushy, foul-smelling roots (rot) and clip them away using shears sterilized in rubbing alcohol. Trim any excessively long or circling roots by no more than 20%.
- Establish the Base Layer: Place a breathable mesh screen over the drainage hole to prevent soil loss. Add a 1 to 2-inch (2.5 to 5 cm) layer of fresh, well-draining soil mix to the bottom of the new pot.
- Position the Plant: Place the root ball in the center of the pot. The top of the root ball should sit roughly 1 to 2 inches (2.5 to 5 cm) below the upper rim of the container to allow room for watering.
- Fill and Tamp: Fill the surrounding gap with your soil blend, tamping down gently with your fingers or a blunt tool to eliminate large air pockets. Do not pack the soil down too aggressively; root hairs need oxygen to function.
- Initial Watering: Water the plant deeply until moisture streams from the drainage holes. This settles the soil particles securely around the root architecture. If you notice similar adjustments needed for young garden crops, review our guide on when to repot cucumber seedlings for related techniques on handling tender root systems. Furthermore, ensuring a seamless transition outdoors later can be compared to the best practices found in when to transplant cucumber seedlings: stop root shock & boost growth.
- Post-Repotting Care: Keep the plant in bright, indirect light and withhold all synthetic fertilizers for at least 6 to 8 weeks. The fresh soil contains ample nutrients, and artificial fertilizer salts will burn newly disturbed, vulnerable root hairs.
Feeding should resume only after the plant shows signs of active top growth, typically 60 days post-transplant. Use a balanced, water-soluble liquid fertilizer formulated for foliage plants, diluted to half-strength, applied every 4 weeks during spring and summer. Cease fertilization entirely between October and February.
Propagation of Ficus lyrata can be achieved via stem cuttings during the active growing season. Select a healthy, pencil-thick stem containing at least two leaves, make a clean 45-degree cut using sterilized shears, and submerge the node in either clean water or a moist perlite-peat propagation chamber. Roots typically emerge within 30 to 45 days when kept at a stable temperature of 75°F (24°C). For detailed academic research on plant tissue development and cutting success rates, reference resources provided by the University of Florida IFAS Extension.
4. Common Problems, Pests & Troubleshooting
Even with meticulous care, repotting can trigger physiological responses that mimic distress. Identifying the root cause quickly saves the specimen.
Leaf drop immediately following a transplant is relatively common. If your Fiddle Leaf Fig drops two or three lower leaves within the first 14 days, it is simply shedding old foliage to redirect energy toward root regeneration. However, if leaf drop is rapid, continuous, and accompanied by black or brown spots moving inward from the edges, you are dealing with root rot caused by poor drainage or overwatering. Immediately unpot the plant, rinse the root ball under lukewarm water, excise all decayed tissue with sterilized blades, and repot into fresh, dry, ultra-porous media.
Edema is another frequent issue, manifesting as small, reddish-brown freckles or blisters on the underside of new leaves. This occurs when water uptake by the roots exceeds the transpiration rate of the leaves, causing individual plant cells to rupture. It is entirely cosmetic and resolves on its own once watering schedules become consistent and ambient airflow is improved via an oscillating fan set on low.
Pest pressures increase when plants are weakened by environmental stress. Spider mites, mealybugs, and scale insects frequently target stressed Fiddle Leaf Figs.
⚠️ Important Caution: Never apply heavy horticultural oils or chemical insecticidal soaps to a Fiddle Leaf Fig that has been repotted within the last 14 days. The combination of transplant shock and chemical coatings can cause catastrophic leaf burn and defoliation. Instead, wipe leaves down manually with a soft microfiber cloth dampened with a mild solution of warm water and a drop of castile soap.

5. Frequently Asked Questions
How do I know if my Fiddle Leaf Fig actually needs to be repotted?
Look for physical indicators: roots visibly circling the surface of the soil, thick roots pushing out of the bottom drainage holes, water running straight through the pot without saturating the soil, or a complete stagnation in vertical growth during the peak summer months. Generally, young plants require repotting every 12 to 18 months, while mature specimens over 6 feet tall only need it every 3 to 4 years.
Should I water my Fiddle Leaf Fig immediately after repotting?
Yes. A thorough watering immediately after repotting is essential. It settles the fresh soil particles snugly around the newly adjusted root system, eliminates large air pockets that can dry out delicate root hairs, and helps jumpstart the recovery process. Always ensure excess water drains away completely.
Can I repot a Fiddle Leaf Fig in the middle of winter?
It is strongly advised against. In winter, light levels drop and indoor heating creates dry, stressful conditions. Fiddle Leaf Figs enter a semi-dormant resting phase during these months and lack the metabolic energy required to generate new root growth. Unless the plant is actively dying from advanced root rot, wait until the stable warmth and long daylight hours of late spring arrive.
Why are the leaves turning yellow after I repotted my plant?
Yellowing leaves are the classic symptom of transplant shock or overwatering. When you disturb the root system during repotting, the plant temporarily loses some of its ability to efficiently transport water and nutrients. If the soil remains soggy due to an oversized pot or poor drainage, the roots suffocate and turn yellow. Ensure your potting mix is well-aerated, verify that the top 3 inches (7 cm) of soil dry out between waterings, and give your tree time to adjust to its new environment.
Related Guides
- Moisture Meter for Fiddle Leaf Fig
- How to Prune Fiddle Leaf Fig Plant
- Rooting Hormone for Fiddle Leaf Fig
- When to Repot Cucumber Seedlings
- Split Leaf Philodendron Plant
- Leaf Shine Definition
📋 Table of Contents ▼ Click to expand
Tags:
Keep reading
🌿 Related Plants You Might Like






PlantSavvyWorld
Editorial team
PlantSavvyWorld is an independent botanical education project. Articles are drafted with AI assistance, then edited and checked against university extension services, botanical garden collections and other published horticultural sources.