

How to Keep Worms Alive Red Wriggler Earthworm Raising Guide
Written with AI assistance, edited and checked against horticultural sources.
1. Botanical Overview & Natural Habitat
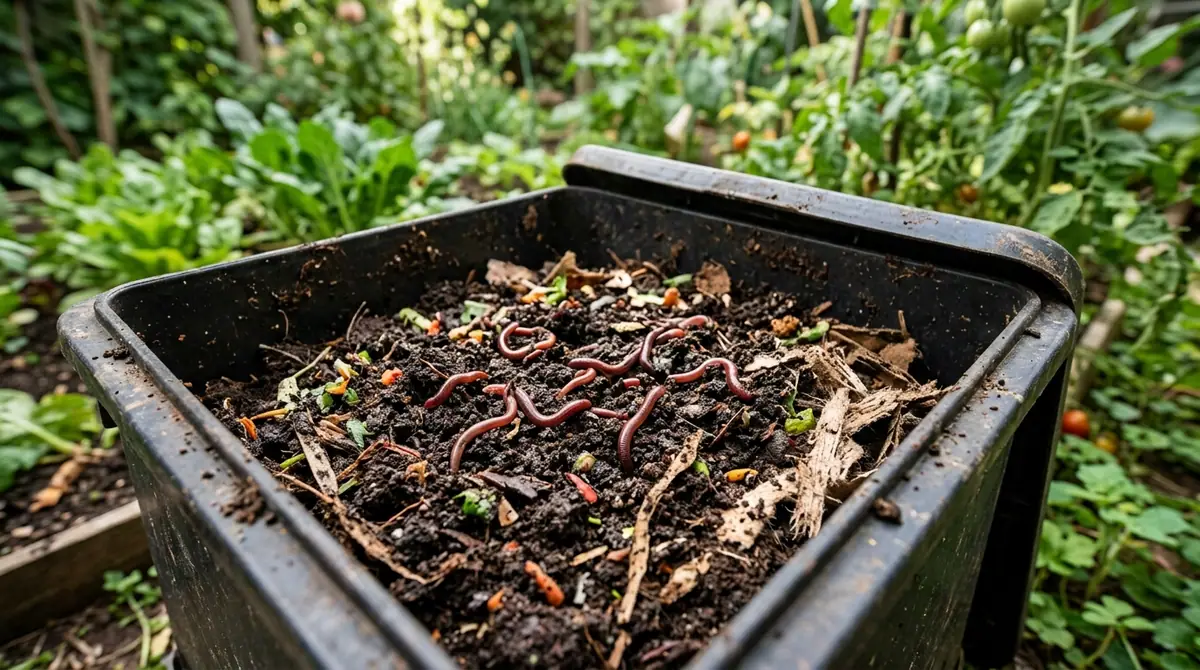
Red wigglers (Eisenia fetida) will crawl straight up the sides of a plastic sorting bin to escape if the bedding is bone dry, the ambient temperature is locked at a sweltering 85°F (29°C), or a pound of fresh citrus peels is dumped directly onto them. If you want to know how to keep worms alive red wriggler earthworm raising guide enthusiasts actually swear by, you have to start by understanding the natural biology of these remarkable epigeic creatures.

Understanding this epigeic nature changes everything about how you house them. Because they are surface-dwellers, they do not need deep containers. A wide, shallow bin measuring 12 to 18 inches (30 to 45 cm) in depth mimics their natural forest-floor habitat far better than a deep bucket. They rely on high humidity, abundant microbial activity, and organic matter to survive. When we translate this to a controlled landscape or indoor composting system, mimicking the woodland floor is the absolute key to keeping your population thriving. For further reading on organic soil management and earthworm biology, consult the comprehensive resources provided by the Cornell University Composting Trash to Treasure Guide.
2. Essential Environmental & Care Requirements
Keeping red wigglers alive long-term is a delicate balancing act of managing five core environmental factors: temperature, moisture, aeration, pH, and carbon-to-nitrogen ratios. Get any one of these wildly out of balance, and your colony will either stage a mass migration or perish.
| Parameter | Optimal Condition | Common Mistake | Why It Matters |
|---|---|---|---|
| Temperature | 55°F – 77°F (13°C – 25°C) | Placing the bin in direct sun or freezing garages | Extreme cold causes dormancy or death; heat above 84°F (29°C) cooks them rapidly. |
| Moisture Level | 70% to 80% (wrung-out sponge) | Drowning the bin or letting bedding dry out | Worms breathe through their skin via cutaneous respiration; dry skin suffocates them. |
| Aeration | 15% to 20% air space in bedding | Using airtight lids or failing to drill side holes | Anaerobic conditions produce toxic methane and hydrogen sulfide. |
| pH Balance | 6.5 to 7.0 (neutral to slightly acidic) | Adding heavy amounts of citrus, onions, or meat | Acidic environments burn their sensitive cutaneous tissue. |
| C:N Ratio | 30:1 (Carbon to Nitrogen) | Dumping pure food waste without shredded paper | Unbalanced ratios trigger foul odors, fruit flies, and overheating. |
Temperature is your primary boundary condition. Red wigglers possess an active metabolic window between 55°F and 77°F (13°C to 25°C). If temperatures drop below 40°F (4°C), their metabolism plummets, feeding stops entirely, and they burrow deep to survive. Conversely, internal bin temperatures exceeding 84°F (29°C)—often caused by a hot composting phase when adding too much nitrogen at once—will liquefy and kill the colony within 24 to 48 hours.
Moisture is equally vital. Red wigglers lack lungs; they absorb dissolved oxygen directly through their moist skin. If your bedding feels like a dry book page, they suffocate. If water pools at the bottom of your bin when you squeeze a handful of bedding, you have created an anaerobic swamp. Aim for the classic "wrung-out sponge" consistency—where only a single drop of water appears when you firmly compress a handful of the material.
💡 Pro-Tip: Always keep a 2-inch (5 cm) dry buffer layer of shredded brown cardboard directly beneath the lid of your worm bin. This acts as a physical barrier that deters fungus gnats and fruit flies while absorbing excess condensation that drips down from the lid.
3. Step-by-Step Cultivation, Feeding & Propagation
Setting up a successful red wiggler system requires patience and methodical preparation. Whether you are maintaining a worm bin for garden vermicompost or producing live bait, follow this step-by-step protocol to establish a bulletproof colony.
- Select and Prepare the Housing Container: Obtain a food-grade plastic storage tote with a capacity of 10 to 20 gallons (38 to 76 liters). Drill thirty 1/4-inch (6 mm) holes around the upper perimeter walls for cross-ventilation, and drill six smaller holes in the base for drainage. Elevate the bin on bricks over a shallow tray to catch any excess leachate.
- Build the Ideal Carbon Bedding: Shred black-and-white newspaper, corrugated cardboard, and dry fall leaves into strips 1 inch (2.5 cm) wide. Fill the bin to a depth of 8 to 12 inches (20 to 30 cm). Saturate the material with non-chlorinated water, then squeeze it thoroughly until it reaches the 75% moisture threshold.
- Inoculate with Red Wigglers: Gently introduce 1 pound (454 g) of active Eisenia fetida—roughly 1,000 individuals—onto the surface of the damp bedding. Leave a bright light overhead for 2 to 3 hours; the worms naturally burrow downward away from the light to escape exposure.
- Acclimate and Feed in Moderation: Allow the worms 48 hours to settle into their new bedding before offering any food. For your first feeding, bury 1 cup (240 ml) of finely chopped vegetable scraps (such as cucumber ends, coffee grounds, and lettuce leaves) 2 inches (5 cm) deep into one corner of the bin. For broader organic waste management principles, review guidelines from the U.S. Composting Council.
- Monitor and Rotate Feeding Zones: Feed your colony once every 4 to 7 days, rotating your burial locations around the bin (e.g., front-left, back-right). Monitor moisture weekly, adding fine mist sprays of water if the surface dries out.
- Harvest the Vermicompost: After 90 to 120 days, the original bedding and food scraps will convert into dark, crumbly, nutrient-rich vermicompost. Stop feeding one half of the bin for 14 days, harvest the finished compost from that side, and shift your feeding routine entirely to the newly cleared side to naturally herd the remaining worms.
⚠️ Important Caution: Never feed red wigglers citrus peels (lemons, limes, oranges), heavily salted foods, dairy products, pet wastes, oils, or meat scraps. Citrus contains d-limonene which is toxic to earthworms, while dairy and meat attract rodents, blowflies, and trigger anaerobic putrefaction that will wipe out your bin.
When transitioning your gardening focus indoors during seasonal shifts, you might also enjoy exploring our Holiday Plants Care Guide: How to Force Poinsettias to Rebloom & Holiday Cacti ID for tips on keeping your botanical investments healthy year-round.
4. Common Problems, Pests & Troubleshooting
Even experienced landscape designers encounter hiccups in vermicomposting systems. Diagnosing issues early prevents total population crashes.
- Mass Migration (Worms Climbing the Walls): If you lift the lid and find hundreds of red wigglers clustered on the upper rim or trying to escape through the ventilation holes, your environment is hostile. Check the pH immediately. If the bin smells like vinegar or ammonia, the bedding has gone sour or acidic. Dump a handful of agricultural limestone or crushed eggshells into the system to buffer the pH, and leave the lid off with a gentle light overhead for an hour to air out trapped gases.
- Foul Odors and Sludge: A healthy worm bin smells like a rich, earthy forest floor after a spring rain. If your bin smells like a rotting garbage dump, you are overfeeding, your moisture level is too high, or you have introduced forbidden foods like dairy or meat. Cease feeding completely for 14 days, mix in 3 handfuls of dry, shredded cardboard to absorb excess moisture, and turn the top 4 inches (10 cm) of bedding to reintroduce oxygen.
- Infestation of Pests (Fruit Flies and Fungus Gnats): Tiny flies buzzing around your bin indicate that food scraps are exposed on the surface. Always bury food scraps at least 2 inches (5 cm) deep beneath the carbon bedding layer. If an infestation takes hold, cover the entire surface of the bedding with a damp burlap sack or a 1-inch (2.5 cm) layer of dry coconut coir to block adult gnats from laying eggs in the decomposing organic matter.
- Sluggish or Dying Population: If your worm count is dwindling and the remaining worms appear limp and unresponsive, the temperature is likely outside their metabolic comfort zone or the bin has dried out. Measure the internal temperature with a digital probe thermometer. Move the bin to a temperature-controlled interior space (aiming for 65°F / 18°C) and mist the bedding lightly.

5. Frequently Asked Questions
How long can red wigglers survive without being fed?
Red wigglers can easily survive for 2 to 3 weeks without any supplemental food additions, provided their bedding has a rich carbon base (such as shredded cardboard and aged compost) that they can consume in the interim. If you are going on vacation for a month, add an extra layer of damp, nutrient-rich brown cardboard and a thick blanket of blended vegetable pulp before you leave.
Can red wigglers survive winter outdoors in cold climates?
No, red wigglers cannot survive freezing ground temperatures. When ambient temperatures drop below 40°F (4°C) for extended periods, outdoor bins will freeze solid, killing the entire colony and their egg cocoons (capsules). If you live in USDA Hardiness Zones 6 or colder, you must bring your worm bins indoors to a basement, heated garage, or utility room by mid-autumn.
What kind of paper is safe to use for worm bedding?
Unbleached corrugated cardboard, plain brown paper bags, black-and-white newspaper, and uncoated egg cartons are entirely safe and make exceptional carbon bedding. Avoid glossy magazines, colored comic book pages, receipt thermal paper, and heavily dyed cardboard boxes, as these materials contain synthetic glues, heavy-metal inks, and plastic coatings that are toxic to earthworms.
Do red wigglers need light to survive?
No, red wigglers are strictly lucifugous, meaning they actively avoid light. They possess specialized light-sensitive receptor cells (photoreceptors) distributed across their anterior segments that allow them to detect UV rays and bright illumination. Exposure to direct sunlight for more than a few minutes dries out their skin and can prove fatal, which is why worm bins must always feature opaque, light-blocking lids.
Related Guides
📋 Table of Contents ▼ Click to expand
Tags:
Keep reading
🌿 Related Plants You Might Like






PlantSavvyWorld
Editorial team
PlantSavvyWorld is an independent botanical education project. Articles are drafted with AI assistance, then edited and checked against university extension services, botanical garden collections and other published horticultural sources.