

How to Place Rocks on a Slope to Stop Erosion
Written with AI assistance, edited and checked against horticultural sources.
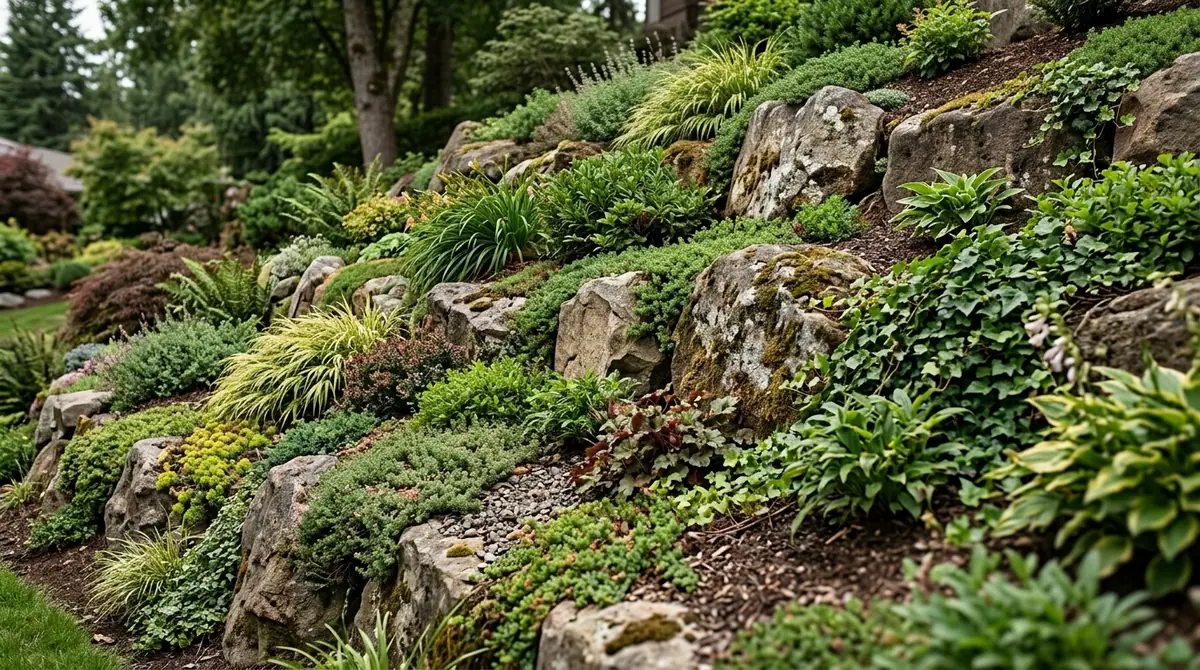

1. Botanical Overview & Natural Habitat
In nature, steep slopes are rarely barren dirt faces; they are dynamic, stable biological communities. Think of an alpine scree slope or a river canyon. In these natural habitats, geological formations—boulders, rock outcrops, and scree—act as structural anchors. They slow down surface runoff, break the kinetic energy of falling rain, and create micro-climates where plants can establish deep, anchor-like root systems.
When we mimic this natural habitat in residential or commercial landscape design, we use rocks not merely as decoration, but as engineering components. The primary botanical challenge of a slope is moisture stress and soil displacement. Water runs off a slope too quickly to hydrate the soil deeply, washing away organic matter and exposing root systems to air and desiccation.
By placing rocks strategically, we create a matrix of terraces, pockets, and swales. This slows water velocity down to a gentle trickle, allowing moisture to infiltrate the root zone. Simultaneously, the stones shade the soil surface, reducing thermal evaporation during scorching summer days when soil temperatures can spike past 95°F (35°C).
To stabilize a slope permanently, the rocks must be paired with erosion-control flora. Species with fibrous, dense root systems—such as creeping juniper (Juniperus horizontalis), switchgrass (Panicum virgatum), and creeping phlox (Phlox subulata)—weave through the rock matrix like living rebar. As these plants grow, their roots bind the soil particles trapped behind the stone terraces. For deep botanical insights on native slope stabilization species, consult the Lady Bird Johnson Wildflower Center.
2. Essential Environmental & Care Requirements
Before hauling a single ton of stone onto your property, you must analyze the environmental parameters of your slope. Soil texture, angle of incline, and precipitation patterns dictate the size of the rocks you need and the depth at which they must be embedded.
Slopes with an incline greater than 30 degrees require engineered rock terracing, whereas gentle slopes of 10 to 15 degrees can often be managed with a scattered riprap approach. The soil beneath the rocks must be assessed for compaction and drainage. Heavy clay soils hold water and can cause a landslide if hydrostatic pressure builds up behind a poorly drained rock wall. Sandy soils, conversely, slip easily and require deep-trench anchor rocks.
| Parameter | Optimal Condition | Common Mistake | Why It Matters |
|---|---|---|---|
| Slope Incline | 15° to 35° for standard dry-stacking | Building on slopes >45° without professional engineering | Steeper grades create massive outward pressure that collapses walls. |
| Rock Weight | 50 to 150 lbs (22.6 to 68 kg) for face stones | Using purely decorative, lightweight pebbles | Light stones wash away in heavy downpours instead of holding soil. |
| Trench Depth | 15% to 20% of total wall height (min. 4–6 inches / 10–15 cm) | Placing rocks directly on top of loose topsoil | Rocks will shift, slide, and destabilize as the soil settles and erodes underneath. |
| Backfill Material | Coarse gravel and crushed stone (3/4 inch / 1.9 cm) | Backfilling solely with dense native clay | Clay traps water, creates hydrostatic pressure, and pushes the wall over. |
| Plant Root Depth | Fibrous root systems reaching 12 to 24 inches (30–60 cm) | Planting shallow annuals or turf grass | Shallow roots fail to anchor the soil layers beneath the stone terraces. |
💡 Pro-Tip: Always calculate your rock volume using a 20% safety margin. Slopes always consume more stone than preliminary surface-area calculations suggest because you must bury the foundational courses and account for irregular stone shapes.
3. Step-by-Step Cultivation, Feeding & Propagation
Stabilizing a slope with rocks is not just stacking stones; it is a sequential construction and planting protocol. Follow these steps meticulously to ensure your landscape stands the test of time and weather.
- Site Assessment and Layout Marking: Clear the slope of weeds and debris. Run mason lines along the contour of the slope (perpendicular to the direction of water flow) to map out your terraced rows. Mark the lowest point of the slope where your primary anchor wall will sit.
- Excavating the Foundation Trench: Dig a trench along your marked line. For every 12 inches (30 cm) of finished wall height, dig down at least 2 to 3 inches (5 to 7.5 cm) into undisturbed subsoil. The trench must be level side-to-side, though it should tilt slightly back into the slope at a 5-to-10-degree batter angle.
- Laying the Base Course: Select your largest, flattest rocks for the bottom trench. Bury the front edge completely. Tamp them down using a rubber mallet or heavy tamper until they are immovably secure. If a rock wobbles even slightly, lift it and pack crushed gravel beneath it until it is rock-solid.
- Installing the Drainage Layer: Behind the first course of rocks, shovel a 4-to-6-inch (10-to-15-cm) wide layer of 3/4-inch (1.9-cm) clean crushed gravel. This acts as a French drain, allowing subsurface water to move downward without pushing the stones forward.
- Stacking Subsequent Courses (Dry-Stacking): Lay the second course of rocks in a running-bond pattern, meaning the vertical joints of the upper stones overlap the centers of the lower stones (like bricks). Ensure every stone touches at least two stones beneath it for maximum friction. Tip each stone slightly backward into the slope.
- Integrating Geotextile Fabric: For slopes prone to severe erosion, lay a sheet of permeable non-woven geotextile fabric against the earthen cut bank behind your gravel backfill before adding the next rock layer. This lets water pass through while keeping soil fines locked in place.
- Backfilling and Soil Settlement: Fill the space behind the rocks with a mix of native soil and coarse sand. Tamp the soil down in 4-inch (10-cm) lifts to prevent future settling. Allow the slope to sit through at least one heavy rain or manually irrigate it for 7 days to settle the soil before final planting.
- Planting Erosion-Control Vegetation: Plant deep-rooted perennials, shrubs, and ornamental grasses directly into the soil pockets between and behind the rocks. Space them 12 to 18 inches (30 to 45 cm) apart. For comprehensive guidance on structural planting density, refer to the Royal Horticultural Society.
- Applying Organic Mulch: Cover all exposed soil between the plants and rocks with a 3-inch (7.5-cm) layer of shredded hardwood bark or coarse arborist wood chips. Shredded bark knits together and resists washing away far better than decorative rounded mulch nuggets.
⚠️ Important Caution: Never build a dry-stack rock wall higher than 3 feet (0.9 meters) on a residential slope without consulting a structural engineer. Unreinforced rock walls higher than this threshold can suffer catastrophic structural failure due to hydrostatic pressure, posing severe safety hazards.
4. Common Problems, Pests & Troubleshooting
Even with careful installation, slopes present persistent maintenance challenges. Here is how to diagnose and correct them before they compromise your entire landscape.
Bulging or Leaning Walls: If your rock courses begin to push outward or sag in the middle, you are experiencing hydrostatic pressure failure. The backfill is retaining too much water. Solution: Carefully dismantle the bulging section, install a perforated 4-inch corrugated pipe wrapped in filter fabric at the base of the trench to divert water away, and replace the backfill entirely with clean, coarse gravel.
Rill Erosion Around Stone Edges: Water carving narrow channels (rills) around the sides of your rock placement indicates that your rock barrier is not wide enough to capture the full sheet flow of water. Solution: Extend your rock installation further out horizontally, tapering the ends into the undisturbed grade of the slope, and plant dense clumps of stiff-stemmed grasses like switchgrass at the flanks.
Root Rot in Pocket Plantings: Plants placed directly behind large boulders may turn yellow and rot if water pools in the depressions created during stone placement. Solution: Prick holes into the soil pockets to improve drainage, or lift the affected plants and amend the planting pocket with a 50/50 mix of coarse horticultural sand and compost.

5. Frequently Asked Questions
How big should rocks be to stop erosion on a steep slope?
For general slope stabilization and riprap applications, rocks should range from 50 to 150 pounds (22.6 to 68 kg), measuring roughly 8 to 18 inches (20 to 45 cm) in diameter. Smaller gravel will simply wash away in a heavy storm, while excessively massive boulders require heavy machinery to place and often create dangerous void spaces beneath them where soil can wash out.
Do I need landscaping fabric behind retaining rocks?
Yes, for most soil types—especially fine silt and clay—permeable non-woven geotextile fabric is essential. It acts as a filter that allows water to pass through into your gravel backfill while retaining soil particles. Without it, heavy rains will wash your topsoil right through the gaps between your rocks, creating sinkholes behind your structure.
How do I keep rocks from sliding down a muddy hill?
You must anchor the base of your installation by digging a foundational trench into solid, unexcavated subsoil. Never place rocks directly on top of loose surface soil or muddy grade. Additionally, tilt every single rock backward into the slope at a 5-to-10-degree angle so gravity pulls them into the hill rather than dragging them down it.
What are the best plants to grow between erosion-control rocks?
The best plants combine deep, fibrous root systems with drought tolerance once established. Excellent choices include creeping juniper (Juniperus horizontalis), bearberry (Arctostaphylos uva-ursi), lavender (Lavandula angustifolia), creeping thyme (Thymus serpyllum), and native ornamental grasses like little bluestem (Schizachyrium scoparium). These species weave their roots through the stone matrix, turning your rock wall into a living, organic retaining system.
Related Guides
📋 Table of Contents ▼ Click to expand
Tags:
Keep reading
🌿 Related Plants You Might Like






PlantSavvyWorld
Editorial team
PlantSavvyWorld is an independent botanical education project. Articles are drafted with AI assistance, then edited and checked against university extension services, botanical garden collections and other published horticultural sources.