

How Do You Seal Terracotta Pots
Written with AI assistance, edited and checked against horticultural sources.
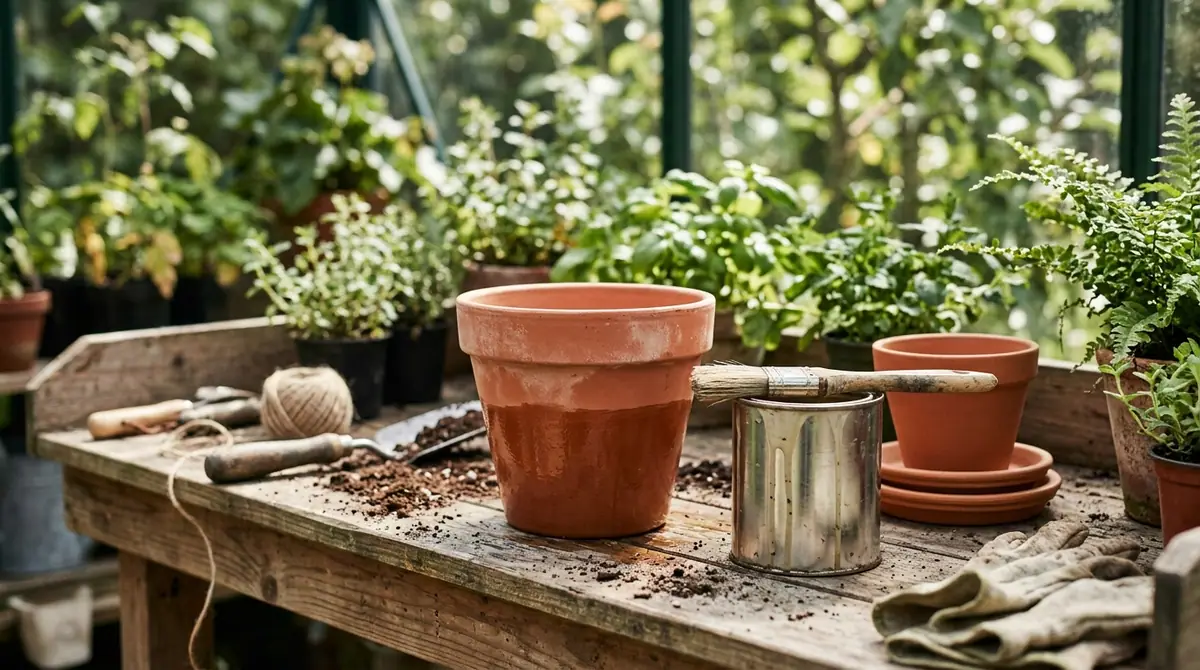
Unsealed terracotta containers can fall victim to winter freeze-thaw cracking when microscopic pores soak up autumn rain, expand by 9% when temperatures drop to 28°F (-2°C), and split the pot open while shearing half the root ball. To help terracotta survive harsh winters, retain moisture for thirsty tropicals, and resist the chalky buildup of mineral efflorescence, understanding how to seal terracotta pots is non-negotiable.
1. Botanical Overview & Natural Habitat

However, when we move these pots indoors, or use them for moisture-loving species that prefer the uniform humidity of How to Grow Plants in Glass Pots, that natural porosity becomes a liability. Unsealed terracotta acts like a wick, pulling moisture out of the potting mix via capillary action and evaporating it into the surrounding air through the container walls. This leads to rapid soil drying, drastic temperature fluctuations in the root zone, and an unsightly white crust of mineral salts (calcium and magnesium) creeping up the exterior. Sealing the interior, the exterior, or both alters this dynamic, transforming a hyper-porous vessel into a controlled micro-environment tailored to your specific botanical specimens—whether you are growing ornamental houseplants or cultivating the Best Tomatoes for Containers and Grow in Pots on a sunny patio.
2. Essential Environmental & Care Requirements
Before applying any sealant, you must evaluate the physiological needs of the plant you intend to house. A desert-adapted succulent or cacti species requires the rapid evaporation provided by raw, unsealed terracotta to prevent root rot. Conversely, ferns, aroids, and heavy-feeding vegetable crops demand consistent moisture levels that unsealed clay simply cannot maintain without daily watering.
| Parameter | Optimal Condition | Common Mistake | Why It Matters |
|---|---|---|---|
| Pot Moisture Content | Bone dry (under 2% internal moisture) | Sealing damp clay | Trapped moisture causes sealants to bubble, peel, and harbor fungal spores. |
| Ambient Curing Temp | 65°F to 85°F (18°C to 29°C) | Sealing below 50°F (10°C) | Low temperatures prevent polymers from cross-linking, resulting in a tacky, failing barrier. |
| Curing Duration | 48 to 72 hours post-application | Planting within 4 hours | Off-gassing solvents and uncured resins can burn delicate root hairs on contact. |
| Drainage Clearance | Unobstructed hole (minimum 0.5 in / 1.3 cm) | Sealing the drainage hole | Traps perched water tables, causing anaerobic root rot within 7 days. |
To dive deeper into the chemistry of clay and moisture retention, consult the comprehensive resources provided by the Royal Horticultural Society.
3. Step-by-Step Cultivation, Feeding & Propagation
When learning how to seal terracotta pots, precision matters. Rushing the prep work ensures your sealant will delaminate within a single growing season. Follow this exact protocol to achieve a durable, professional-grade moisture barrier.
- Scrub and Debris Removal: Submerge the terracotta pot in warm water for 30 minutes to loosen surface dirt and mineral crusts. Scrub the interior and exterior walls using a stiff nylon brush and a 10% white vinegar solution to dissolve alkaline deposits. Rinse thoroughly.
- Complete Dehydration: Place the cleaned pot in a well-ventilated area and allow it to dry completely for a minimum of 48 hours. For accelerated drying, bake the pot in an oven at 200°F (93°C) for 60 minutes to drive out deeply embedded capillary moisture. Let it cool to room temperature before proceeding.
- Select Your Sealing Agent: Choose your barrier based on your aesthetic and functional goals. Use a penetrating silane-siloxane sealer if you want to preserve the matte, raw-clay look while stopping frost damage. Use a low-VOC water-based polyurethane or acrylic sealer if you want to block moisture transpiration entirely for indoor humidity lovers.
- Apply the Interior Barrier (Optional): If planting moisture-sensitive species, paint the inside of the pot with a food-safe epoxy resin or waterproofing membrane. Apply a thin, even coat using a synthetic bristle brush, ensuring you do not pool liquid at the base. Leave the drainage hole clear. Allow this to cure for 24 hours.
- Apply the Exterior Barrier: Working in a dust-free environment, apply a thin coat of your chosen exterior sealer. Brush vertically, then cross-hatch horizontally to fill every microscopic pore. For optimal freeze-proof protection, apply a second coat within 4 to 6 hours while the first coat is still chemically receptive.
- Curing and Off-Gassing: Allow the sealed pot to rest undisturbed in a temperature-controlled space (70°F / 21°C) for 72 hours. This ensures complete polymerization of the sealant resins, preventing chemical leaching into your potting soil.
- Planting and Integration: Fill your prepared pot with a high-porosity potting mix tailored to your plant. Water thoroughly once to test the drainage dynamics before placing the container in its permanent growing location.
💡 Pro-Tip: Always seal the bottom rim and the interior bottom edge of your terracotta pot. This is the exact zone where soil moisture wicks downward, freezing against the saucer and causing the base to snap off during late-winter deep freezes.
⚠️ Important Caution: Never use exterior-grade marine spar varnish or heavy industrial wood sealers on pots destined for edible crops like culinary herbs or fruiting vegetables. These products often contain heavy metal driers and toxic biocides that leach directly into the root zone and accumulate in plant tissues.
4. Common Problems, Pests & Troubleshooting
Even with careful sealing, you may encounter environmental issues over time. Here is how to diagnose and correct them:
- White Chalky Residue (Efflorescence): If minerals still push through your seal, it means moisture is entering through an unsealed section—usually the bottom drainage hole or hairline cracks. Strip the pot, dry it completely, and reapply a penetrating siloxane sealer to the entire surface, including the base.
- Flaking or Bubbling Sealer: This occurs when moisture was trapped inside the clay walls before the sealant was applied. The trapped vapor expands as the pot warms up, pushing the coating off. Scrape away the failing finish with a wire brush, dry the pot thoroughly in the sun for 3 to 5 days, and start the sealing process over.
- Fungal Mold on Interior Walls: If you applied a waterproof interior coating without allowing the potting mix to dry out between waterings, anaerobic conditions can foster white saprophytic molds. Treat the soil with a weak hydrogen peroxide solution (1 part 3% H2O2 to 4 parts water) to oxygenate the root zone, and adjust your watering frequency.

5. Frequently Asked Questions
Can you waterproof terracotta pots so they don't leak?
Yes, by applying a dedicated waterproof masonry sealer or a marine-grade polyurethane to the interior walls. However, completely stopping moisture transmission means your potting soil will retain water much longer, requiring you to reduce your watering frequency by at least 50% to prevent root rot.
What is the best sealant for terracotta pots outdoors?
Penetrating silane-siloxane sealers are the gold standard for outdoor terracotta. Unlike film-forming paints or varnishes that peel under UV exposure, silane-siloxane formulas soak deep into the clay pores, chemically bonding to create a hydrophobic barrier that repels liquid water while still allowing trapped vapor to escape.
Do I need to seal terracotta pots before painting them?
Yes. If you plan to paint the exterior of your terracotta pots with acrylic or latex paints, you must apply a primer or a clear masonry sealer first. Unsealed terracotta draws moisture from the soil straight through the clay walls, causing exterior paint to bubble, crack, and peel within weeks.
Can you use Mod Podge or Elmer's glue to seal terracotta?
No. While Mod Podge is frequently recommended in craft circles, it is water-soluble. When exposed to regular watering or outdoor rain, Mod Podge rehydrates, turns milky white, grows mold, and completely fails within a few watering cycles. Always use proper ceramic, masonry, or polyurethane sealers.
Related Guides
- Problems with Olive Trees in Pots
- Can Peony Be Planted in Pots
- How Do You Measure Flower Pots
- How to Grow Plants in Glass Pots
- Best Tomatoes for Containers and Grow in Pots
📋 Table of Contents ▼ Click to expand
Tags:
Keep reading
🌿 Related Plants You Might Like






PlantSavvyWorld
Editorial team
PlantSavvyWorld is an independent botanical education project. Articles are drafted with AI assistance, then edited and checked against university extension services, botanical garden collections and other published horticultural sources.