

How Do You Plant Walla Walla Onions
Written with AI assistance, edited and checked against horticultural sources.
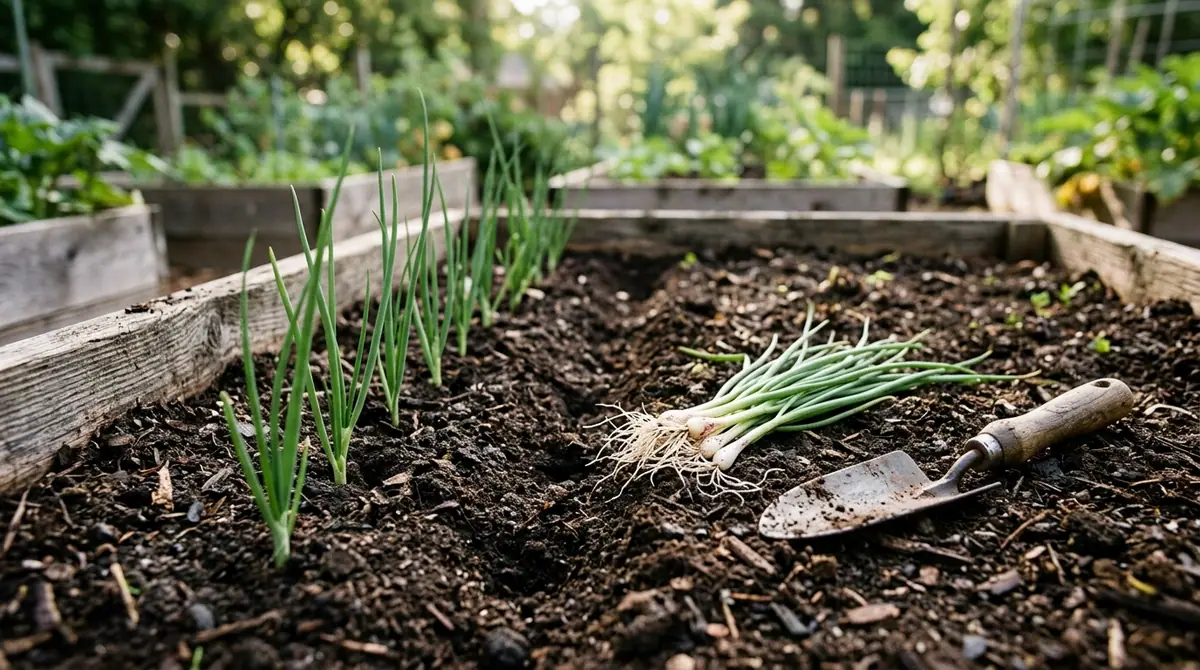
The scent of damp, silty loam mixed with sulfur always takes me back to my first major trials at the Walla Walla sweet onion research plots in southeastern Washington, where I learned that the legendary sweetness of Allium cepa 'Walla Walla' is as much a product of precise horticultural timing as it is of volcanic ash soil. When I first watched seasoned growers handle pencil-thin onion plants—clipping their roots and burying them precisely one inch deep—I realized that treating onions like casual garden seeds leads only to disappointment. If you want those massive, mild bulbs that bruise if you look at them wrong, you need a method rooted in botanical science. Let’s dive into how you plant Walla Walla onions the right way.
1. Botanical Overview & Natural Habitat

Unlike sharp, pungent storage onions bred for high sulfur content and long-term preservation, the Walla Walla onion was selected for its high water content, low pyruvic acid levels, and delicate, paper-thin skins. In its naturalized home of the Walla Walla Valley, the plants thrive in rich, highly permeable alluvial soils deposited by ancestral floods, layered over a sub-strata of volcanic ash. This specific geological profile provides excellent drainage while retaining just enough moisture during the scorching Pacific Northwest summers.
As a monocotyledonous species, Allium cepa features narrow, hollow, tubular leaves (scapes) arising from a compressed, disc-like underground stem called the basal plate. The root system is notoriously shallow and fibrous, rarely penetrating deeper than 12 to 18 inches (30 to 45 cm), with the vast majority of water and nutrient absorption occurring in the top 6 to 8 inches (15 to 20 cm). Because of this shallow root architecture, the plant lacks root hairs, making it a poor competitor against weeds and highly sensitive to surface drought conditions.
Understanding its photoperiodic trigger is vital: Walla Walla onions are triggered to form bulbs as day lengths approach 13 to 14 hours. If planted too late in the spring, the plants will form small, poorly developed bulbs before the root system and foliage have reached the necessary mass to support a large onion. Conversely, planting them in the late fall or very early spring allows the vegetative phase to maximize leaf production—each green leaf represents a ring in the future bulb, meaning more leaves equate to a larger harvest. For those managing diverse cool-season crops, you might find structural parallels when looking at timing for items like When to Plant Brussel Sprouts in Zone 7, where early establishment dictates ultimate yield.
2. Environmental & Care Requirements
To successfully cultivate Walla Walla onions, you must replicate their preferred environmental conditions, balancing soil structure, temperature, and light exposure.
| Parameter | Optimal Condition | Common Mistake | Why It Matters |
|---|---|---|---|
| Soil pH | 6.0 to 6.8 | Highly acidic soil (<5.5) | Low pH locks up essential calcium and magnesium, stunting growth. |
| Soil Texture | Sandy loam to silt loam | Heavy clay without amendments | Dense clay restricts bulb expansion and causes waterlogging and rot. |
| Sunlight | Full sun (6 to 8+ hours daily) | Partial shade | Insufficient light reduces photosynthetic output, resulting in small bulbs. |
| Watering | 1 inch (2.5 cm) per week | Shallow, daily sprinkling | Deep watering encourages downward root growth; shallow water causes root-bound, weak plants. |
| Temperature | 55°F to 75°F (13°C to 24°C) | Extreme heat early in growth | High temperatures prematurely trigger bulbing before foliage is fully developed. |
Soil preparation is the absolute foundation of sweet onion culture. Because these onions possess delicate, low-solids bulbs, they are intensely susceptible to bruising and basal rot if forced to push through compacted earth. Incorporate well-rotted compost or aged manure several weeks before planting to achieve a crumbly, friable texture. Avoid fresh, uncomposted manures; high nitrogen spikes late in the season will cause thick, multi-centered bulbs that do not cure properly.
Nutritional requirements lean heavily toward phosphorus and sulfur during early root development, followed by a steady, moderate supply of nitrogen during the vegetative leaf-expansion phase. However, high sulfur soils—which make onions pungent—are actually counterproductive for Walla Walla sweet onions. The historic soils of their namesake valley are notoriously low in sulfur, which is a primary reason why these onions remain remarkably mild and sweet. If your native garden soil is high in sulfur, your yields may still taste sharper than expected.
Moisture management requires vigilance. The soil must remain consistently moist but never waterlogged. Because onions are roughly 90% water, any dry spell during the bulbing phase will stress the plant, causing the bulb to split or form tough, woody rings. As harvest approaches in mid-summer, watering must be tapered off to allow the outer skins to dry and protect the inner flesh. Similar precision in moisture and timing is required when mapping out other root and bulb crops, such as checking guidelines for When to Plant Carrots in Zone 8a (note: reference applies to cool-season planning).
3. Step-by-Step Cultivation, Feeding & Propagation
While Walla Walla onions can be started from seed, sets, or transplants, purchasing healthy, pencil-thin bare-root transplants (or starting seeds indoors 10 to 12 weeks prior to your last frost) yields the most reliable results for home gardeners.
💡 Pro-Tip: When your onion bundles arrive, don't be afraid to give them a haircut. Trim the green tops down to about 3 to 4 inches (7.5 to 10 cm) and trim the roots back to 1 inch (2.5 cm) before planting. This minimizes transplant shock, prevents the long leaves from flopping over in the wind, and redirects the plant's immediate energy into establishing a robust root system.
Follow this step-by-step sequence to plant your Walla Walla onions successfully:
- Select and Prepare the Planting Site: Choose a location that receives full sun and has well-drained soil. Amend the top 8 inches (20 cm) with organic compost. Rake the bed smooth and create shallow planting furrows spaced 12 to 15 inches (30 to 38 cm) apart.
- Timing the Planting: In USDA Zones 5 through 8, plant onion transplants in early spring as soon as the soil can be worked (typically 4 to 6 weeks before your average last frost date, when soil temperatures reach 45°F / 7°C). In mild winter climates (USDA Zones 7b to 9), plant them in late summer to early fall (August to October) to overwinter as small plants for an extra-early harvest.
- Spacing the Transplants: Set individual onion plants along the furrow spaced 4 to 6 inches (10 to 15 cm) apart if you want to harvest every other plant as a green spring onion. For final full-sized mature bulbs, thin or space them at 6 inches (15 cm) intervals.
- Planting Depth: Place each plant into the soil at a depth of 1 inch (2.5 cm).
⚠️ Important Caution: Never plant onion sets or transplants too deep. If you bury the developing bulb past the basal plate—specifically deeper than 1 inch (2.5 cm)—the bulb will become elongated, distorted, or fail to swell properly, resulting in poor yields and increased susceptibility to rot.
- Firm and Water: Gently firm the soil around the base of each transplant with your fingers to ensure root-to-soil contact. Water the entire bed thoroughly with a gentle stream to settle the soil and eliminate air pockets around the roots.
- Mulch and Maintain: Apply a light layer of clean straw or shredded leaves between the rows to suppress weed competition. Keep the soil evenly moist with 1 inch (2.5 cm) of water per week from rainfall or irrigation.
For growers balancing multiple garden beds, syncing your allium schedule with other delicate greens can optimize your garden layout; many gardeners find success pairing these timelines with recommendations found in guides for When to Plant Bok Choy Zone 7.
As the plants enter their rapid growth phase in late spring, feed them every 3 weeks with a balanced organic fertilizer rich in nitrogen and phosphorus. Stop all fertilization by early summer when the necks begin to soften and the bulbs start pushing out of the soil.
4. Common Problems, Pests & Troubleshooting
Even with meticulous care, Walla Walla onions face several biotic and abiotic challenges. Because of their high sugar and water content, they are prime targets for specific pests and fungal pathogens.
Onion Thrips (Thrips tabaci): These tiny, slender insects feed by rasping the leaf surfaces and sucking out plant juices, leaving behind silvery, bleached patches and distorted leaves. Heavy infestations stunt bulb growth. Manage thrips by washing plants down with a strong jet of water, introducing beneficial predatory insects like lacewings, or applying insecticidal soap or neem oil during early morning hours.
Root Maggots (Delia antiqua): The larvae of the onion fly burrow into the basal plate and roots, causing the leaves to yellow, wilt, and collapse. Prevent maggot infestations by rotating your allium crops annually—never plant onions in the same spot two years in a row—and using floating row covers immediately after planting to prevent adult flies from laying eggs at the soil line. For further reading on pest management strategies in related root crops, consult resources provided by the Oregon State University Extension Service.
Pink Root (Phoma terrestris): A soil-borne fungus that attacks the root system, causing roots to turn pink, shrivel, and die. The plant becomes starved of water and nutrients. Because pink root thrives in warm soils, planting early gives the crop a chance to establish a strong root system before soil temperatures rise. Crop rotation and purchasing certified disease-free transplants are your best defenses.
Bolting (Premature Flowering): If Walla Walla onions experience a prolonged period of cold temperatures (between 32°F and 45°F / 0°C and 7°C) after they have started growing, the plant perceives this as passing through a winter and initiates a flower stalk (scapes). Once a plant bolts, the center of the bulb becomes woody, and it will not store well. Harvest bolted onions immediately and use them fresh in the kitchen.

5. Frequently Asked Questions
Can you grow Walla Walla onions outside of Washington state?
Yes, you can successfully grow Walla Walla onions anywhere that experiences moderate spring temperatures and has suitable soil drainage. They perform exceptionally well across USDA Zones 5 through 8. The key is planting them early enough in the spring so they develop substantial foliage before the long days of summer trigger bulb formation. If grown in extremely hot, southern climates, they may mature much faster and exhibit a slightly sharper flavor profile due to environmental stress.
How do you know when it is time to harvest Walla Walla onions?
You will know your Walla Walla onions are ready for harvest when roughly 50% to 70% of the green tops naturally fall over, turn yellow, and begin to dry out. Gently nudge the soil away from one or two bulbs; if the paper-like outer skins are dry and the bulb feels firm and full-sized, lift the entire crop out of the ground on a dry, sunny day.
Can you store Walla Walla onions for the winter?
No. This is the most common misconception about the cultivar. Walla Walla sweet onions have high water content, low pyruvic acid, and very thin skins, making them entirely unsuited for long-term storage. Unlike pungent storage onions that last for months in a root cellar, harvested Walla Walla onions will typically only keep for 3 to 4 weeks at room temperature or up to 2 months if refrigerated. Eat them fresh, slice them onto burgers, or use them in salads right away.
Should you cut the green tops off Walla Walla onions while they are growing?
Never trim the green leaves of a growing onion plant during its vegetative stage unless you are harvesting the entire plant as a green spring onion. Each green leaf acts as a solar panel feeding the plant; trimming the leaves reduces the plant's photosynthetic capacity, which directly translates to smaller bulbs. The only time you should trim foliage is right before planting transplants to reduce wind resistance and shock, or after harvest when curing the tops away from the bulb.
Related Guides
- How Do You Kill Wild Onions Without Killing Grass
- When to Plant Onions in Southern California (Zone 9 & 10 Planting Calendar)
- How to Grow Plumeria from Seed
📋 Table of Contents ▼ Click to expand
Tags:
Keep reading
🌿 Related Plants You Might Like






PlantSavvyWorld
Editorial team
PlantSavvyWorld is an independent botanical education project. Articles are drafted with AI assistance, then edited and checked against university extension services, botanical garden collections and other published horticultural sources.