

Can Carrots Be Transplanted — Complete Care, Planting & Growth Masterclass
Written with AI assistance, edited and checked against horticultural sources.
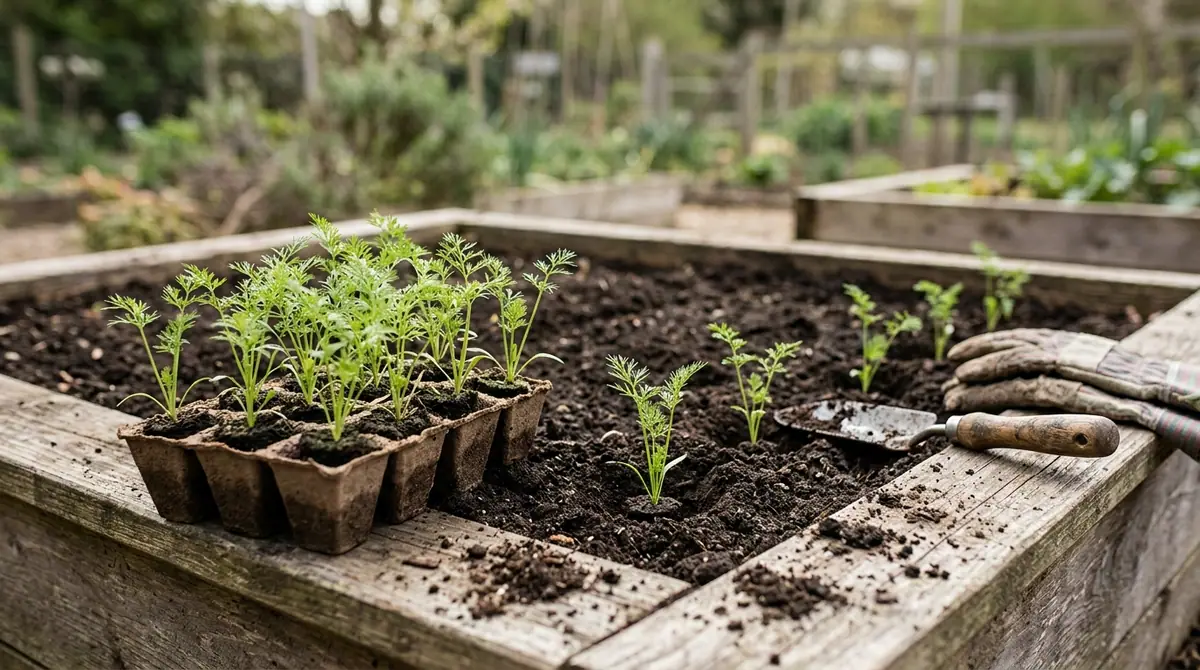
Carrots can actually be transplanted, even though conventional wisdom suggests they prefer direct sowing, and their tiny roots that are already a few inches long can be carefully handled when filling gaps in garden beds.
1. Botanical Overview & Natural Habitat

The core question, "can carrots be transplanted," is met with a nuanced answer. While they can be transplanted, they are not as forgiving as many leafy greens or even some other root vegetables like radishes. Their taproot is their primary storage organ, and any disturbance can lead to forking, stunted growth, or reduced sweetness and texture. However, with careful technique and optimal timing, successful transplanting is absolutely achievable, especially when dealing with young seedlings.
Difficulty Rating: While direct sowing is generally easier and recommended for the most uniform, straight roots, transplanting carrots is rated as Hard. This is primarily due to the sensitivity of the taproot to disturbance.
2. Essential Environmental & Care Requirements
Successfully growing and transplanting carrots hinges on understanding and meeting their environmental needs. Just like any plant, they have specific requirements for light, soil, and moisture.
Soil Preparation and Root Health
Healthy plants start below the ground, and this is doubly true for root vegetables like carrots. The soil is paramount for developing straight, well-formed roots.
- Ideal Soil Composition: Ensure your soil is loose, friable, and free of obstructions. A balanced blend of compost provides essential organic matter and nutrients. For improved drainage and aeration, incorporate perlite or coarse sand. Organic worm castings are a fantastic addition, enriching the soil with beneficial microbes and nutrients without the risk of burning young roots.
- pH Level: Carrots prefer slightly acidic to neutral soil. The Recommended Soil pH is 6.0 – 6.8. A soil test can confirm your pH, and amendments like lime can be used to raise it, while sulfur can lower it.
- Avoiding Compaction: Compacted, waterlogged soils are the enemy of carrot roots. They lead to stunted growth, forking (where the taproot splits into multiple smaller roots), and can create an environment conducive to root rot and fungal pathogens. If you have heavy clay soil, raised beds or amending with significant amounts of organic matter and grit are essential.
- Obstructions: Remove any rocks, large stones, or debris from the planting area. These will deflect the taproot, causing it to fork or grow misshapen.
Environmental & Climate Optimization
Carrots are cool-season crops, but they can be grown in a variety of climates with the right strategies.
- Sunlight: Carrots thrive in sunny locations. Sunlight Requirements are generally Full Sun (6+ hours). However, in regions with intensely hot afternoon sun, Partial Afternoon Shade can be beneficial to prevent stress and bolting, especially during the summer months.
- Temperature: Carrots germinate best in soil temperatures between 50°F and 85°F (10°C to 29°C). For optimal root development, air temperatures between 60°F and 70°F (15°C to 21°C) are ideal. Extreme temperature fluctuations can induce shock, especially in young seedlings or transplanted plants, potentially leading to bolting or reduced root quality. Monitor your USDA Plant Hardiness Zone and consider using row covers for frost protection in early spring or late fall, or shade netting during extreme summer heatwaves to mitigate stress.
- Moisture Management: Consistent moisture is key for germination and root growth, but overwatering is a common pitfall. Deep, infrequent irrigation is the best approach to promote resilient root architecture. Aim to keep the soil consistently moist but not waterlogged. This encourages the roots to grow deeper in search of water, leading to stronger, more robust taproots.
Nutrient Cycling & Organic Fertilization
While carrots don't require heavily fertilized soil, they do benefit from nutrient-rich conditions. The key is to provide the right nutrients at the right time.
- Phosphorus for Roots: Carrots are all about their roots, and phosphorus is the nutrient that fuels root development. Apply a high-phosphorus organic blend (like bone meal or a balanced organic fertilizer with a higher middle number in its N-P-K ratio) during root establishment and bud formation. This is particularly important when transplanting, as it helps the plant quickly establish a strong root system in its new location.
- Potassium for Strength: As plants mature, potassium becomes crucial for overall plant health, cellular wall strength, and drought tolerance. Transitioning to potassium-rich kelp meal as plants mature can significantly enhance their resilience and ability to withstand environmental stresses.
- Avoid Excess Nitrogen: Be cautious with high-nitrogen fertilizers. Too much nitrogen can lead to lush top growth at the expense of root development and can also make the roots more susceptible to pests and diseases.
Here’s a quick summary of the critical parameters for carrot cultivation:
| Parameter | Optimal Condition | Common Mistake | Why It Matters |
|---|---|---|---|
| Soil pH | 6.0 – 6.8 | Soil too acidic or alkaline | Affects nutrient availability; impacts root development and health. |
| Sunlight | Full Sun (6+ hours) | Too much shade | Essential for photosynthesis and energy production for root growth. |
| Soil Texture | Loose, friable, well-drained, free of rocks | Compacted, heavy clay, rocky soil | Allows taproot to grow unimpeded, preventing forking and promoting size. |
| Moisture | Deep, infrequent, consistently moist (not wet) | Overwatering or inconsistent watering | Promotes deep root growth; prevents rot and stress. |
| Temperature | 60-70°F (15-21°C) for root growth | Extreme fluctuations or prolonged heat/cold | Can induce bolting, stress, and poor root development. |
| Fertilization (Early) | Balanced organic, moderate phosphorus | Over-fertilizing with high nitrogen | Encourages root establishment and development. Excess nitrogen favors leaves. |
| Fertilization (Late) | Potassium-rich amendments (e.g., kelp meal) | Neglecting late-stage feeding | Enhances root quality, sweetness, and drought tolerance. |
3. Step-by-Step Cultivation, Feeding & Propagation
While carrots are typically direct-sown, there are situations where transplanting is advantageous, such as starting seeds indoors to get a head start, or filling in gaps in the garden. The key is to handle these tender seedlings with extreme care.
Can Carrots Be Transplanted? Yes, but with specific precautions.
Starting Seeds for Transplanting
- Choose the Right Varieties: Opt for shorter, more compact carrot varieties for transplanting. Varieties like 'Nantes' types or 'Chantenay' tend to be more forgiving than long, slender types.
- Use Biodegradable Pots: Start seeds in peat pots, coir pots, or soil blocks. These can be planted directly into the ground, minimizing root disturbance.
- Sowing Indoors: Sow seeds about 3-4 weeks before your last expected frost date for your region. Plant 2-3 seeds per pot, about 1/4 inch (0.6 cm) deep.
- Provide Optimal Conditions: Keep the soil consistently moist and warm (around 70°F / 21°C). Once germinated, ensure they receive plenty of light, either from a sunny south-facing window or grow lights, to prevent legginess.
- Thin Seedlings: Once seedlings have a true leaf or two, thin them to the strongest one per pot.
The Transplanting Process
- Harden Off: About a week before transplanting, begin hardening off your seedlings. Gradually expose them to outdoor conditions for increasing periods each day. This acclimates them to wind, sun, and temperature fluctuations.
- Prepare the Garden Bed: Ensure the soil is deeply loosened, free of rocks, and amended with compost and perlite, as detailed in section 2.
- Water Thoroughly: Water the seedlings in their biodegradable pots thoroughly an hour before transplanting. This helps the soil ball stay intact.
- Gentle Removal: Carefully remove the biodegradable pot from the seedling. If using regular pots, gently invert the pot while supporting the seedling with your hand, encouraging the root ball to slide out. Try not to touch the delicate roots.
- Planting Depth: Dig a hole slightly larger than the seedling's root ball. Place the seedling in the hole, ensuring the top of the root ball is level with or slightly below the soil surface. If using biodegradable pots, plant the entire pot.
- Spacing: Space transplanted carrots about 2-4 inches (5-10 cm) apart, depending on the mature size of the variety.
- Water In: Gently water the transplanted seedlings immediately to settle the soil around the roots.
- Provide Shade (Optional but Recommended): For the first few days after transplanting, provide a light shade cover (like a shade cloth or even a strategically placed board) during the hottest part of the day. This reduces transplant shock.
- Ongoing Care: Continue with consistent, deep watering, and the appropriate fertilization schedule outlined in section 2.
Propagation (Seed Saving)
While not directly related to transplanting, understanding how carrots propagate is part of a complete masterclass. Carrots are grown as annuals for their roots, but if allowed to overwinter (in milder climates) and then exposed to lengthening days and warming temperatures, they will bolt. The plant sends up a flowering stalk, producing umbels of small white flowers. These flowers are cross-pollinated by insects. After pollination, the seeds develop. Once the seed heads turn brown and dry, they can be harvested, threshed, and stored.
💡 Pro-Tip: When transplanting, if the taproot looks excessively long or has a slight bend, you can sometimes carefully prune the very tip of the taproot (no more than 1/4 inch or 0.6 cm). This can sometimes encourage more lateral root development and a slightly straighter main root, though it is a risky maneuver that should only be attempted on very healthy, vigorous seedlings.
4. Common Problems, Pests & Troubleshooting
Even with the best care, you might encounter issues. Understanding these common problems can help you intervene effectively.
Common Mistakes
- Overwatering and Poor Drainage: This is a very common mistake, especially in containers or in heavy soil. It can lead to root rot, fungal diseases, and stunted growth. Always check the top 2 inches (5 cm) of the substrate before hydrating. The soil should feel dry to the touch before watering again.
- Compacted Soil: As mentioned, this is a major cause of forked, misshapen roots. If your soil is heavy, amend it liberally or opt for raised beds.
- Rocky Soil: Rocks will deflect roots, causing them to split and fork. Ensure your planting area is free of debris.
- Inconsistent Watering: This can cause roots to split as they experience periods of stress and rapid growth. Aim for deep, consistent moisture.
- Incorrect Spacing: Overcrowded carrots compete for resources, leading to smaller roots. Under-crowded plants may not be as productive.
- Temperature Extremes: Sudden heat waves or frost can stress the plants. Use shade cloth or row covers as needed.
Pests
- Carrot Rust Fly: The larvae of this fly bore into the roots, creating tunnels and causing an unpleasant taste. Signs include wilting foliage and an earthy smell. Row covers are the best preventative measure. Companion planting with rosemary or onions can also deter them.
- Aphids: These small insects can infest the foliage, weakening the plant. They can often be washed off with a strong jet of water or treated with insecticidal soap.
- Cutworms: These larvae chew through the stems of young seedlings at the soil line. Using collars around seedlings or dipping them in a diluted pesticide can help.
Diseases
- Root Knot Nematodes: Microscopic worms that cause galls (swellings) on the roots, stunting growth. Crop rotation and planting resistant varieties are key.
- Fungal Diseases: Various fungi can cause damping off (seedlings collapsing at the soil line) or root rots, particularly in wet conditions. Ensuring good drainage and avoiding overwatering are crucial.
⚠️ Important Caution: When transplanting carrots, the biggest risk is disturbing the taproot. If you see significant wilting or yellowing of the leaves after transplanting that doesn't improve with watering, the root system may have been too severely damaged to recover. This is why starting in biodegradable pots or being exceptionally careful with handling is paramount.

5. Frequently Asked Questions
Can I transplant carrots from a seed tray?
Yes, you can transplant carrots from a seed tray, but it's crucial to do so when they are very young, ideally with only 2-3 true leaves. Handle them with extreme care to avoid damaging the delicate taproot. Using biodegradable seed starting pots makes this process much easier as they can be planted directly into the garden, minimizing root disturbance.
What's the biggest mistake people make when transplanting carrots?
The most common mistake when managing transplanted carrots is overwatering and poor container drainage, or overwatering once they are in the ground. Carrots need consistent moisture, but they absolutely abhor soggy feet, which can lead to root rot and forking. Always check the top 2 inches (5 cm) of substrate or soil before hydrating.
How long does it take for transplanted carrots to show growth?
With proper temperature, adequate light, and balanced organic feeding, you can expect to see noticeable vigor and healthy development in transplanted carrots within 10 to 14 days. This indicates that the root system has begun to establish itself in its new environment.
Is it okay to plant carrots closer together if I transplant them?
While transplanting might make you think you can squeeze them in, it's best to stick to the recommended spacing for your chosen variety, typically 2-4 inches (5-10 cm) apart. Overcrowding will still lead to competition for light, water, and nutrients, resulting in smaller, less desirable roots, even if they are transplanted. Focus on providing ample space for individual root development.
Should I fertilize carrots after transplanting?
Yes, it's beneficial to fertilize transplanted carrots. Apply a balanced organic fertilizer with a moderate amount of phosphorus shortly after transplanting to encourage root establishment. You can then follow up with a potassium-rich amendment like kelp meal as the plants mature to support robust root growth. Avoid high-nitrogen fertilizers.
What are the best companion plants for carrots?
Yes, companion planting is highly recommended for carrots. Aromatic companion herbs such as basil, thyme, rosemary, and marigolds naturally deter destructive pests like the carrot rust fly while attracting beneficial pollinators and predatory insects to your garden. They can also help improve soil health and nutrient uptake.
For more expert advice and to explore other gardening topics, check out our other guides:
- When to Plant Carrots in Zone 8a
- Complete Guide to Winter Vegetable Harvesting for Beginners
- Complete Garden Tool Maintenance Checklist for Winter
- The Complete Guide to Coleus Plants: 50+ Varieties, Care, Propagation & Landscaping
For further reading and to delve deeper into horticultural science, consult these authoritative resources:
Tags:
🌿 Related Plants You Might Like






PlantSavvyWorld
Editorial team
PlantSavvyWorld is an independent botanical education project. Articles are drafted with AI assistance, then edited and checked against university extension services, botanical garden collections and other published horticultural sources.