

Complete Garden Tool Maintenance Checklist for Winter
Written with AI assistance, edited and checked against horticultural sources.
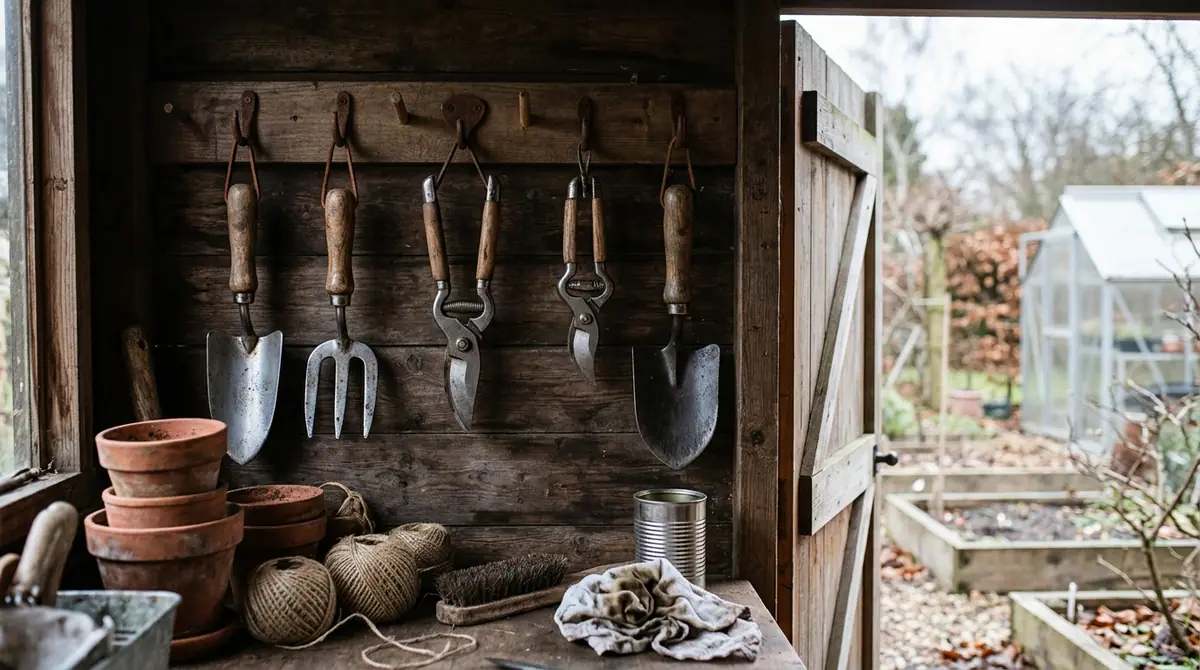
The sharp snap of frozen clay against the tines of my digging fork still rings in my ears from a bitter late-November afternoon three winters ago, when I pulled my tools straight from the wet shed and locked the door until April. When spring finally broke with temperatures hovering persistently around 45°F (7°C), I walked out to a graveyard of rust: my favorite stainless steel grafting knife was pitted with oxidation, the wooden handle of my spade had shrunk and cracked where the grain dried unevenly, and my pruners were so gummed up with dried plant sap and moisture that they chewed rather than sliced through my heritage rose canes.
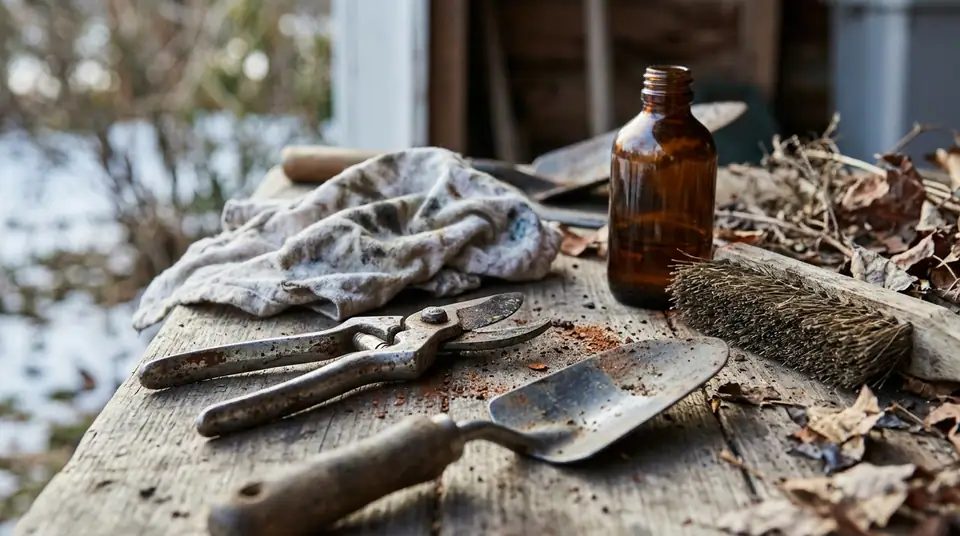
1. Botanical Overview & Natural Habitat
To understand why garden tools deteriorate so rapidly in storage, we must examine the intersection of metallurgy, organic residues, and environmental microclimates. Every time we prune a diseased tomato vine, slice through the resinous stem of a Pinus sylvestris, or turn over rich garden loam, our tools collect a microscopic slurry of plant sap, organic acids, soil particles, and moisture.
From a botanical perspective, plant saps are complex solutions containing tannins, sugars, and organic acids with pH levels often ranging from 3.5 to 5.5. When left on carbon steel or even low-grade stainless steel surfaces, these acidic residues actively etch the metal over a period of 14 to 30 days, creating microscopic pitting. When winter temperatures drop below 32°F (0°C), any moisture trapped inside these pits or within the microscopic pores of wooden handles undergoes volumetric expansion—water expands by approximately 9% as it freezes. This creates micro-fractures in both the metal grain and the wood cells, structural damage that compounds exponentially every winter season.
Understanding the habitat of your tool shed is equally critical. A standard unheated garden shed in USDA Hardiness Zones 4 through 7 experiences wild relative humidity swings, often exceeding 85% during winter thaws while temperatures hover around 35°F (2°C). This specific thermal envelope accelerates galvanic corrosion and rust formation at a rate nearly three times faster than dry indoor storage at a stable 65°F (18°C).
| Parameter | Optimal Condition | Common Mistake | Why It Matters |
|---|---|---|---|
| Storage Temperature | 50°F to 70°F (10°C to 21°C) | Storing in unheated sheds with freezing, fluctuating temps | Prevents freeze-thaw expansion of trapped moisture in wood and metal |
| Relative Humidity | Below 50% | Storing in damp basements or unsealed sheds (>85% RH) | Stops airborne moisture from condensing on bare metal and causing oxidation |
| Blade Coating | Light mineral oil or boiled linseed oil | Leaving bare metal or using cooking oils | Cooking oils go rancid and gummy; mineral oil creates an airtight moisture barrier |
| Handle Moisture Content | 12% to 15% | Exposing dry wood to extreme winter dryness without oiling | Prevents the wood grain from splitting, shrinking, and loosening from metal sockets |
2. Essential Environmental & Care Requirements
Preparing your inventory for the winter dormancy cycle requires a controlled environment and specific mechanical inputs. Before executing your complete garden tool maintenance checklist for winter, ensure you have gathered the proper supplies: stiff-bristled wire brushes, coarse steel wool (Grade #0000), a biodegradable degreaser, sharpening stones (coarse 400-grit and fine 1000-grit), food-grade mineral oil, boiled linseed oil, and a bucket of clean builder's sand mixed with 32 fluid ounces (950 ml) of mineral oil for storage.
Environmental control is your primary defense line. Tools should ideally be brought indoors into a basement, workshop, or utility room where ambient relative humidity remains strictly below 50%. If indoor storage is impossible, your winter storage container or cabinet must be weather-stripped and equipped with rechargeable silica gel desiccant packs, changing them out when humidity indicator cards rise above 40%.
Wood preservation requires distinct attention. Hickory, ash, and white oak handles dried below 10% internal moisture content will inevitably split under stress. Conversely, unchecked moisture breeds fungal hyphae that cause dry rot. Treating wooden grips with boiled linseed oil fills the cellular lumen of the xylem and phloem remnants in the lumber, rendering the material hydrophobic while preserving its natural flexural strength.
💡 Pro-Tip: Skip the expensive commercial tool-dip products and make your own winter storage medium by filling a five-gallon (19-liter) bucket with dry masonry sand mixed with one quart of boiled linseed oil. Plunging your cleaned shovels, trowels, and cultivators into this oily sand mixture keeps them completely oxygen-free, scours away micro-rust, and lubricates the metal in a single motion all winter long.
3. Step-by-Step Cultivation, Feeding & Propagation
Treat your tool maintenance protocol with the same rigorous precision you apply to propagating rare botanicals. Execute this sequence over a single weekend in late November or early December, ensuring every implement is addressed before the ground freezes solid.
- Initial Sorting and Triage: Sort your entire inventory into three distinct categories: handheld cutting tools (pruners, loppers, shears), long-handled digging tools (spades, forks, hoes), and mechanical or motorized equipment (mowers, tillers, trimmers). Discard any handles splintered beyond structural repair and tools with cracked sockets.
- Coarse Debris Removal: Scrape away dried clay, root masses, and caked organic matter using a stiff wire brush and a wooden putty knife. For stubborn soil baked onto spade blades, soak the metal portion in a basin of warm water mixed with dish soap for 45 to 60 minutes, then scrub thoroughly and dry immediately with a microfiber cloth.
- Resin and Sap Dissolution: Saturate a rag with a citrus-based degreaser or denatured alcohol and wipe down all cutting blades. Scrub sticky bud scales and pine resins off pruner pivot joints and blades until the bare metal is entirely free of gummy plant exudates.
- Disinfection and Pathogen Eradication: To prevent overwintering bacterial spores (Pseudomonas syringae), fungal conidia, and viral particles from transferring to next spring's seedlings, wipe all metal surfaces with a 10% household bleach solution (1 part bleach to 9 parts water) or quaternary ammonium disinfectant. Leave the solution on for exactly 10 minutes, then rinse with clean water and dry completely to prevent immediate flash rusting.
- Rust Abatement: Inspect metal surfaces for orange oxidation pitting. Rub active rust spots vigorously using Grade #0000 steel wool lubricated with a few drops of mineral oil until the pitting is clear and the surrounding steel shines.
- Precision Blade Sharpening: Secure your pruners, loppers, and shears in a bench vise. Maintain the original factory bevel angle—typically between 20 and 30 degrees—by stroking a diamond sharpening stone or a medium-grit whetstone smoothly across the bevel. Finish with a 1000-grit stone to create a razor-sharp, burr-free cutting edge. Test the edge on a single layer of heavy-duty craft paper; it should slice cleanly without tearing.
- Mechanical Lubrication: Apply two drops of lightweight machine oil or 3-in-1 oil directly to the pivot bolts, springs, and locking mechanisms of all cutting tools. Open and close the handles 10 to 15 times to draw the lubricant deep into the pivot channel, then wipe away excess oil that could otherwise attract dust and grit.
- Wood Conditioning: Sand down any rough, splintered wooden handles with 120-grit sandpaper until completely smooth. Pour a quarter-sized amount of boiled linseed oil onto a clean rag and massage it vigorously into the wood grain until saturated. Allow it to cure indoors for 24 hours before wiping away any tacky residue.
- Final Staging and Storage: Pack your long-handled tools blade-down into your oil-and-sand bucket, hang pruning shears in the open position to preserve spring tension, and store all items in your designated temperature-stable winter location.
⚠️ Important Caution: Never use boiled linseed oil rags and toss them carelessly into a pile or trash can. Linseed oil undergoes an exothermic drying process as it oxidizes, generating enough heat to spontaneously combust within 4 to 8 hours. Always lay used rags flat outdoors to dry completely on a non-flammable surface before disposal, or store them submerged in a sealed water-filled metal container.
4. Common Problems, Pests & Troubleshooting
Even with careful end-of-season preparation, winter storage environments can present challenges. Recognizing the early warning signs of tool degradation prevents catastrophic failures during the bustling spring planting window.
If you inspect your tool storage area in January and discover a velvety orange coating creeping across your carbon steel spades, your storage zone's relative humidity has spiked above critical thresholds. Immediately isolate the affected tools, scrub away the active oxidation with steel wool and vinegar, and relocate your storage cache to a drier interior wall away from concrete foundations, which wick and release ground moisture continuously.
Stiff or locked pruning shears are another frequent winter grievance. If the pivot bolt has seized due to dried organic residue mingling with old oil, never force the handles apart; you will snap the bypass blade or shear the pivot pin. Instead, submerge the joint area in penetrating oil (such as WD-40 Specialist or liquid wrench) for 12 to 24 hours. Gently warm the metal with a household hair dryer on high heat for 3 minutes to expand the outer socket slightly before attempting to gently wiggle the handles open.

5. Frequently Asked Questions
Can I use vegetable oil or olive oil to protect my garden tool blades over the winter?
No, you should never use cooking oils for tool preservation. Vegetable and olive oils are organic lipids that oxidize, polymerize, and turn into a sticky, varnish-like gum within 30 to 60 days. This sticky residue attracts dirt, traps ambient moisture against the steel, and accelerates deep pitting rust. Always use mineral oil, linseed oil, or specialized synthetic tool lubricants.
How do I fix loose wooden tool handles that wiggle in their sockets?
Wooden handles loosen during winter storage because the wood dries out and shrinks inside the metal ferrule or socket. To fix this, submerge the tool head in water for 24 hours to swell the wood fibers temporarily. Then, drive a specialized metal ring wedge or wood wedge deeper into the end grain, or treat the joint with a commercial wood-swell liquid designed to lock handles permanently in place.
Is it necessary to disassemble pruners completely for winter maintenance?
While a complete disassembly down to the individual spring, nut, and bolt is ideal for high-end Japanese bypass pruners (like Felco or Okatsune), it is not strictly mandatory for every tool. If your pruners open smoothly, show no grit in the pivot, and can be thoroughly cleaned and oiled from the outside, an annual disassembly every two to three years is sufficient. However, if you pruned diseased plants during the previous season, full disassembly is required to sanitize internal contact surfaces.
What is the best way to remove heavy rust from antique or neglected garden tools?
For heavily rusted vintage tools, submerge the metal components in a non-toxic, food-grade molasses-and-water bath (ratio of 1 part molasses to 9 parts water) for 3 to 5 days. The natural chelating agents in the molasses eat away the iron oxide without harming the underlying sound metal. Alternatively, use a commercial rust-dissolving gel containing phosphoric acid, scrubbing with a brass-bristle brush before neutralizing the reaction with baking soda and water, drying, and oiling.
Related Guides
- 10 Best Low Maintenance Front Yard Landscaping Ideas for Small Spaces
- Complete Guide to Winter Vegetable Harvesting for Beginners
- Will a Lemon Tree Survive Winter
- How to Heat Greenhouse in Winter
- How to Protect Backyard Fruit Orchard from Winter Frost
📋 Table of Contents ▼ Click to expand
Tags:
Keep reading
🌿 Related Plants You Might Like






PlantSavvyWorld
Editorial team
PlantSavvyWorld is an independent botanical education project. Articles are drafted with AI assistance, then edited and checked against university extension services, botanical garden collections and other published horticultural sources.