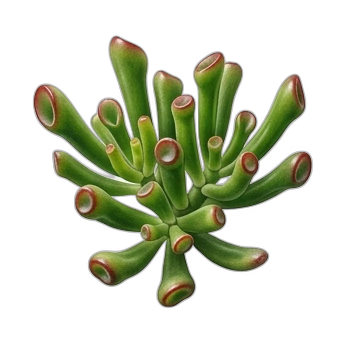
Aloe Vera
Aloe barbadensis miller

The distinct, medicinal tang of fresh leaf juice hit the back of my throat before I even registered the slip. I was standing in my glasshouse in early October, slicing open a massive, two-pound Aloe barbadensis miller leaf to harvest fresh gel for a gardener's stubborn kitchen burn, when my pruning shears bit too deep, piercing the yellowish, bitter aloin layer just beneath the green rind. That sharp, medicinal lesson taught me early in my botanical career what textbooks often gloss over: true Aloe vera is a finely tuned desert survivor that demands absolute respect for its physiological boundaries, whether you are harvesting its gel or coaxing it through a Northern winter.
1. Botanical Overview & Natural Habitat

+--------------------------------------------------------------------------+
 ANATOMICAL CROSS-SECTION OF ALOE VERA LEAF
+--------------------------------------------------------------------------+

 [ Outer Cuticle & Epidermis ] -> Tough, protective green rind
 |
 v
 [ Chlorenchyma & Vascular Bundles ] -> Produces and transports food
 |
 v
 [ Yellow Sap (Aloin) ] -> Bitter latex layer; protective deterrent
 |
 v
 [ Inner Parenchyma (Gel) ] -> Clear, mucilaginous water-storage cells

+--------------------------------------------------------------------------+
The true evolutionary origin of Aloe barbadensis miller is somewhat obscured by centuries of human cultivation, but botanical consensus points to the Arabian Peninsula, specifically modern-day Oman and Yemen, alongside parts of North Africa and the Sudan. In these native ecosystems, plants endure punishing solar radiation and erratic precipitation patterns. To survive, Aloe vera utilizes Crassulacean Acid Metabolism (CAM) photosynthesis. Unlike standard plants that open their stomata during the heat of the day to take in carbon dioxide—risking massive water loss—Aloe vera keeps its stomata tightly sealed until nightfall. This physiological adaptation allows the plant to sequester carbon with minimal transpirational loss, storing it as malic acid until daylight triggers the photosynthetic machinery.
The root system is shallow, fibrous, and spreading. Instead of driving a deep taproot into the substrate, Aloe roots deploy a wide horizontal net designed to capture the briefest morning dew or the lightest desert flash flood before surface evaporation claims the moisture. This structural reality dictates every decision we make regarding container selection, soil density, and watering intervals in a cultivated environment.
2. Essential Environmental & Care Requirements
Replicating an arid Arabian habitat inside a modern home or landscape requires strict adherence to specific parameters. Fail in these measurements, and the plant's cellular structure collapses into rot or etiolation.
| Parameter | Optimal Condition | Common Mistake | Why It Matters |
|---|---|---|---|
| Light | 6–8 hours of bright, direct sunlight daily | Placing deep within a windowless office or north-facing room | Low light forces weak, vertical stretching (etiolation) and structurally compromises cell walls. |
| Temperature | 55°F to 80°F (13°C to 27°C) | Exposing to frost or sustained temperatures below 40°F (4°C) | Water-engorged cellular vacuoles rupture when frozen, turning the plant to mush instantly. |
| Soil pH | 6.0 to 7.0 (slightly acidic to neutral) | Using heavy, moisture-retaining organic garden loam | Dense soils trap moisture around the shallow root zone, suffocating root hairs and inviting fungal pathogens. |
| Watering | Soak-and-dry method when soil is 100% dry | Giving small, frequent sips of water every few days | Shallow watering encourages weak surface roots instead of deep structural anchoring. |
Sunlight is the primary driver of compact, robust growth. If your Aloe vera begins to lean dramatically toward the light source or the new leaves emerge thin, pale, and flattened rather than plump and triangulated, the plant is starving for photons. West- or south-facing windowsills are ideal indoor locations. Outdoors, ensure plants receive direct morning sun, though afternoon shade is occasionally beneficial in extreme desert zones where ambient temperatures exceed 100°F (38°C) to prevent sunscorch.
💡 Pro-Tip: If you are moving your indoor Aloe outside for the summer growing season, do not shock it with direct midday sun immediately. Acclimate the plant gradually over 14 days by offering morning sun only, increasing exposure by 45 minutes every second day until it sits comfortably in full sun. This prevents irreversible sunburn, which manifests as bleached, papery white patches on the upper leaf surfaces.
Soil composition must mimic coarse, rocky desert earth. A standard commercial potting mix will hold too much water and suffocate the roots. I formulate my own blend using two parts coarse horticultural sand or pumice, one part expanded clay pebbles, and one part organic cactus-and-succulent compost. This guarantees rapid drainage, ensuring water passes entirely through the root zone within 10 seconds of application.
3. Step-by-Step Cultivation, Feeding & Propagation
Propagation of Aloe vera is most efficiently achieved through division of basal offsets, commonly known as "pups." These miniature rosettes emerge from underground lateral stems around the perimeter of the mother plant. When managed correctly, you can multiply a single specimen into a thriving colony within a single growing season.
Follow this exact step-by-step propagation protocol:
- Select a Mature Mother Plant: Choose a healthy, disease-free parent plant that has produced pups measuring at least 3 to 4 inches (7.5 to 10 cm) in height with their own distinct root nodes visible at the base.
- Unpot and Inspect: Gently tip the container on its side, tap the rim to loosen the root ball, and slide the plant out. Shake away excess soil from the roots to expose the connection point between the parent plant and the pup.
- Sever the Offsets: Using a sterile, sharp blade (wiped with isopropyl alcohol), cut the pup away from the mother plant. Ensure you retain a portion of the shared stem and as many independent roots as possible on the pup.
- Cure the Wound: Place the freshly cut pups in a warm, dry, shaded location for 3 to 5 days. This crucial waiting period allows the wound site to form a protective, dry callus, preventing soil-borne bacteria and fungi from entering the moist interior tissue.
- Plant in Dry Medium: Fill a 4-inch (10 cm) container with your dry, coarse cactus mix. Insert the calloused base of the pup into the soil at the exact depth it grew previously—do not bury the leaves, or stem rot will occur.
- Withhold Water: Keep the newly potted pup completely dry for the first 10 to 14 days. This forces the plant to push out exploratory roots in search of moisture. After two weeks, give it a thorough, deep watering, then allow the soil to dry completely before repeating.
Feeding Aloe vera requires a light hand. In its natural habitat, nutrients are scarce. Over-fertilizing leads to rapid, weak leaf production that easily snaps under its own weight and burns the delicate root tips. Feed precisely once in early spring and once in mid-summer using a balanced, water-soluble fertilizer diluted to one-quarter strength (such as a 10-10-10 formulation). Never fertilize in fall or winter when the plant enters a state of natural dormancy. For deeper botanical insights into succulent care guidelines, consult the Royal Horticultural Society.
4. Common Problems, Pests & Troubleshooting
Even with meticulous care, environmental shifts or pest introductions can stress your Aloe. Diagnosing the root cause early saves the specimen.
+--------------------------------------------------------------------------+
 ALOE VERA DIAGNOSTIC DECISION TREE
+--------------------------------------------------------------------------+

 [ Symptom: Leaves are soft, translucent, and collapsing at the base ]
 |
 +---> Cause: Overwatering & Root Rot
 | Action: Unpot immediately, trim dead roots, let dry, repot.

 [ Symptom: Leaves are thin, curled inward, and deeply wrinkled ]
 |
 +---> Cause: Severe Underwatering
 | Action: Submerge pot in water for 30 minutes, drain fully.

 [ Symptom: Cottony, white, sticky masses in leaf axils ]
 |
 +---> Cause: Mealybug Infestation
 | Action: Dab spots with a cotton swab soaked in rubbing alcohol.

+--------------------------------------------------------------------------+
Root rot is the single greatest killer of cultivated Aloe. It occurs when moisture remains trapped around the root system, causing cells to burst and inviting anaerobic bacteria. The leaves lose their turgor pressure, turning a sickly, translucent yellow-green before becoming mushy at the soil line. If caught early, unpot the plant, wash the root system under lukewarm water, use sterile shears to carve away all black, rotting tissue down to healthy white or pale pink stem material, dust the cuts with sulfur powder, and repot in bone-dry soil.
Pests are relatively rare due to the plant's natural chemical defenses, but mealybugs (Pseudococcus spp.) can establish colonies in the tight, protected nooks where leaves emerge from the center of the rosette. These sap-sucking insects appear as small, cotton-like tufts. Do not use heavy synthetic bug sprays, which can burn the tender leaf epidermis; instead, target individual insects with a cotton swab saturated in 70% isopropyl alcohol. For large outdoor plantings facing scale or aphid pressures, visit the University of Florida Extension for localized, integrated pest management protocols.
⚠️ Important Caution: Never ingest store-bought Aloe vera houseplant gels or apply raw leaf gel directly to deep, open surgical wounds. The yellow latex layer (aloin) located directly beneath the outer skin is a potent laxative and skin irritant. Commercial products undergo specialized processing and decolorization to remove these harsh anthraquinones before safe human consumption or topical application.

5. Frequently Asked Questions
How often should I water my Aloe vera plant?
Water only when the potting mix is 100% dry from top to bottom. In a warm indoor environment with bright light, this typically translates to every 14 to 21 days during the spring and summer growing seasons. In winter, reduce watering frequency to once every 4 to 6 weeks. Always test the soil moisture by inserting a wooden dowel or your finger 2 inches (5 cm) deep into the medium; if any soil clings or feels cool and damp, withhold water.
Why are the leaves on my Aloe vera turning brown and mushy?
Brown, mushy leaves are the classic, unmistakable sign of overwatering and subsequent root rot. The cells within the leaves have taken on more water than they can hold, leading to cellular rupture and decay. Immediately stop watering, remove the plant from its wet substrate, trim away decayed roots, and allow the remaining healthy structure to dry out before repoting in a faster-draining, gritty mix.
Can I grow Aloe vera successfully indoors in a low-light room?
No, Aloe vera cannot survive long-term in low-light indoor environments. As an obligate sun-lover adapted to open desert environments, it requires a minimum of 6 hours of direct sunlight daily. Placing an Aloe in a dim room or far away from a window causes etiolation—a process where the plant stretches rapidly toward the light source, producing weak, pale, floppy leaves that lack structural integrity and medicinal compounds.
How do I know when it is time to repot my Aloe vera?
Repotting is necessary every 2 to 3 years, or when you notice roots emerging from the drainage holes at the bottom of the container, or when the plant has produced so many offsets (pups) that the rosette outweighs the pot and causes it to tip over. Choose a new container that is only 1 to 2 inches (2.5 to 5 cm) wider in diameter than the previous pot; planting a small Aloe in an oversized container increases the volume of soil, which retains moisture far too long and triggers root rot.
📋 Table of Contents ▼ Click to expand
Tags: