

Can I Use Topsoil For Potted Plants — Complete Care, Planting & Growth Masterclass
Redactado con asistencia de IA, editado y verificado con fuentes hortícolas.
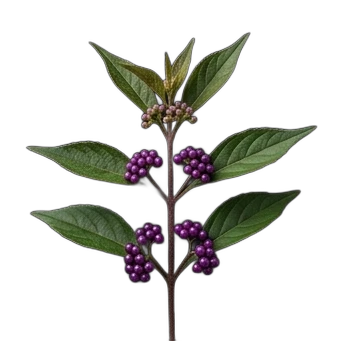
Container gardening requires specific soil, as heavy, dense topsoil or improper mixes can suffocate roots and cause seedlings to wilt within a week. Not all soil is created equal, and containers demand specialized potting mixes rather than heavy dirt to prevent root suffocation.

1. Botanical Overview & Natural Habitat
Understanding where plants naturally grow is key to mimicking that environment in a pot. In the wild, plants aren't confined to a small, static volume of soil. Their roots explore, interact with a vast ecosystem of microorganisms, and access a fluctuating but generally rich supply of nutrients and moisture.
- Soil Structure in Nature: Natural topsoil is a complex, living matrix. It's a mixture of mineral particles (sand, silt, clay), organic matter (decomposed plant and animal material), water, and air. Critically, it teems with beneficial microbes, fungi, and earthworms that break down organic matter, aerate the soil, and make nutrients available to plants. This dynamic system is self-regulating to a degree, able to absorb excess water and release it slowly, and to allow air to penetrate to the root zone.
- The Topsoil Question: Topsoil, as sold commercially, is often harvested from fields and can be quite dense. It's typically rich in organic matter, which is good, but it lacks the crucial aeration and drainage properties needed for container gardening. When packed into a pot, it can become compacted, hindering root growth and leading to waterlogged conditions that are a breeding ground for root rot and fungal diseases. This is why the core topic we're exploring is "Can I Use Topsoil For Potted Plants" – and the answer is generally a cautious "not on its own."
- Plant Needs: Plants in containers are entirely dependent on us for their environment. They can't send roots out to find water or nutrients, nor can they escape unfavorable conditions. Therefore, the soil we provide must be a carefully curated blend that supports healthy root development, adequate moisture, and consistent nutrient availability. We aim to replicate the benefits of natural soil structure in a more controlled environment.
2. Essential Environmental & Care Requirements
Providing the right environmental conditions is just as crucial as the soil itself. Plants have specific needs for light, temperature, and moisture that dictate their growth and health.
The Importance of Soil pH
The pH of your potting mix affects how well plants can absorb nutrients. Most plants thrive in a slightly acidic to neutral range.
- Recommended Soil pH: 6.0 – 6.8. This range is optimal for the availability of essential macro- and micronutrients in the soil. Outside this range, certain nutrients become locked up and unavailable to the plant, even if they are present in the soil. For instance, at very low pH (highly acidic), elements like aluminum and manganese can become toxic, while at very high pH (alkaline), phosphorus and iron availability decreases.
- Richness in Organic Matter: A pH within this range is often naturally achieved when the soil is rich in organic matter. Decomposing organic material buffers pH changes and also supplies a slow release of nutrients.
Sunlight and Temperature
Light is the engine of photosynthesis, and temperature directly influences plant metabolic processes.
- Sunlight Requirements: Most flowering plants and vegetables require Full Sun (6+ hours) of direct sunlight per day. Some plants, particularly many leafy greens and some ornamentals, will tolerate or even prefer Partial Afternoon Shade (around 4-6 hours of sun, ideally avoiding the hottest afternoon rays). Always research the specific light needs of the plants you are growing. Insufficient light leads to leggy, weak growth, while too much intense sun can scorch leaves, especially in containers that heat up quickly.
- Temperature Fluctuations: Plants are sensitive to rapid temperature changes, which can induce stress, known as "transplant shock" or "environmental shock."
- USDA Plant Hardiness Zones: Understanding your zone helps you choose plants that are suited to your climate's average minimum winter temperatures. While this primarily relates to outdoor planting, it gives an indication of a plant's cold tolerance.
- Container Considerations: Pots can heat up much faster than the ground. In summer, temperatures on the surface of a dark pot in direct sun can reach well over 120°F (49°C), stressing or even cooking the roots. Conversely, pots left exposed in winter can freeze solid, killing roots. Provide appropriate frost protection (e.g., moving sensitive plants indoors, wrapping pots with burlap or bubble wrap) or shade netting during extreme summer heatwaves to keep temperatures around the root zone more stable. Aim for daytime temperatures between 65-85°F (18-29°C) for most common garden plants and cooler temperatures at night, ideally dropping to 50-60°F (10-15°C) for many.
Moisture Management
Proper watering is arguably the most critical – and most misunderstood – aspect of container gardening.
- Deep, Infrequent Irrigation: The goal is to encourage roots to grow downwards in search of moisture, promoting a strong and resilient root architecture. Shallow, frequent watering keeps the top layer of soil constantly moist, encouraging shallow root growth which makes plants more susceptible to drying out.
- How to Water: Water thoroughly until water drains from the bottom of the pot. Then, allow the top 1-2 inches (2.5-5 cm) of soil to dry out before watering again. This checks how dry the soil is: stick your finger into the soil. If it feels dry, it's time to water. If it feels moist, wait.
- Drainage is Non-Negotiable: Ensure all containers have drainage holes. Without them, water has nowhere to go, leading to waterlogged soil, root rot, and nutrient deficiencies.
Here's a quick reference table to summarize these key parameters:
| Parameter | Optimal Condition | Common Mistake | Why It Matters |
|---|---|---|---|
| Soil pH | 6.0 – 6.8 (Slightly acidic to neutral) | Using unamended topsoil which can be too alkaline or acidic | Affects nutrient availability and uptake by plant roots. |
| Sunlight | Varies by plant; generally 6+ hours for sun-lovers | Insufficient light (leggy growth) or too much intense sun (scorching) | Photosynthesis drives plant growth and energy production. |
| Temperature | Stable; ideal daytime 65-85°F (18-29°C) for many | Extreme fluctuations, overheating in pots | Affects plant metabolism, growth rate, and can cause stress or damage. |
| Moisture | Deep, infrequent watering; allow top 1-2" to dry | Overwatering (constant dampness) or underwatering | Essential for nutrient transport, cell turgor, and preventing root rot/desiccation. |
| Aeration/Drainage | Well-draining mix with air pockets | Compacted, heavy soil that holds too much water | Roots need oxygen for respiration; excess water displaces air and promotes rot. |
3. Step-by-Step Cultivation, Feeding & Propagation
Now, let's get practical. We'll build a solid foundation for your potted plants, from soil preparation to feeding and even starting new plants.
1. Soil Preparation and Root Health: The Foundation of Success
This is where we directly address the "can I use topsoil" question.
-
Don't Use 100% Topsoil: Pure topsoil is generally too dense and compacts too easily in pots. It lacks the aeration and drainage that potted plants desperately need.
-
The Ideal Mix: A good potting mix is a blend designed for containers. It’s lighter, airier, and drains well while still retaining some moisture. You can buy pre-made potting mixes, or create your own. A good DIY blend often includes:
-
Compost (25-50%): Provides nutrients and improves soil structure. Use high-quality, finished compost.
-
Peat Moss or Coco Coir (25-50%): These are the base materials that provide bulk and retain moisture. Coco coir is a more sustainable alternative to peat moss.
-
Perlite or Vermiculite (10-25%): These lightweight volcanic rocks (perlite) or expanded minerals (vermiculite) are crucial for aeration and drainage. They create air pockets, preventing compaction and allowing oxygen to reach the roots.
-
Optional Amendments:
-
Organic Worm Castings (5-10%): A fantastic source of slow-release nutrients and beneficial microbes that significantly boost plant health and vigor.
-
Aged Bark Fines: Can add structure and drainage.
-
Small amounts of horticultural sand: For added drainage, but use sparingly as too much can also lead to compaction.
-
Mixing: Thoroughly combine all ingredients before filling your pots. This ensures an even distribution of components.
-
Pre-Moistening: Lightly moisten your mix before planting. It should be damp, like a wrung-out sponge, not soaking wet. This makes it easier to work with and prevents dry pockets from forming.
-
Container Choice: Always use pots with adequate drainage holes. The size of the pot also matters; too small a pot will restrict root growth and dry out quickly, while too large a pot can hold too much moisture, especially for young plants.
2. Planting and Root Establishment
Once your soil is ready, it’s time to get planting.
- Prepare the Plant: Gently remove your plant from its nursery container. If the roots are tightly circling (root-bound), gently tease them apart with your fingers or make a few shallow vertical slices with a clean knife to encourage outward growth.
- Position in Pot: Place the plant in the new container so that the top of its root ball is about 1 inch (2.5 cm) below the rim of the pot. This creates space for watering.
- Fill with Mix: Fill the pot with your prepared potting mix around the root ball, gently firming it down to eliminate large air pockets. Do not pack it too tightly.
- Water Thoroughly: Water the newly planted container deeply until water runs out of the drainage holes. This settles the soil around the roots and reduces transplant shock.
- Location: Place the pot in its intended location, considering its light and temperature requirements.
3. Nutrient Cycling & Organic Fertilization: Feeding Your Plants
Container plants have a finite supply of nutrients, so regular feeding is essential.
- Early Stages (Root Establishment): During the initial growth phase, plants are focused on developing a strong root system. A fertilizer with a higher phosphorus content can be beneficial. Look for organic blends that contain rock phosphate or bone meal.
- Application: Apply a balanced organic liquid fertilizer or a granular slow-release fertilizer according to package directions, typically starting about 2-3 weeks after planting, as the plant establishes.
- Vegetative Growth and Bud Formation: As the plant grows leaves and begins to form buds, it needs a balanced supply of nitrogen, phosphorus, and potassium (N-P-K), along with micronutrients.
- Maturing Plants (Fruiting/Flowering): Once flowering or fruiting begins, the demands change. Potassium becomes more critical for overall plant health, disease resistance, and the development of fruits and flowers.
- Potassium-Rich Supplements: Transitioning to potassium-rich kelp meal or a fertilizer with a higher potassium ratio (the third number in the N-P-K ratio) as plants mature can enhance cellular wall strength and improve drought tolerance.
- Organic Fertilization Methods:
- Liquid Organic Fertilizers: These provide a quick nutrient boost. Examples include fish emulsion, compost tea, and seaweed extract. Dilute according to package instructions.
- Granular Organic Fertilizers: These release nutrients slowly over time, providing a more sustained feeding.
- Top-Dressing: Adding a layer of compost or worm castings to the surface of the soil periodically can replenish nutrients and improve soil biology.
- Frequency: The frequency of fertilization depends on the type of fertilizer used and the plant's needs. Generally, liquid feeds might be applied every 2-4 weeks, while granular feeds last longer (follow product instructions). Avoid over-fertilizing, which can burn roots.
4. Propagation: Creating More Plants
Many container-friendly plants can be easily propagated from cuttings or divisions.
- Taking Cuttings: For many herbs (like basil, mint) or ornamental shrubs, take a 4-6 inch (10-15 cm) stem cutting from healthy, non-flowering growth. Remove the lower leaves and dip the cut end in rooting hormone (optional, but helpful). Plant the cutting in a small pot filled with a moist, sterile seed-starting mix (which is lighter than potting soil and good for fragile new roots). Keep it in a warm, bright location, out of direct sun. Mist regularly to maintain humidity. Roots typically form within 3-6 weeks.
- Division: Perennial plants that outgrow their pots, like many ornamental grasses or hostas, can be divided. Carefully remove the plant from its pot, use a clean, sharp knife or spade to divide the root ball into sections, ensuring each section has roots and shoots. Replant these divisions into fresh potting mix.
💡 Pro-Tip: When propagating from cuttings, using a clear plastic bag or a propagator lid to create a mini-greenhouse can significantly increase success rates by maintaining high humidity. Just be sure to air it out for a few minutes daily to prevent fungal issues.
4. Common Problems, Pests & Troubleshooting
Even with the best care, plants can encounter issues. Understanding common problems helps you address them quickly.
Root Rot: The #1 Container Killer
This is the most common problem directly linked to using unsuitable soil and incorrect watering.
- Symptoms: Yellowing leaves, wilting despite moist soil, stunted growth, mushy or dark roots, foul smell from the soil.
- Causes: Overwatering, poor drainage, compacted soil preventing aeration.
- Solutions:
- Stop Watering: Allow the soil to dry out significantly.
- Improve Drainage: If possible, gently loosen the soil surface with a fork. Ensure drainage holes are clear.
- Repot (Severe Cases): If the plant is severely affected, carefully remove it from the pot. Trim away any rotted, black, mushy roots with clean shears. Repot into fresh, well-draining potting mix in a clean pot (consider a terracotta pot which breathes better). Water sparingly until recovery.
Pests: Unwelcome Guests
Container plants can attract common garden pests.
- Aphids, Spider Mites, Whiteflies: Small insects that feed on plant sap.
- Symptoms: Stunted growth, sticky honeydew on leaves, visible insects.
- Solutions: Blast them off with a strong spray of water. If infestations persist, use insecticidal soap or neem oil (follow product instructions carefully).
- Fungus Gnats: Tiny, dark flies that hover around the soil surface. The larvae feed on roots, especially in consistently wet soil.
- Symptoms: Annoying flies, potential damage to seedlings.
- Solutions: Allow the soil to dry out between waterings. Sticky traps can catch adults. Consider beneficial nematodes or Bacillus thuringiensis israelensis (Bti) for larvae control.
Nutrient Deficiencies
If your plant isn't getting the right nutrients, its growth will suffer.
- Symptoms: Yellowing leaves (chlorosis), stunted growth, poor flowering/fruiting. Specific deficiencies cause distinct patterns (e.g., nitrogen deficiency causes general yellowing starting with older leaves; iron deficiency causes yellowing of new leaves with green veins).
- Causes: Depleted soil, incorrect pH, overwatering washing away nutrients.
- Solutions: Use a balanced organic fertilizer. Ensure your pH is within the optimal range (6.0-6.8) to allow nutrient uptake. Repotting with fresh soil may be necessary if the current soil is exhausted.
Environmental Stress
- Sunburn: Leaves develop brown, crispy patches.
- Solutions: Move the plant to a location with less intense direct sun during the hottest part of the day, or provide shade netting.
- Cold Damage: Leaves may darken, wilt, or drop.
- Solutions: Bring sensitive plants indoors or provide frost protection.
⚠️ Important Caution: Never use garden soil or unprocessed topsoil directly from your yard in pots. It compacts easily, lacks adequate drainage, and can harbor weed seeds, pests, and diseases that your container plants have no defense against. Always use a specially formulated potting mix or create your own.

5. Frequently Asked Questions
Let's tackle some of the most common questions I receive.
Can I just put garden topsoil in my pots?
No, you absolutely should not use plain garden topsoil directly in pots. While topsoil is rich in organic matter, it's far too dense for container gardening. It compacts easily, preventing essential aeration and leading to waterlogged conditions that are deadly for roots. Always use a specially formulated potting mix designed for containers.
What's the difference between potting mix and topsoil?
Topsoil is generally a blend of mineral particles and organic matter harvested from the top layer of the earth. It's intended for ground planting. Potting mix, on the other hand, is a sterile, lighter blend specifically designed for containers. It typically includes ingredients like peat moss, coco coir, perlite, and vermiculite to ensure excellent drainage, aeration, and moisture retention – properties that plain topsoil lacks.
How do I know if my potted plant needs watering?
The best way is to check the soil moisture. Stick your finger about 1-2 inches (2.5-5 cm) into the soil. If it feels dry at that depth, it's time to water. If it feels moist, wait. You can also lift the pot; a dry pot will feel significantly lighter than a well-watered one. Avoid relying on a strict schedule; always check the soil before watering.
My potted plant's leaves are turning yellow. What does this mean?
Yellowing leaves (chlorosis) can indicate several issues, but in potted plants, overwatering and poor drainage are the most common culprits, leading to root suffocation and nutrient deficiencies. Other causes include insufficient light, nutrient deficiencies (like nitrogen or iron), or even pests. First, check your watering habits and soil drainage. If the soil is constantly wet, reduce watering frequency. If drainage is poor, consider repotting.
How often should I repot plants in containers?
Most plants in containers benefit from repotting every 1-3 years, depending on their growth rate. You'll know it's time when you see roots emerging from the drainage holes, when the plant dries out very quickly between waterings, or when the plant's growth seems stunted. Repotting into a slightly larger container with fresh potting mix revitalizes the plant and prevents root-bound conditions.
Growing plants in containers is incredibly rewarding, and mastering the soil is the first, most important step. By understanding the unique needs of plants in pots and preparing a suitable growing medium, you're setting yourself up for a season of vibrant growth and bountiful harvests. Happy Growing!
Related Guides
- Topsoil and Compost Mix
- Compost As Topsoil
- Compost for Topsoil
- Complete Guide to Winter Vegetable Harvesting for Beginners
- Complete Garden Tool Maintenance Checklist for Winter
Further Reading
Tags:
🌿 Related Plants You Might Like






PlantSavvyWorld
Equipo editorial
PlantSavvyWorld es un proyecto independiente de educación botánica. Los artículos se redactan con asistencia de IA y luego se editan y verifican con servicios de extensión universitaria, colecciones de jardines botánicos y otras fuentes hortícolas publicadas.