

Can I Cut Hydrangea Blooms — Complete Care, Planting & Growth Masterclass
Redactado con asistencia de IA, editado y verificado con fuentes hortícolas.
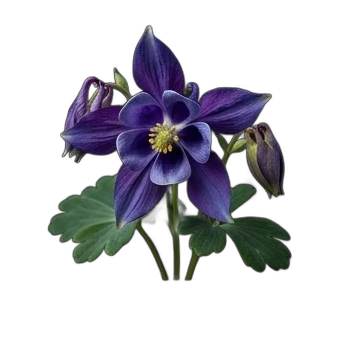
Hydrangea blooms can be cut to bring vibrant beauty indoors to enjoy up close without harming the plant or missing out on future blooms, provided you master the art of cutting hydrangea blooms to ensure the plants thrive for years to come.
1. Botanical Overview & Natural Habitat

The beauty of a hydrangea bloom is its complexity. What we perceive as a single "flower" is often a collection of smaller, fertile florets surrounded by larger, sterile bracts, which are the showy parts that attract pollinators. The color of many hydrangea blooms, particularly those of Hydrangea macrophylla and Hydrangea serrata, is influenced by soil pH. Acidic soils (pH 5.2-5.6) with available aluminum ions tend to produce blue flowers, while more alkaline soils (pH 6.0-6.4) with less available aluminum result in pink or red hues. White varieties typically remain white regardless of pH.
The crucial aspect of when and how to cut hydrangea blooms hinges on understanding their growth habits. Hydrangeas bloom on either old wood (growth from the previous year) or new wood (growth from the current season), or a combination of both.
- Old Wood Bloomers: Species like Hydrangea macrophylla (Bigleaf Hydrangea) and Hydrangea serrata (Mountain Hydrangea) produce flowers on the "old wood." Cutting these blooms too late in the season or pruning them incorrectly in spring can remove the very buds that will develop into next year's flowers.
- New Wood Bloomers: Species such as Hydrangea paniculata (Panicle Hydrangea) and Hydrangea arborescens (Smooth Hydrangea, like 'Annabelle') bloom on "new wood." This means they produce flowers on the current season's growth. These varieties are generally more forgiving when it comes to pruning and cutting blooms, as cutting them back doesn't sacrifice future flowering potential.
Knowing your hydrangea variety is paramount to successful bloom cutting and overall plant management. For those wondering "can I cut hydrangea blooms," the answer is almost always yes, but when and how depends entirely on the type of hydrangea you're growing.
2. Essential Environmental & Care Requirements
Providing the right conditions is fundamental to a healthy hydrangea, whether you plan to cut its blooms or not. These requirements ensure the plant has the energy and resources to produce those magnificent flowers in the first place.
| Parameter | Optimal Condition | Common Mistake | Why It Matters |
|---|---|---|---|
| Soil pH | 6.0 – 6.8 (Rich in organic matter) | Too acidic or too alkaline; lack of organic matter | Influences flower color (blue vs. Pink/red) and nutrient availability. |
| Sunlight | Full Sun (6+ hours) to Partial Afternoon Shade | Deep shade or scorching all-day sun | Affects flowering, leaf health, and prevents heat stress or etiolation. |
| Moisture | Deep, infrequent irrigation; consistently moist | Waterlogged soil or complete drought | Promotes robust root systems, prevents root rot, and supports flower development. |
| Temperature | USDA Zones 3-9 (varies by species) | Extreme fluctuations or lack of frost protection | Prevents winter damage and summer heat shock, ensuring plant survival and bloom. |
| Air Circulation | Good air movement around the plant | Overcrowding; dense foliage | Reduces the risk of fungal diseases like powdery mildew. |
Sunlight Requirements: While many gardeners associate hydrangeas with shade, the reality is more nuanced. Bigleaf hydrangeas (H. Macrophylla) often perform best with morning sun and afternoon shade, especially in hotter climates. This protects their blooms and foliage from scorching. Panicle and smooth hydrangeas, however, generally tolerate and even prefer full sun (6+ hours of direct sunlight per day). Insufficient light can lead to fewer blooms and leggy growth.
Moisture Management: Hydrangeas are thirsty plants and thrive in consistently moist, but not waterlogged, soil. Deep watering, allowing the water to penetrate at least 6-8 inches (15-20 cm) into the soil, encourages the development of a strong, deep root system. Allow the top 1-2 inches (2.5-5 cm) of soil to dry out slightly between waterings. This "deep, infrequent irrigation" strategy is crucial for promoting resilient root architecture, particularly in containers. Overwatering is a very common mistake that leads to root rot.
Environmental & Climate Optimization: Understanding your USDA Plant Hardiness Zone is vital. For instance, in Zone 5, you'll need to ensure your hydrangeas are protected from harsh winter freezes, especially those that bloom on old wood. Mulching heavily in late fall can provide insulation. Conversely, in Zone 9, providing afternoon shade is critical to prevent heat stress during peak summer months. Monitor temperature fluctuations. Sudden dips below freezing after buds have formed in spring can damage flower buds. Likewise, extreme heatwaves can cause wilting, even with adequate watering. Shade netting during the hottest part of the day can be a lifesaver for sensitive varieties.
3. Step-by-Step Cultivation, Feeding & Propagation
Cultivating healthy hydrangeas that produce abundant blooms ready for cutting involves a consistent, nurturing approach. Here’s a masterclass in their care, from planting to feeding.
Planting Your Hydrangea
- Choose the Right Spot: Select a location based on your hydrangea species' light requirements. For H. Macrophylla and H. Serrata, aim for morning sun and dappled afternoon shade. For H. Paniculata and H. Arborescens, full sun is often ideal. Ensure good air circulation.
- Prepare the Soil: Dig a hole twice as wide and as deep as the plant's root ball. Amend the native soil generously with 2-3 inches (5-7.5 cm) of compost and aged manure or worm castings. This creates a well-draining, nutrient-rich environment. If your soil is heavy clay, incorporate perlite or coarse sand to improve drainage.
- Planting Depth: Place the hydrangea in the hole so the top of its root ball is level with or slightly above the surrounding soil. This prevents water from pooling around the crown.
- Water Thoroughly: After planting, water deeply to settle the soil and eliminate air pockets.
- Mulch: Apply a 2-3 inch (5-7.5 cm) layer of organic mulch (like shredded bark, wood chips, or compost) around the base of the plant, keeping it a few inches away from the trunk. Mulch helps retain moisture, suppress weeds, and regulate soil temperature.
Feeding Your Hydrangea
Hydrangeas are moderate feeders. Their nutrient needs change throughout the growing season.
- Root Establishment & Bud Formation (Spring): During the initial growth phase and as buds begin to form, a fertilizer rich in phosphorus is beneficial for root development and flower initiation. Look for an organic blend with a higher middle number (e.g., 5-10-5). Apply according to package directions, typically around 4-6 weeks after new growth appears in spring.
- Maturing Plants & Drought Tolerance (Summer/Fall): As the plant matures and especially as it heads towards the end of the growing season, a fertilizer higher in potassium can enhance cellular wall strength and improve drought tolerance. Kelp meal or a balanced organic fertilizer with a higher last number (e.g., 10-10-15) can be beneficial. Avoid over-fertilizing with nitrogen, as this can lead to lush foliage at the expense of blooms.
💡 Pro-Tip: For those aiming for blue blooms on H. Macrophylla or H. Serrata, incorporating aluminum sulfate into the soil around the plant (following product instructions carefully to avoid over-application) in early spring can help achieve the desired color. Conversely, adding lime can shift the color towards pink. Remember, this only works on types that respond to soil pH for color.
Propagation
Hydrangeas can be propagated through stem cuttings, a rewarding way to expand your collection or share with friends.
- Timing: The best time for taking cuttings is in early summer, after the plant has finished its initial flush of spring growth but before it sets seed.
- Taking Cuttings: Select healthy, semi-hardwood stems. Look for stems that are green and flexible but starting to firm up. Cut a piece about 4-6 inches (10-15 cm) long, just below a leaf node (where a leaf attaches to the stem). Remove the lower leaves, leaving only the top two or three.
- Rooting Hormone: Dip the cut end into rooting hormone powder or gel. This significantly increases the chances of successful root formation.
- Planting Cuttings: Insert the cut end into a well-draining potting mix, such as a 50/50 blend of peat moss and perlite or vermiculite.
- Environment: Keep the cuttings moist, cover the pot with a clear plastic bag or place it in a propagator to maintain high humidity. Place in a bright spot with indirect light. Roots typically form within 4-6 weeks. Once you see new growth, the cutting has rooted and can be transplanted into its own pot.
4. Common Problems, Pests & Troubleshooting
Even with the best care, hydrangeas can encounter issues. Understanding these problems and their solutions will help you maintain vibrant plants and beautiful blooms.
Leaf Spot and Fungal Diseases: Powdery mildew and leaf spots are common, especially in humid conditions or when air circulation is poor. Symptoms include white, powdery patches on leaves or dark spots.
- Solution: Improve air circulation by spacing plants adequately and pruning out dense interior growth. Water at the base of the plant to keep foliage dry. Remove affected leaves and dispose of them away from the garden. Fungicidal sprays, particularly organic ones containing neem oil or sulfur, can be used as a preventative or treatment.
Pests: Aphids, spider mites, and Japanese beetles can be problematic.
- Aphids: Small, pear-shaped insects often found on new growth. They can be washed off with a strong spray of water or treated with insecticidal soap or neem oil.
- Spider Mites: Tiny arachnids that thrive in hot, dry conditions. They cause stippling on leaves and fine webbing. Increase humidity, wash plants, and use insecticidal soap or horticultural oil.
- Japanese Beetles: These iridescent green and copper beetles can decimate blooms and foliage. Handpicking them off the plants early in the morning and dropping them into a bucket of soapy water is effective.
Wilting:
- Overwatering/Poor Drainage: This is a primary cause. The roots suffocate and can't function. Ensure your soil drains well, especially in containers.
- Underwatering: Hydrangeas are thirsty. If the soil is dry, wilting is a sign they need water. Water deeply.
- Heat Stress: Even with adequate water, extreme heat can cause temporary wilting. Providing afternoon shade can help.
Bud Blight: Flower buds turn brown and drop before opening. This can be caused by frost damage after buds have formed, or by fungal diseases like Botrytis.
- Solution: For frost damage, there's little to be done once it occurs. Protect plants from early frosts if possible. For fungal issues, improve air circulation and consider a preventative fungicide in humid weather.
⚠️ Important Caution: When using any pesticide or soil amendment, always read and follow the label instructions precisely. Over-application can harm the plant, beneficial insects, and the environment. For color-changing hydrangeas, excessive aluminum sulfate can be toxic, and lime can make essential micronutrients unavailable.

5. Frequently Asked Questions
When is the best time to cut hydrangea blooms for drying?
The ideal time to cut hydrangea blooms for drying is when they have fully developed their color but before they start to fade or turn brown. For most varieties, this is late summer or early fall. The blooms should feel slightly papery to the touch. Cutting them too early will result in them wilting, and cutting too late means they're already past their prime.
Can I cut my hydrangeas if they are blooming on old wood?
Yes, you can cut hydrangea blooms from plants that bloom on old wood, but you need to be strategic. The best time to cut these blooms is immediately after they have finished flowering, typically in mid-to-late summer. This allows the plant sufficient time to produce new growth and develop next year's flower buds before winter. Cutting them too late in the fall or too severely in the spring will remove these vital buds, leading to fewer or no blooms the following year. For these types, err on the side of caution and make lighter cuts for arrangements, or wait until the end of the flowering season.
How do I care for cut hydrangea blooms to make them last longer in a vase?
Once you've cut your hydrangea blooms, condition them immediately. Plunge the cut stems into a bucket of cool water as soon as possible. Before placing them in a vase, re-cut the stems at an angle under running water or submerge the stem ends in water while you cut. This helps prevent air bubbles from blocking water uptake. Remove any leaves that would fall below the waterline in the vase, as decaying leaves can foul the water. Some people also find success by briefly immersing the entire bloom head in cool water for a minute or two to rehydrate them, especially if they've started to droop. Change the vase water every 1-2 days.
My hydrangea is wilting, what am I doing wrong?
Wilting in hydrangeas can stem from several issues. The most common culprits are overwatering leading to root rot or underwatering. Always check the soil moisture by sticking your finger about 2 inches (5 cm) into the soil. If it's dry, water deeply. If it's soggy and the plant still wilts, you likely have a drainage problem or are overwatering. Ensure your pots have adequate drainage holes and that you're not keeping the soil consistently saturated. In hot weather, wilting can also be a sign of heat stress, even if the soil is moist. Providing afternoon shade can help alleviate this. Finally, if your hydrangea is planted in a windy spot, it can lose moisture faster through its leaves, so consider moving it or providing a windbreak.
How often should I fertilize my hydrangea?
Fertilize your hydrangea once in early spring as new growth emerges, and then again in mid-summer. Use a balanced, slow-release organic fertilizer. For plants where you want to influence bloom color, consider specific soil amendments like aluminum sulfate for blue flowers or lime for pink, applied in early spring. Avoid over-fertilizing, especially with high-nitrogen fertilizers, as this can lead to lush foliage but fewer blooms.
Related Guides
- Why My Hydrangea Doesn't Bloom
- Hydrangea with Red Stems
- Why Didn't My Hydrangea Bloom This Year
- Curling Leaves on Hydrangea
- Hydrangea Did Not Bloom
Further Reading
Tags:
🌿 Related Plants You Might Like






PlantSavvyWorld
Equipo editorial
PlantSavvyWorld es un proyecto independiente de educación botánica. Los artículos se redactan con asistencia de IA y luego se editan y verifican con servicios de extensión universitaria, colecciones de jardines botánicos y otras fuentes hortícolas publicadas.