

How to Use Coffee Grounds As Organic Fertilizer for Tomatoes
Written with AI assistance, edited and checked against horticultural sources.
1. Botanical Overview & Natural Habitat
Tomato seedlings (Solanum lycopersicum) refuse to put on new growth when planted in dense, lifeless clay soil hovering around a chilly 52°F (11°C). Additionally, dumping raw, straight-from-the-pot coffee grounds directly onto the root zones locks up every molecule of available nitrogen, creating a classic botany disaster.

Botanically, Solanum lycopersicum is a heavy feeder belonging to the Solanaceae (nightshade) family. It possesses an extensive, vigorous root system that can plunge up to 4 feet (120 cm) deep into the earth if the soil profile allows, alongside a vast network of lateral feeder roots concentrated in the top 8 to 12 inches (20 to 30 cm) of soil. Because they grow rapidly and produce heavy, succulent fruit sets, they demand continuous supplies of macronutrients—primarily Nitrogen (N), Phosphorus (P), and Potassium (K)—along with vital micronutrients like calcium and magnesium.
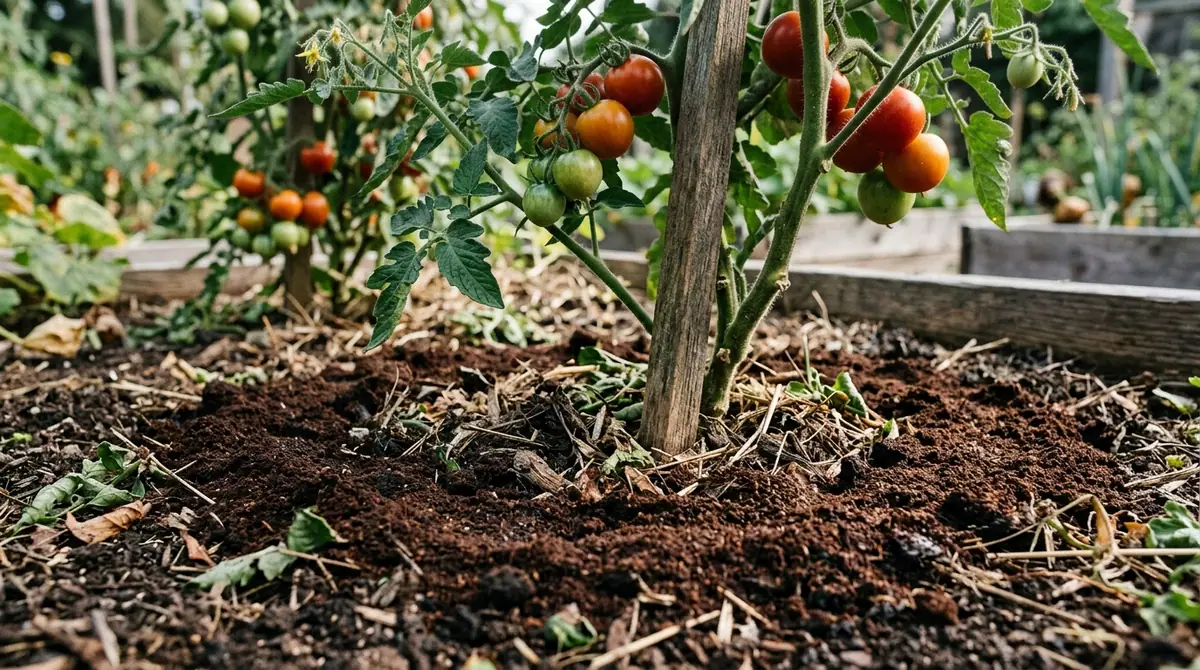
Used correctly, spent coffee grounds act as a phenomenal soil amendment that mimics the rich, decaying organic layers of the tomato's native Andean habitat. However, because raw grounds have an average pH of 6.5 to 6.8 (contrary to popular belief, they are only moderately acidic once brewed, unlike fresh coffee) and a Carbon-to-Nitrogen (C:N) ratio of roughly 20:1, they must be managed with botanical precision. When applied raw in thick layers, they compact into an impermeable mat that repels water and suffocates aerobic soil microbes. But when integrated correctly through composting or shallow soil incorporation, they improve soil structure, feed earthworms, and slowly release essential organic compounds that support robust tomato vitality.
2. Essential Environmental & Care Requirements
To successfully cultivate tomatoes using organic inputs like coffee grounds, you must master the fundamental environmental parameters that dictate their physiological processes. Tomatoes are not subtle plants; when a single variable falls out of range, fruit set drops, blossom-end rot appears, or fungal pathogens take hold.
| Parameter | Optimal Condition | Common Mistake | Why It Matters |
|---|---|---|---|
| Soil pH | 6.2 – 6.8 | Assuming coffee grounds aggressively acidify soil | Extreme pH locks out micronutrients like phosphorus and calcium, causing deficiency symptoms regardless of fertilizer presence. |
| Soil Temperature | 70°F – 85°F (21°C – 29°C) | Planting when soil is below 60°F (15°C) | Cold roots cannot take up water or phosphorus efficiently, leading to stunted, purple-tinted foliage. |
| Moisture / Irrigation | 1 to 2 inches (2.5 to 5 cm) of water per week | Frequent, shallow surface watering | Deep watering encourages the 4-foot (120 cm) taproot system, anchoring the plant and preventing drought stress. |
| Sunlight Exposure | Minimum 6 to 8 hours of direct, unfiltered sunlight | Growing in partial shade | Insufficient light halts photosynthetic output, resulting in leggy vines and flavorless, watery fruit. |
Light is the engine of tomato growth. Without a minimum of 6 to 8 hours of direct daily sunlight, the plant's photosynthetic machinery slows down, reducing the energy available to transport nutrients from the soil up into the fruiting clusters.
Water management is equally critical. Tomatoes require a consistent moisture regime. Erratic watering—letting the soil dry out completely for 7 days followed by a sudden deluge—causes the rapid expansion of fruit cells against hardened skins, resulting in unsightly and destructive fruit splitting.
💡 Pro-Tip: When applying organic amendments like coffee grounds to your garden beds, always pair them with a balanced source of calcium, such as finely ground eggshells or agricultural lime. Because coffee grounds stimulate microbial activity that rapidly consumes soil carbon, they can temporarily tie up surface nutrients; balancing them with a slow-release mineral source keeps your tomato plants in a state of uninterrupted, vigorous uptake.
3. Step-by-Step Cultivation, Feeding & Propagation
Applying coffee grounds to your tomato patch should never be a random, impulsive chore. It requires a structured protocol that respects the biology of the soil food web. Follow this precise 5-step process during your growing season to safely integrate spent coffee grounds into your tomato fertility program.
- Collect and Store Spent Grounds: Gather spent coffee grounds from your kitchen or local cafes, ensuring they are free of paper filters unless the filters are unbleached and torn into small pieces. Spread the damp grounds in a thin layer (no more than 1 inch or 2.5 cm deep) on a baking sheet and allow them to dry for 48 hours at room temperature to prevent premature mold growth.
- Calculate the Carbon Balance (Composting): Mix your dried coffee grounds into a hot compost pile at a strict volumetric ratio of 1 part coffee grounds (a "green" nitrogen source) to 4 parts "brown" sources like shredded dry leaves, straw, or cardboard. Coffee grounds alone are too dense; mixing them ensures proper aeration for thermophilic bacteria.
- Monitor the Composting Cycle: Turn your compost pile every 7 to 10 days. Ensure internal temperatures reach between 130°F and 160°F (54°C to 71°C) to kill weed seeds and pathogens. Allow the compost to cure for a minimum of 60 to 90 days until it transforms into a dark, crumbly humus with an earthy, sweet aroma.
- Incorporate into Garden Soil: In early spring, two weeks before transplanting your tomato starts outdoors, work a 2-inch (5 cm) layer of your finished coffee-ground compost into the top 6 inches (15 cm) of your tomato bed. For established plants, apply a 0.5-inch (1.2 cm) top-dress ring around the drip line of each plant every 30 days, gently scratching it into the top 1 inch (2.5 cm) of soil.
- Water and Mulch: Immediately after applying any coffee-ground amendment, water the soil thoroughly with 1 inch (2.5 cm) of water to settle the particles and initiate microbial integration. Cover the soil surface with a 3-inch (7.5 cm) layer of clean straw or shredded hardwood mulch to retain moisture and prevent soil splashing, which transmits fungal spores.
For further reading on optimal soil management practices for vegetable crops, consult the RHS Vegetable Growing Guidelines.
4. Common Problems, Pests & Troubleshooting
Even with meticulous planning, integrating organic practices into a tomato patch can present hurdles. Misusing coffee grounds or misdiagnosing environmental stressors can lead to declining plant health.
- Nutrient Lock-out (Nitrogen Starvation): If you dump wet, uncomposted coffee grounds directly onto the soil surface in a thick 2-inch (5 cm) layer, soil bacteria will rapidly consume all available surface nitrogen to break down the complex cellulose and lignin. Solution: Rake away the raw grounds immediately, apply a balanced organic blood meal or fish emulsion to replenish the nitrogen, and switch exclusively to pre-composted grounds.
- Fungal Leaf Spot and Blight: Humid weather combined with improper mulching can cause fungal spores to splash onto lower tomato leaves. Solution: Prune off all lower foliage within 18 inches (45 cm) of the soil line, ensure plants are spaced at least 24 to 36 inches (60 to 90 cm) apart for adequate airflow, and avoid overhead watering. For official diagnostic guidance on plant diseases, refer to the University of California Integrated Pest Management Program.
- Blossom-End Rof: The bottom of your developing tomatoes turns flat, black, and leathery. While coffee grounds improve soil texture, excessive caffeine or uneven watering can hinder calcium translocation. Solution: Maintain consistent soil moisture and supplement with water-soluble calcium chelate if soil tests confirm a deficiency.
⚠️ Important Caution: Never apply raw, liquid leftover brewed coffee directly to the soil around young tomato seedlings in high frequencies. The residual acidity, concentrated tannins, and caffeine content can alter the immediate rhizosphere pH, inhibit seed germination, and stunt delicate root hairs, ultimately killing the plant before it establishes fruit.

5. Frequently Asked Questions
Can you put coffee grounds directly on tomato plants?
Putting raw, uncomposted coffee grounds directly on tomato plants in large quantities is discouraged. A thin sprinkle (less than 1/4 inch thick) scratched lightly into the soil once a month is generally safe, but heavy layers will compact, form a water-repellent crust, and tie up vital nitrogen as soil microbes work to break them down. Always compost them first for best results.
Do coffee grounds make soil too acidic for tomatoes?
No. Once coffee has been brewed, the resulting grounds are nearly neutral, with a pH typically testing between 6.5 and 6.8. While fresh, unbrewed coffee beans are acidic, the brewing process extracts most of the acids. Therefore, spent coffee grounds will not drastically lower your garden soil pH or harm tomatoes, which prefer a slightly acidic range of 6.2 to 6.8.
Are coffee grounds good for keeping pests away from tomatoes?
While many gardeners believe coffee grounds deter pests like slugs, snails, and cats due to their texture and scent, scientific evidence supporting this is mixed. Slugs may temporarily avoid crawling over dry, sharp grounds, but once the grounds become damp from rain or irrigation, their deterrent effect vanishes completely. Rely on physical barriers and proper sanitation rather than coffee grounds for pest control.
How much nitrogen do coffee grounds actually add to tomato soil?
Spent coffee grounds contain roughly 2% nitrogen by weight, making them a moderate source of this essential macronutrient. However, because that nitrogen is locked inside organic compounds, it is not immediately available to your tomato plants. It must first be digested by soil microorganisms over a period of 60 to 90 days, acting as a slow-release soil conditioner rather than an instant fertilizer punch.
Related Guides
- Fertilizer for Daylilies
- When to Water After Granular Fertilizer
- Fertilizer for Plumerias
- How to Make Organic Compost for Vegetable Gardens at Home
- Best Organic Pest Control Methods for Backyard Fruit Trees
📋 Table of Contents ▼ Click to expand
Tags:
Keep reading
🌿 Related Plants You Might Like






PlantSavvyWorld
Editorial team
PlantSavvyWorld is an independent botanical education project. Articles are drafted with AI assistance, then edited and checked against university extension services, botanical garden collections and other published horticultural sources.