

How to Grow Tea Green Black
Written with AI assistance, edited and checked against horticultural sources.
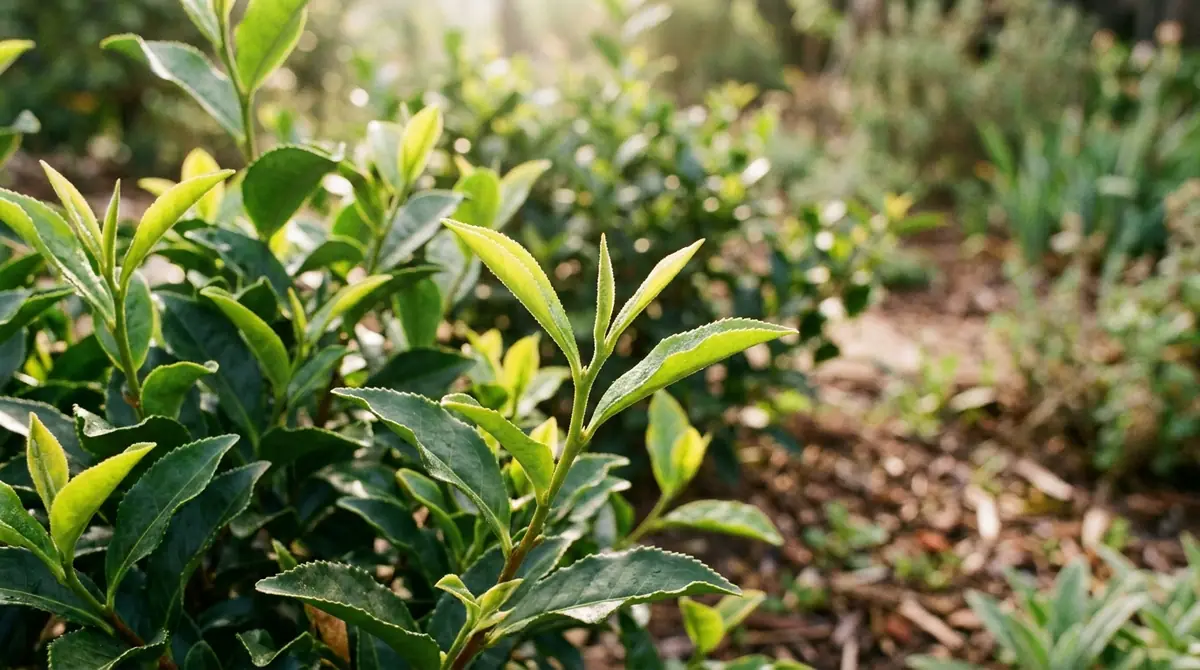
The exact same plant, Camellia sinensis 'Assamica', can yield a grassy, astringent green tea or a robust, malty black tea entirely depending on what happens after the harvest of the tender terminal bud and the two youngest leaves. It is entirely possible for home growers to cultivate, harvest, and process their own green and black teas from scratch.
1. Botanical Overview & Natural Habitat

There are two primary botanical varieties you need to know:
- Camellia sinensis var. sinensis: Native to high-altitude regions of China, this variety features smaller leaves, possesses high cold tolerance (surviving down to 5°F / -15°C), and produces delicate, nuanced green and white teas.
- Camellia sinensis var. assamica: Native to the low-elevation, tropical regions of Assam, India, this variety produces much larger leaves, thrives in heat and humidity, and forms the backbone of bold black teas.
Understanding your climate and selecting the right variety is the first step in successful tea cultivation. When designing edible landscapes for gardeners who want to harvest both green and black teas, I often integrate these attractive, glossy-leaved shrubs into acidic woodland borders, where they double as stunning ornamental hedges with fragrant white and yellow-centered autumn blossoms.
For additional context on cultivating unique perennial crops in specific garden microclimates, you can explore academic guidelines provided by the NC State Extension.
2. Essential Environmental & Care Requirements
Growing healthy tea bushes requires mimicking their native montane and subtropical environments. Getting these parameters right dictates whether your plants merely survive or produce the vigorous flushes of tender leaves required for processing.
| Parameter | Optimal Condition | Common Mistake | Why It Matters |
|---|---|---|---|
| Soil pH | 4.5 to 5.5 | Planting in neutral or alkaline soil (pH 6.5+) | Tea is an obligate calcifuge; alkaline soil causes iron chlorosis, stunting, and eventual death. |
| Temperature | 50°F to 85°F (10°C to 29°C) | Exposing young plants to hard freezes below 10°F (-12°C) | Extreme temperature fluctuations destroy tender leaf flushes and damage vascular tissues. |
| Watering | 1 inch (2.5 cm) of water weekly | Allowing roots to sit in waterlogged soil | Poor drainage leads to Phytophthora root rot, a fatal fungal pathogen in wet soils. |
| Sunlight | Full sun to partial shade (4-6 hours direct) | Scorching full-day desert sun without afternoon relief | Intense heat scorches leaf margins and reduces the delicate amino acids that create sweet green tea flavor. |
💡 Pro-Tip: If your native garden soil is stubbornly sitting at a neutral pH of 6.5 or 7.0, do not try to fight it directly in the ground. Instead, grow your tea plants in large, deep containers or raised beds filled with an ericaceous ericaceous-grade potting mix composed of 50% pine bark, 30% peat moss, and 20% coarse perlite.
⚠️ Important Caution: Never use municipal tap water that has been softened with sodium or has a high calcium carbonate content. Over time, hard water will steadily raise your carefully acidified soil pH, leading to nutrient lockout and leaf chlorosis. Collect rainwater or use acidified, filtered water.
3. Step-by-Step Cultivation, Feeding & Propagation
Growing tea is a rewarding, multi-year journey. Whether you are establishing a hedge or a single specimen, follow this rigorous protocol to move from propagation to your first harvest.
- Select Propagation Material: While you can grow Camellia sinensis from seed (which takes 3 to 5 years to establish), taking semi-hardwood cuttings in late summer ensures genetic consistency and faster yields. Snip 4-inch (10 cm) terminal cuttings from disease-free, mature bushes.
- Root the Cuttings: Dip the cut end in rooting hormone powder and insert them 1.5 inches (3.8 cm) deep into a sterile rooting medium of half perlite and half peat moss. Maintain a high humidity tent at 75°F (24°C) for 60 to 90 days until robust root systems develop.
- Prepare the Planting Site: Dig a hole twice as wide as the root ball and equal in depth. Amend the native soil with composted pine bark to ensure exceptional drainage and acidity. Space your plants 3 to 4 feet (0.9 to 1.2 meters) apart if creating a continuous harvesting hedge.
- Planting and Mulching: Plant your rooted cutting or nursery sapling so the root crown sits precisely level with the soil surface. Apply a 3-inch (7.6 cm) thick layer of shredded pine straw or oak leaf mulch around the base to retain soil moisture and suppress weeds while continually lowering pH.
- Establishment and Irrigation: Water deeply once a week, providing 1 inch (2.5 cm) of moisture. In dry summer spells, monitor soil moisture daily. Just as when managing heavy-feeding crops like those detailed in my guide on how to grow huge tomato plants: pruning, trenching & heavy yields, consistent moisture and fertility are the secrets to maximum biomass production.
- Pruning and Shaping: For the first 2 to 3 years, refrain from heavy harvesting to allow the structural branches to form. Tip the central leader when the plant reaches 2 feet (60 cm) tall to encourage outward branching. Once established, prune the top annually in late winter to maintain a comfortable waist-high harvesting plane.
- The Harvest (Plucking): Harvest tender flushes in spring and summer. Pinch off the terminal bud and the top two tender leaves using your fingernails, leaving the lower mature leaves to photosynthesize.
- Processing Green vs. Black Tea:
- To make Green Tea: Immediately steam or pan-fire (fix) your freshly picked leaves for 60 to 90 seconds to halt oxidation. Roll them into tight shapes, then dry them completely in a dehydrator at 170°F (77°C) for 2 to 3 hours.
- To make Black Tea: Spread freshly picked leaves out on a clean tray and let them wither at room temperature for 18 to 24 hours until limp. Roll and bruise the leaves vigorously between your palms to break cell walls and release enzymes. Spread them out again in a humid room at 70°F to 80°F (21°C to 27°C) for 2 to 4 hours to oxidize until they turn a rich copper-brown. Finally, dry them in a dehydrator at 170°F (77°C) to stop oxidation and preserve your finished black tea.
For authoritative insights on woody perennial crop management, consult the resources at the Royal Horticultural Society.
4. Common Problems, Pests & Troubleshooting
Even with meticulous care, you may encounter a few bumps along the road. Addressing them quickly keeps your tea garden thriving.
- Interveinal Chlorosis (Yellowing Leaves with Green Veins): This classic symptom points directly to iron deficiency caused by high soil pH. Flush the soil with a chelated iron drench and apply elemental sulfur to lower the pH back into the 4.5–5.5 range.
- Tea Scale and Aphids: These sap-sucking insects cluster on the undersides of glossy leaves, leaving a sticky honeydew residue. Spray affected areas thoroughly with horticultural oil or insecticidal soap, ensuring coverage of leaf axils.
- Leaf Spot Fungi: Caused by high humidity and poor air circulation around closely planted hedges. Prune out crowded inner branches to improve airflow, remove fallen infected leaves from the soil surface, and avoid overhead watering.
- Root Rot (Phytophthora): Manifests as sudden wilting despite adequate or excessive soil moisture. Once root rot takes hold, it is nearly impossible to reverse. Prevention is your only defense: ensure your planting beds drain completely within hours of heavy rain, mirroring the soil conditions recommended in my tutorials on how to grow strawberries indoors: from fruit seeds to sweet berries where root health dictates overall plant vitality.

5. Frequently Asked Questions
Can I really make both green and black tea from the exact same bush?
Yes. Both green and black tea come from the exact same plant species, Camellia sinensis. The ultimate difference lies entirely in the post-harvest processing steps. Green tea leaves are heated immediately after picking to prevent oxidation, preserving their bright green color and vegetal flavor. Black tea leaves are allowed to wither, roll, and fully oxidize in the air, turning dark brown and developing deep, malty flavor profiles.
How many tea plants do I need to make a cup of tea?
A single mature, well-tended Camellia sinensis shrub yields roughly 1 pound (454 grams) of dry tea per year under ideal growing conditions. Because 1 gram of loose leaf tea makes roughly one standard cup, a single mature bush can supply you with roughly 450 cups of tea annually. If you drink a cup a day, three to four bushes will easily keep your pantry stocked year-round.
Can I grow tea plants indoors in a northern climate?
You can successfully grow Camellia sinensis in containers indoors if you can provide bright, direct sunlight for at least 6 hours a day. Place containers near a south-facing window or under high-output LED grow lights. Keep them away from drafty heating vents in the winter, and maintain indoor humidity above 50% using a pebble tray or room humidifier.
How long does it take before I can harvest my first tea leaves?
You should allow your tea plants to grow undisturbed for the first 24 to 36 months to establish a strong root system and woody framework. You can begin light harvesting or "tipping" in the third spring, but maximum yields and optimal leaf flavors will not be reached until the fourth or fifth year in the ground. Similar to mastering techniques from how to grow butternut squash in small spaces: vertical trellising secrets, patience during the establishment phase pays off exponentially at harvest time.
Related Guides
- Black Mold in Yard
- Emerald Green Arborvitae vs Thuja Green Giant
- Why Are My Peace Lily Flowers Green
- When is Green Bean Season
- How to Make Grass Green Fast
📋 Table of Contents ▼ Click to expand
Tags:
Keep reading
🌿 Related Plants You Might Like






PlantSavvyWorld
Editorial team
PlantSavvyWorld is an independent botanical education project. Articles are drafted with AI assistance, then edited and checked against university extension services, botanical garden collections and other published horticultural sources.