

Pollen on Lilies
Written with AI assistance, edited and checked against horticultural sources.
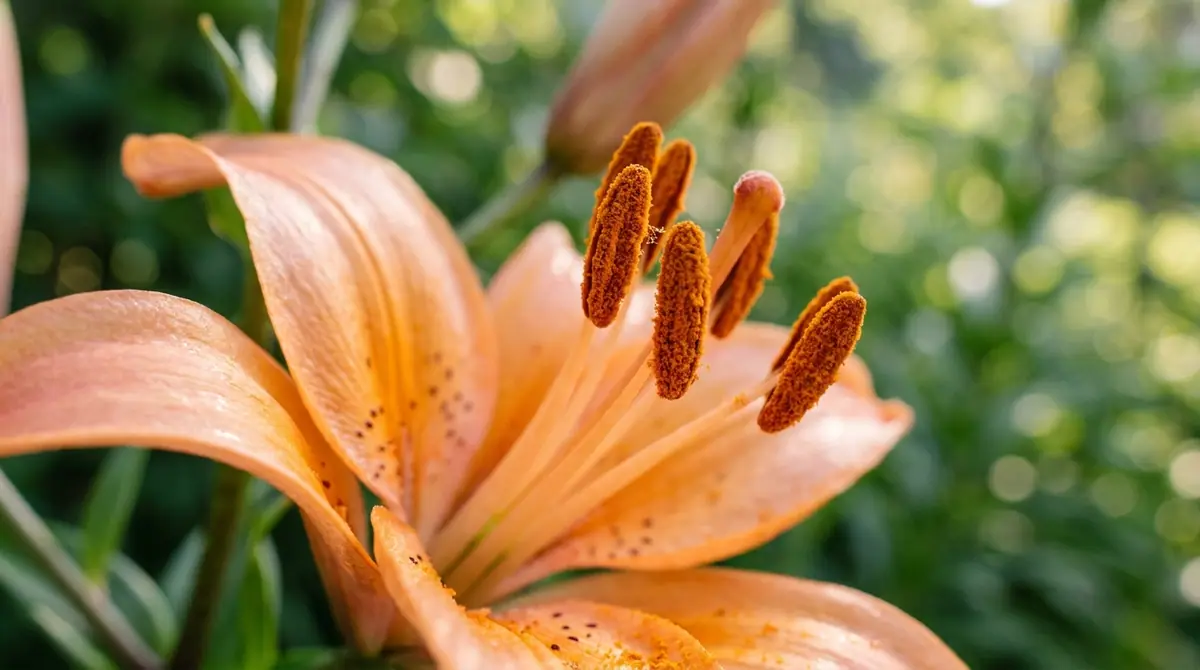
I was halfway through arranging a towering bunch of crisp white Lilium longiflorum for a spring gallery opening when the inevitable happened: a heavy-handed brush against an anther dusted my silk sleeve with a cloud of Rust-orange dust, instantly sinking deep into the weave like a permanent stain. I see this exact panic every day in both the garden and the studio. Lily pollen is a marvel of evolutionary engineering, designed by nature to stick tenaciously to pollinators, but it is also one of the most aggressive natural dyes known to floriculture.

1. Botanical Overview & Natural Habitat
True lilies belong to the genus Lilium, encompassing over 100 species of bulbous perennials native throughout the temperate Northern Hemisphere. Their natural habitats range from the cool, damp mountain woodlands of Asia to the well-draining meadows of North America and the scrubby slopes of the Mediterranean.
Botanically, the pollen of a lily is produced within the anther, the terminal sac of the stamen. Each lily flower typically features six stamens surrounding a central, three-lobed pistil. When a lily bud matures and unfurls over the course of 3 to 5 days, the anthers dehisce (split open) to expose millions of microspores—the pollen grains.
In terms of coloration, lily pollen is notoriously diverse. Depending on the hybrid division—such as Asiatic, Oriental, Trumpet, or LA Hybrids—the pollen ranges from a pale buttery yellow to a deep rusty orange, rich chocolate brown, and even a vibrant brick red. This pigment is packed with carotenoids and flavonoids, compounds designed to withstand intense UV radiation during transport by wind or insect, which is precisely why the stain binds so aggressively to organic and synthetic fabrics alike.
2. Essential Environmental & Care Requirements
Growing robust lilies that produce healthy, vibrant anthers requires strict adherence to environmental parameters. If you are cultivating lilies for cut flowers or garden display, managing soil moisture, temperature, and sun exposure directly influences the vigor of the blooms and the longevity of the pollen-shedding phase.
| Parameter | Optimal Condition | Common Mistake | Why It Matters |
|---|---|---|---|
| Soil Temperature | 55°F to 65°F (13°C to 18°C) at planting | Planting in super-heated summer soils | Prevents premature root rot and encourages strong bulb establishment |
| Planting Depth | 6 to 8 inches (15 to 20 cm) deep | Planting too shallow (2–3 inches / 5–7 cm) | Causes weak stem structure and exposes roots to freezing or drought |
| Sunlight Exposure | 6 to 8 hours of direct morning sun | Full, blazing afternoon sun in zones 8+ | Scorches petals and causes anthers to drop pollen prematurely |
| Soil Moisture | Evenly moist, watering when top 1 inch (2.5 cm) is dry | Allowing soil to dry out completely or stay soggy | Triggers bud drop and inhibits nutrient uptake for vibrant coloration |
For deeper guidance on selecting climate-appropriate cultivars for your specific region, consult the Royal Horticultural Society Lily Guide.
💡 Pro-Tip: If you are growing lilies specifically for indoor floral arrangements, select pollen-free or pollen-reduced varieties (such as certain modern 'Roselily' double Oriental hybrids), or simply harvest the stems when the buds are showing color but have not yet cracked open. This gives you complete control over when—or if—the pollen ever develops indoors.
3. Step-by-Step Cultivation, Feeding & Propagation
Growing show-stopping lilies that yield pristine, healthy flowers—and managing their pollen effectively—starts from the bulb up. Follow this exact propagation and care protocol:
- Select and Inspect Bulbs: Choose firm, heavy, disease-free lily bulbs in early spring or autumn. Discard any bulbs showing signs of mold, soft rot, or desiccation.
- Prepare the Planting Trench: Dig a trench or individual holes to a depth of 6 to 8 inches (15 to 20 cm), ensuring the bottom 2 inches (5 cm) of soil are amended with coarse horticultural sand or perlite for maximum drainage.
- Position the Bulb: Place the bulb root-side down, spreading the fleshy roots gently over a small mound of soil at the base of the hole.
- Backfill and Tamp: Fill the hole with a 50/50 mix of native garden loam and compost. Tamp down gently to eliminate large air pockets, then water deeply with approximately 1 inch (2.5 cm) of water to settle the soil.
- Apply Targeted Nutrition: As soon as green shoots emerge 2 to 3 inches (5 to 7 cm) above the soil line, apply a balanced, slow-release 10-10-10 granular fertilizer at a rate of 1 tablespoon per square foot, keeping granules 3 inches (7 cm) away from emerging stems.
- Mulch for Thermal Regulation: Apply a 2-inch (5 cm) layer of shredded hardwood bark or pine straw around the base to retain moisture and keep soil temperatures below 70°F (21°C).
- Manage Pollen Post-Bloom: Once flowers open fully, use clean floral shears to carefully pinch or snip off the anthers before they shed, protecting surrounding furniture, clothing, or lighter-colored neighboring petals from staining.
4. Common Problems, Pests & Troubleshooting
Even with meticulous care, lily growers often encounter issues related to the blooms, foliage, and—yes—that pesky pollen.
The most common issue homeowners face is accidental staining. If lily pollen falls onto clothing, never use water or rub it. Water activates the oils and pigments, driving them deeper into the fibers. Instead, use a dry-cleaner's sponge, a piece of sticky duct tape pressed gently against the powder, or take the garment outside and use a stiff-bristled brush to flick the dry grains away before treating any residual ghost-mark with an enzymatic stain remover.
In the garden, heavy pollen loads can sometimes attract unwanted pests or trap moisture against the petals during prolonged rainy spells, leading to Botrytis elliptica (lily blight). To prevent this fungal pathogen, ensure your planting beds maintain at least 12 to 18 inches (30 to 45 cm) of spacing between individual stalks to promote robust air circulation.
For comprehensive diagnostic resources on managing regional lily diseases and physiological disorders, refer to the University of Minnesota Extension Yard and Garden Guide.
⚠️ Important Caution: Lily pollen and all parts of the Lilium plant are profoundly toxic to domestic cats. Even a tiny amount of pollen groomed from a cat's fur can lead to acute, irreversible feline kidney failure. If you share your home with cats, you must either strictly banish true lilies from the indoor environment or meticulously excise every single anther the moment the flower opens.

5. Frequently Asked Questions
Can you remove lily pollen without staining the flower petals?
Yes, absolutely. The best time to remove lily pollen is right when the flower opens and before the anthers begin to shed. Take a clean tissue or a pair of small floral snips, grasp the fuzzy tip of the stamen (the anther), and gently snap or cut it off. Doing this carefully prevents the powdery dust from spilling onto the white or pastel petals below.
Why does lily pollen stain clothes so permanently?
Lily pollen grains are packed with heavy-duty carotenoid pigments and natural oils designed to adhere firmly to the bodies of flying insects. When you touch the pollen, the oils melt into fabric fibers, and moisture from your skin or water binds the pigments permanently. This is why you should always brush away loose pollen while it is completely dry.
Are there any lilies that do not have pollen?
While true species lilies all produce pollen, plant breeders have developed specific cultivars—most notably double-flowered Oriental lilies like the 'Roselily' series—that have had their stamens modified through selective breeding into extra petals. These double varieties produce little to no viable pollen, making them exceptionally popular for indoor floral design and allergy sufferers.
How do I remove lily pollen stains from fabric and furniture?
Start by taking the stained item outside or holding it over a trash can, and use a piece of adhesive tape or a stiff brush to lift away as much dry powder as possible. Do not wipe or use water first. Once the loose powder is gone, dab the area with rubbing alcohol on a clean white cloth, or pretreat with an oxygen-based bleach cleaner before laundering according to the fabric care label.
Related Guides
📋 Table of Contents ▼ Click to expand
Tags:
Keep reading
🌿 Related Plants You Might Like






PlantSavvyWorld
Editorial team
PlantSavvyWorld is an independent botanical education project. Articles are drafted with AI assistance, then edited and checked against university extension services, botanical garden collections and other published horticultural sources.