

Sphagnum Moss for Propagation
Yapay zekâ desteğiyle yazıldı; botanik kaynaklara karşı düzenlendi ve doğrulandı.
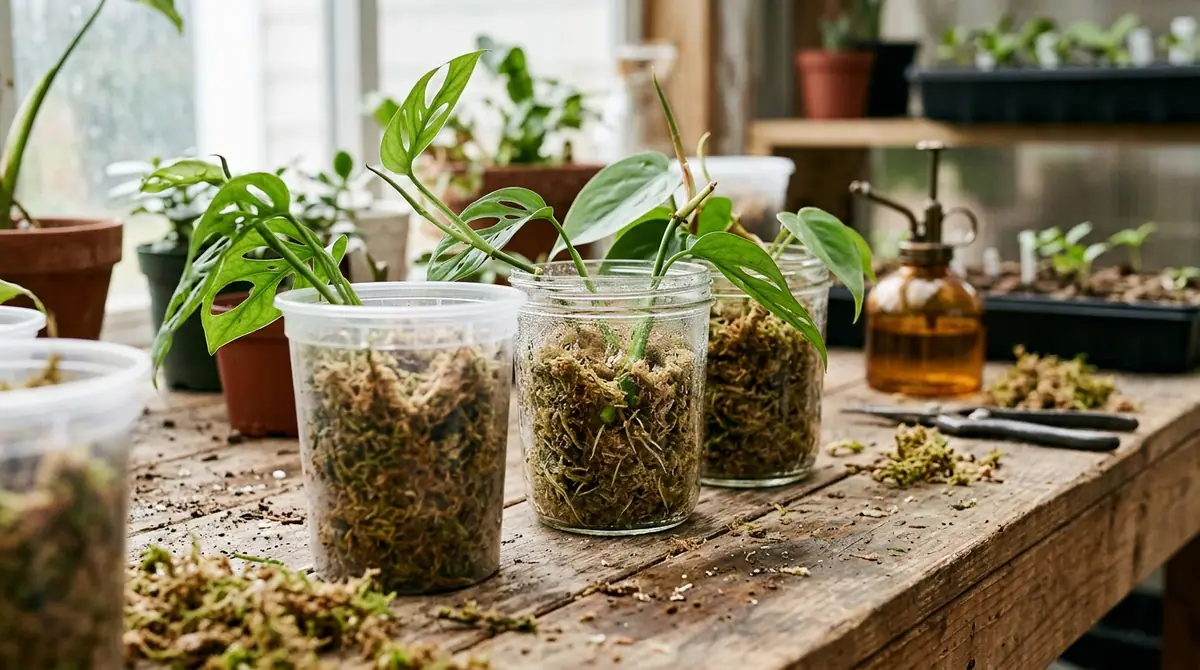
For high-stakes propagation of finicky Monstera albo node cuttings, New Zealand sphagnum moss rehydrated to feel like a wrung-out damp sponge prevents root rot and encourages vigorous, pearly-white roots to emerge from dormant axillary buds within 14 days.
1. Botanical Overview & Natural Habitat

In their native peat bog ecosystems—often found in the cool, temperate zones of the Northern Hemisphere, though they also range into sub-Antarctic regions—sphagnum mosses grow in dense, cushion-forming mats. They dominate these acidic, nutrient-poor wetlands by actively modifying their environment. Sphagnum plants release hydrogen ions into their surroundings, lowering the surrounding pH to a highly acidic range of 3.0 to 4.5. This chemical adaptation creates a hostile environment for the bacteria and fungi that cause organic decay, which is why ancient organic matter and even prehistoric bog bodies remain remarkably preserved.
From a physiological standpoint, sphagnum moss possesses extraordinary cellular architecture. Up to 90% of its dry weight is composed of large, empty, dead hyaline cells featuring specialized pores. These cells act like millions of microscopic reservoirs, capable of holding up to 20 times their dry weight in water. For the propagator, this means the moss maintains a constant, uniform moisture gradient around vulnerable cuttings without suffocating the developing root tissues.
To understand more about the wider world of bryophytes and their ecological adaptations, you can explore resources provided by the Royal Botanic Gardens, Kew.
2. Essential Environmental & Care Requirements
Propagating plants in sphagnum moss requires balancing moisture retention with aerobic gas exchange. Because sphagnum holds water so efficiently, the primary danger is not dehydration, but chronic hypoxia—oxygen starvation of the root zone caused by waterlogged cells.
| Parameter | Optimal Condition | Common Mistake | Why It Matters |
|---|---|---|---|
| Hydration Level | Damp, like a wrung-out sponge (60-70% saturation) | Drips water freely when squeezed | Excess water displaces air pockets, causing stem rot and fungal collapse |
| Ambient Temperature | 70°F to 75°F (21°C to 24°C) | Temperatures below 60°F (15°C) | Cold halts cellular division in callus tissue, stalling root emergence |
| Light Exposure | Bright, indirect light (1,500 to 2,500 foot-candles) | Direct, unshaded midday sun | Direct sun inside enclosed propagation setups superheats the microclimate, cooking tender tissues |
| Ambient Humidity | 75% to 90% relative humidity | Uncovered containers in arid indoor air (<40%) | Rapid evaporation dehydrates exposed nodes before roots can form |
| Substrate pH | 4.5 to 5.5 (naturally acidic) | Adding heavy alkaline fertilizers | High pH invites opportunistic pathogens that thrive in sweet, nutrient-rich environments |
💡 Pro-Tip: Always use high-grade New Zealand sphagnum moss (specifically Sphagnum cristatum or Sphagnum subnitens) rather than standard green craft moss or generic garden mulch. New Zealand moss yields longer, cleaner strands that resist compaction and maintain structural integrity for months, which is critical when you need to transplant rooted cuttings without tearing fragile new root hairs.
3. Step-by-Step Cultivation, Feeding & Propagation
Whether you are rooting rare aroids, woody shrub cuttings, or starting delicate seeds, this step-by-step protocol delivers high propagation success rates.
- Rehydrate and Sanitize the Moss: Submerge 2 packed cups of dry sphagnum moss in a bowl of warm water (approx. 100°F / 38°C) for 15 minutes. Once fully expanded, lift the moss out and squeeze it firmly with both hands until it stops dripping and feels uniformly damp. If you suspect contamination, microwave the damp moss in a microwave-safe container on high for 3 minutes to sterilize weed seeds and fungal spores.
- Prepare the Propagation Vessel: Select a clean, clear plastic container with a fitted lid, such as a nursery prop box or a clear clamshell takeout container. Line the bottom with a 1.5-inch (3.8 cm) compacted layer of the prepared moss.
- Select and Prep Cuttings: Take your plant cuttings using sterile razor blades. For stem cuttings, ensure each piece includes at least one viable node and a healthy leaf. Dust the cut ends lightly with rooting hormone powder containing IBA (Indole-3-butyric acid) if working with stubborn woody species.
- Position the Cuttings: Lay the stems horizontally across the moss layer, or insert node-down stems vertically into the moss so that the node is fully encompassed by the strands, but the upper bud remains exposed to light and air. Gently press the moss around the base of the cutting to secure it in place.
- Establish the Microclimate: Seal the lid on your propagation vessel. Place the container in a location receiving bright, indirect light where temperatures consistently hover between 70°F and 75°F (21°C to 24°C).
- Manage Ventilation and Moisture: Open the container lid for 10 minutes every 3 to 4 days to flush out stale air and prevent anaerobic conditions. Check the moisture level; if the top strands of moss feel dry to the touch, mist them lightly with a spray bottle filled with distilled water.
- Monitor Root Development: Depending on the species, visible root initials should appear within 14 to 28 days. Once roots reach a length of 1 to 2 inches (2.5 to 5 cm), the cutting is ready for transplantation. If you are curious about expanding your botanical knowledge beyond propagation, you might also enjoy reading our guide on Can You Eat Moss Edible Mosses for a fascinating look at bryophyte utility.
⚠️ Important Caution: Never pack sphagnum moss down too tightly around soft-stemmed tropical cuttings. If the moss is compressed to the density of felt, it loses its porosity, choking off oxygen and turning your propagation tray into a breeding ground for anaerobic bacteria.
4. Common Problems, Pests & Troubleshooting
Even experienced growers occasionally run into issues when propagating in high-humidity moss environments. Here is how to diagnose and correct them.
- Fuzzy White or Gray Mold Growth: This is almost always caused by stagnant air and excessive surface moisture. Immediately remove the lid of your propagation chamber for 2 to 3 hours to let the surface dry out. Dust the affected areas with a tiny pinch of cinnamon, which possesses natural antifungal properties, or mist with a weak hydrogen peroxide solution (1 part 3% hydrogen peroxide to 10 parts water).
- Black, Mushy Stem Bases (Stem Rot): If the base of your cutting turns translucent brown or black and smells swampy, the cutting has contracted Pythium or Phytophthora root rot. Discard the rotting cutting and the surrounding moss immediately to protect neighboring propagations. In the future, ensure your moss is wrung out more thoroughly before inserting stems.
- Stalled Root Growth: If 30 days pass with no root emergence, check your ambient temperature. Temperatures dropping below 65°F (18°C) at night will stall metabolic processes in plants. Move the propagation tray to a warmer spot or utilize a propagation heating mat set to 74°F (23°C).
- Algal Bloom on the Moss Surface: Green or dark brown slime coating the exterior of the moss indicates that light is hitting a damp, nutrient-bearing surface. While harmless to most cuttings, it can compete for space. Reduce light intensity slightly and increase fresh air exchange during your daily maintenance checks.

5. Frequently Asked Questions
Should I add fertilizer to sphagnum moss when propagating cuttings?
No. Unrooted cuttings do not possess the root hairs required to absorb synthetic mineral fertilizers, and introducing salts to the moss will burn delicate new root tips through osmotic shock. Tap water or clean rainwater contains all the trace minerals a cutting needs during its first 3 to 4 weeks of life. Once secondary roots reach 1 inch (2.5 cm) in length, you can introduce a balanced, water-soluble fertilizer diluted to one-quarter strength.
How do I remove sphagnum moss from roots without breaking them?
Do not pull the moss away from dry roots, as the fibrous strands will lock onto delicate root hairs and tear them. Instead, submerge the entire root ball of the cutting in a bowl of lukewarm water for 10 minutes. Gently swish the roots in the water; the hydrated moss will loosen and slide away from the root system naturally without causing mechanical damage.
Can I reuse sphagnum moss after a propagation cycle?
You can, provided the previous cutting was healthy and free of disease. However, used moss degrades structurally and loses its ability to hold an ideal air-to-water ratio. To reuse it, pick out old root fragments, soak the moss in a 10% household bleach solution for 30 minutes to kill lingering pathogens, rinse it thoroughly in running water until all chemical scents disappear, and let it dry completely before storing.
Is sphagnum moss the same thing as peat moss?
No, though they are botanically related. Sphagnum moss consists of the harvested, dried, long fibrous upper stems of living or recently deceased moss plants. Peat moss (often sold as horticultural peat) is the heavily decomposed, compacted accumulation of sphagnum moss and other bog materials harvested from deep layers of a peat bog over thousands of years. Peat moss has a fine, powdery consistency that packs tightly, whereas sphagnum moss is fibrous and structurally open, making it vastly superior for air circulation in propagation.
Related Guides
- Can You Eat Moss Edible Mosses
- The Complete Guide to Coleus Plants: 50+ Varieties, Care, Propagation & Landscaping
- How to Get Rid of Raspberry Bushes
📋 Table of Contents ▼ Click to expand
Tags:
🌿 Related Plants You Might Like






PlantSavvyWorld
Editör ekibi
PlantSavvyWorld bağımsız bir botanik eğitim projesidir. Makaleler yapay zekâ desteğiyle hazırlanır; ardından üniversite ziraat yayınları, botanik bahçesi koleksiyonları ve diğer yayımlanmış botanik kaynaklara karşı düzenlenir ve doğrulanır.