

Peat Humus for Gardening
Written with AI assistance, edited and checked against horticultural sources.
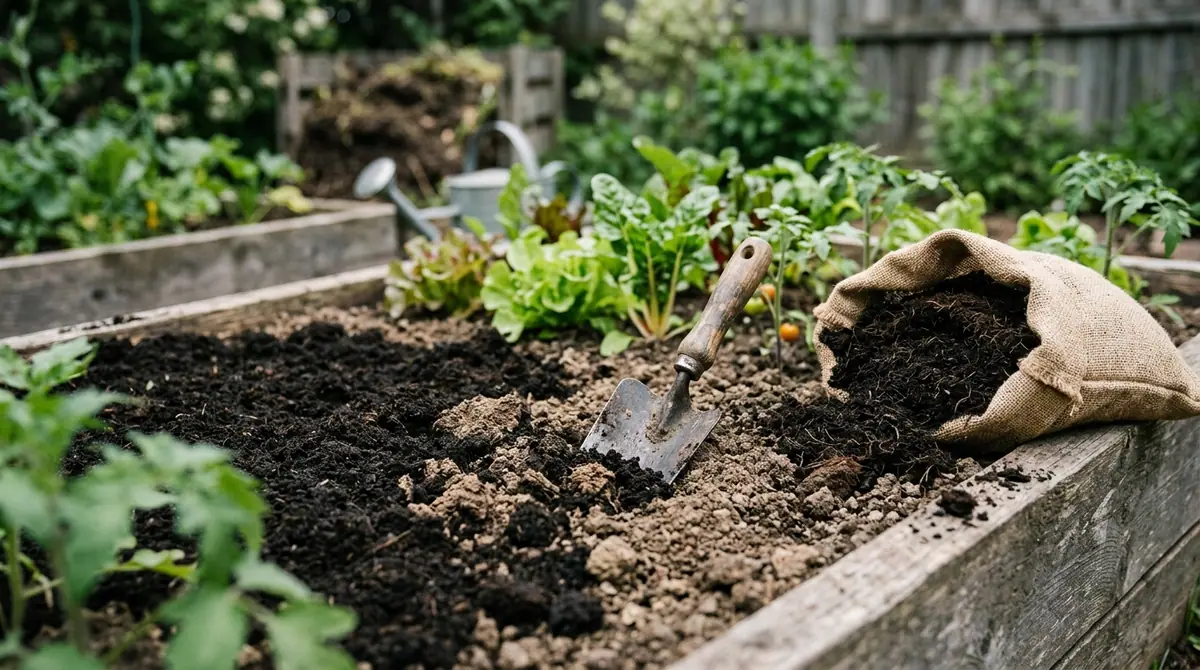
The spade hit something black, greasy, and dense at precisely 6 inches (15 cm) down in my south-facing perennial border, and the damp, earthy aroma of decaying ancient forest flooded the air. I was renovating a declining shrub bed in USDA Hardiness Zone 6b, where summer soil temperatures routinely soar past 85°F (29°C), incinerating organic matter faster than earthworms can process it. That shovel stroke struck pure, aged peat humus. Unlike raw peat moss that sheds water like a waxed jacket, this fully decomposed, dark amendment integrated instantly into the surrounding mineral clay, holding moisture while creating the crumbly, aggregate structure my struggling boxwoods and hostas desperately needed.
1. Botanical Overview & Natural Habitat

In its natural wetland habitat, this dense accumulation forms layers extending 3 to 10 feet (0.9 to 3 m) deep. Unlike raw sphagnum peat moss, which harvests from the upper, less-decomposed layers of raised bogs and remains extremely acidic (pH 3.5 to 4.5), peat humus forms in mineral-rich fens. This groundwater influence buffers the material, bringing its pH much closer to neutral, typically ranging from 6.0 to 7.5.
The botanical significance of peat humus in modern landscape design and horticulture stems from its high Cation Exchange Capacity (CEC). The microscopic humic colloids possess immense surface areas studded with negatively charged sites. These sites act like chemical magnets, holding onto essential plant nutrients such as calcium, magnesium, potassium, and ammonium, preventing them from leaching away during heavy downpours or automated irrigation cycles. When you incorporate peat humus into garden beds, you are essentially introducing a stable sponge of concentrated fertility and structural resilience that mimics the rich forest floor horizons found in undisturbed ecosystems.
2. Essential Environmental & Care Requirements
Integrating peat humus into your garden requires understanding how its physical and chemical properties interact with soil biology, moisture levels, and temperature. Because it is a finished, stable organic amendment, it behaves very differently from raw compost or coarse mulches.
When applying peat humus, you must calibrate your rates based on existing soil texture. For heavy clay soils, incorporating a 2-inch (5 cm) layer tilled down to a depth of 8 inches (20 cm) breaks up compaction by creating microscopic pore spaces that facilitate root respiration. For sandy soils that drain at rates exceeding 2 inches (5 cm) per hour, mixing in peat humus dramatically increases water-holding capacity, reducing irrigation frequency by up to 40% during peak summer heat.
| Parameter | Optimal Condition | Common Mistake | Why It Matters |
|---|---|---|---|
| Application Depth | 1 to 2 inches (2.5 to 5 cm) incorporated into top 6 to 8 inches (15 to 20 cm) | Piling pure peat humus on top of soil as a thick mulch layer | Forms a hard, water-repellent crust when dry, suffocating surface roots |
| Soil pH Range | 6.0 to 7.0 for general perennials and vegetables | Assuming all peat products are acidic like sphagnum moss | Applying it expecting to acidify blueberry beds will cause iron chlorosis |
| Moisture Level | Damp, like a wrung-out sponge (40–60% field capacity) | Working with bone-dry peat humus straight from the bag | Dry humic particles resist re-wetting and blow away easily in the wind |
| Storage Conditions | Cool, shaded area protected from torrential rain leaching | Leaving opened bags exposed to UV light and standing water | Degrades microbial life and washes away water-soluble humates |
💡 Pro-Tip: Always pre-moisten bulk peat humus with a garden hose before spreading it over your beds. Toss the pile with a pitchfork while spraying a fine mist until the internal moisture matches the consistency of a damp sponge; this eliminates hydrophobic dry pockets that steal water from your plant's root zone.
3. Step-by-Step Cultivation, Feeding & Propagation
Using peat humus correctly in garden establishment and maintenance ensures maximum structural benefit without suffocating the soil microbiome. Follow this precise protocol when amending planting beds or installing new perennials, shrubs, and cool-season turfgrasses.
- Assess Soil Composition: Dig a core sample 6 inches (15 cm) deep. If the soil forms a slick, shiny ribbon when squeezed between your thumb and forefinger, you have heavy clay requiring structural amendments. If it crumbles instantly and feels gritty, you have sandy soil requiring moisture-retention support.
- Clear and Weed: Remove all perennial weeds, rhizomes, and surface debris from the target zone to prevent competition during the establishment phase.
- Distribute the Amendment: Spread a uniform 2-inch (5 cm) layer of high-quality, screened peat humus across the soil surface. For container gardening mixes, blend peat humus at a strict ratio of 1 part humus to 3 parts native loam or perlite.
- Incorporate to Root Depth: Using a rotary tiller or a stout garden spade, thoroughly work the peat humus into the top 8 inches (20 cm) of native soil. Avoid tilling deeper than 10 inches (25 cm) to preserve natural soil stratification and beneficial anaerobic/aerobic zones.
- Level and Rake: Rake the amended bed smooth, breaking up any remaining clods larger than 0.5 inches (1.3 cm) in diameter to ensure optimal seed-to-soil contact or root ball settling.
- Settle with Water: Irrigate the newly amended bed thoroughly with 1 inch (2.5 cm) of water delivered slowly over a 2-hour period to settle the soil particles around the newly introduced humic colloids and eliminate large air pockets.
- Planting Execution: Wait 48 hours for the soil moisture to stabilize at field capacity before installing container-grown perennials, shrubs, or direct-sowing seeds.
⚠️ Important Caution: Never use peat humus as a standalone container medium or unmixed planting hole backfill. Pure peat humus lacks the macro-porosity required for gas exchange; roots planted in 100% humus will quickly suffocate from lack of oxygen during routine irrigation cycles. For further insights on sustainable organic amendments, consult the guidelines provided by the Royal Horticultural Society.
4. Common Problems, Pests & Troubleshooting
Even experienced horticulturists occasionally run into issues when utilizing heavy organic amendments like peat humus. Recognizing the early warning signs of improper application saves plants from stress and root decline.
- Surface Crusting and Runoff: When dry peat humus is left exposed on the soil surface without a protective organic mulch cover, it bakes in the sun and forms a hard, cement-like crust. Rainwater will pool and run off instead of infiltrating. Solution: Break the crust gently with a hand cultivator and immediately cover the bed with a 2-inch (5 cm) layer of shredded bark mulch to protect the humic layer from direct solar radiation and wind erosion.
- Nutrient Tie-Up and Yellowing Foliage: Occasionally, gardeners notice sudden chlorosis (yellowing between leaf veins) in plants shortly after heavy peat humus incorporation. This typically occurs because uncomposted, raw fractions within cheap, low-grade products temporarily immobilize soil nitrogen as soil microbes multiply. Solution: Apply a light top-dressing of a balanced organic fertilizer or blood meal to supply an immediate 0.1 lbs of actual nitrogen per 100 square feet (9.3 square meters).
- Waterlogging in Containerized Environments: Gardeners who use unblended peat humus in potted specimens often experience root rot caused by Phytophthora species. Because peat humus holds immense amounts of water, heavy pots fail to drain adequately. Solution: Re-pot affected specimens immediately, shaking away the waterlogged humus and repotting in a coarse blend containing at least 40% perlite, pumice, or expanded shale. For regional agricultural extension advice on managing local soil pathogens, reference resources from University of Florida IFAS Extension.

5. Frequently Asked Questions
What is the difference between peat moss and peat humus?
Peat moss consists of raw, minimally decomposed sphagnum moss harvested from the top layers of bogs, featuring a fibrous texture and a strongly acidic pH of 3.5 to 4.5. Peat humus is the fully decomposed, highly stable final product found at the bottom of ancient fens; it has a dark, soil-like texture, a neutral pH between 6.0 and 7.5, and a much higher concentration of nutrient-holding humic acids.
Can I use peat humus as a top dressing for my lawn?
Yes, peat humus makes an exceptional top dressing for lawns, particularly when applied at a rate of 0.25 inches (0.6 cm) immediately following core aeration. Its fine, crumbly particle size sifts easily down into aeration holes, smoothing out minor surface bumps while introducing vital organic matter and beneficial microorganisms to turf root zones without smothering the grass blades.
Does peat humus lower soil pH?
No. Unlike raw sphagnum peat moss, which is famously acidic, true peat humus undergoes prolonged biological decomposition in mineral-rich environments that neutralize its acidity. Its pH typically hovers between 6.0 and 7.5, meaning it will not acidify alkaline soils or harm plants that prefer neutral growing conditions.
How often do I need to reapply peat humus to garden beds?
Because peat humus consists of highly stable humic compounds resistant to rapid microbial breakdown, it lasts much longer than standard yard waste compost. A single application incorporated at a 2-inch (5 cm) depth provides structural and chemical benefits for 3 to 5 years. You can maintain optimal soil health by adding a fresh 0.5-inch (1.3 cm) maintenance layer as a top-dressing each spring beneath your decorative mulch layer.
Related Guides
📋 Table of Contents ▼ Click to expand
Tags:
🌿 Related Plants You Might Like






PlantSavvyWorld
Editorial team
PlantSavvyWorld is an independent botanical education project. Articles are drafted with AI assistance, then edited and checked against university extension services, botanical garden collections and other published horticultural sources.