

How to Dry a Gourd Out
Written with AI assistance, edited and checked against horticultural sources.
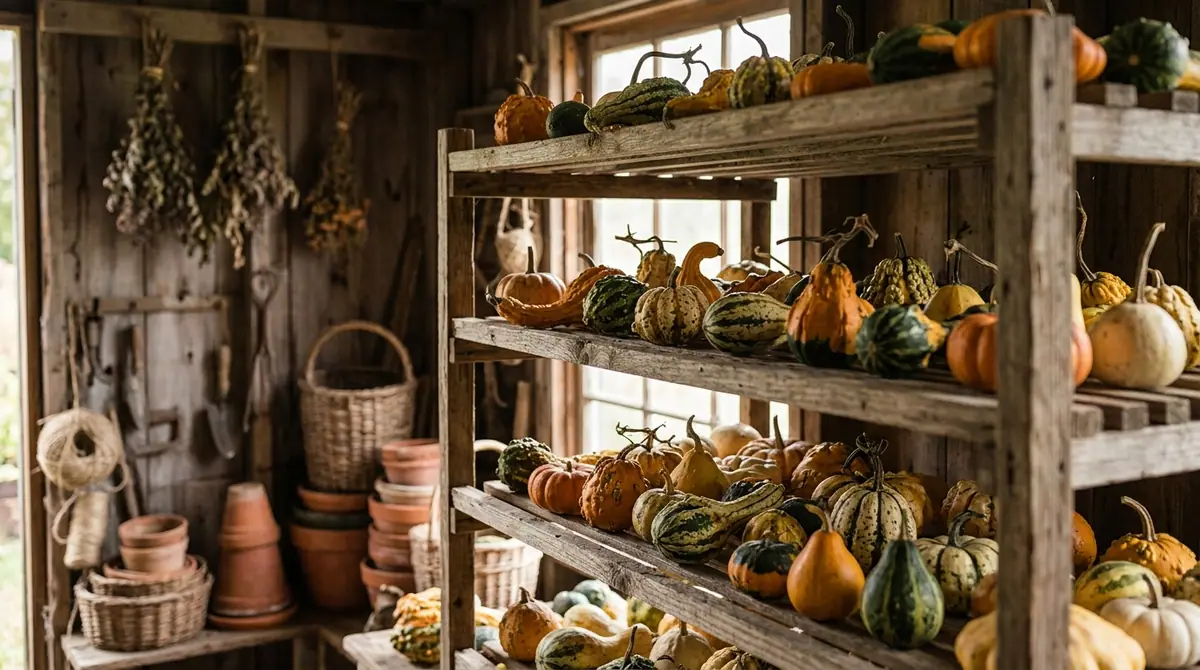
I can still vividly recall the crisp October morning back in 2018 when I harvested my first crop of Dipper gourds (Lagenaria siceraria). They were heavy, shockingly cold to the touch, and saturated with moisture after a sudden autumn frost dropped temperatures to 32°F (0°C) overnight. I made the classic rookie mistake of stacking them in a damp garden shed, only to return a month later to find a collapsed, foul-smelling mush leaking across the concrete floor. That messy failure taught me more about curing cucurbits than any textbook ever could. I have since dried hundreds of gourds successfully. If you want to transform a heavy, fresh-picked gourd into a lightweight, durable canvas for crafting or seasonal decor, you need to understand the biological transformation that occurs during the drying process. Here is your definitive guide on how to dry a gourd out properly.
1. Botanical Overview & Natural Habitat

In their native tropical and subtropical habitats, hard-shelled gourds evolved as climbing or trailing vines that rely on sturdy tendrils to scramble up to 15 to 20 feet (4.5 to 6 meters) into forest canopies or across open savannah scrublands. This climbing habit keeps the heavy fruit elevated off damp soil, preventing premature fungal infection. The mature fruit features a remarkably tough, water-impermeable epicarp (the outer skin) and a spongy mesocarp that eventually dries down into a woody, cork-like interior. Inside, the seeds detach from the placenta and rattle around inside the dry cavity.
To achieve optimal drying results, you must harvest your gourds at the absolute peak of physiological maturity. A premature gourd harvested when the vine is still lush will lack the necessary cellular wall thickness, resulting in a fragile, hollow shell that easily cracks. You can confirm maturity by checking the stem; it must turn completely brown, dry, and corky. Furthermore, the fingernail test is a reliable field metric: if you press your thumbnail firmly against the gourd's skin and it leaves a dent, the gourd is unripe and must stay on the vine longer. If the skin resists your nail entirely, it is ready for harvest.
2. Essential Environmental & Care Requirements
Drying a hard-shelled gourd is not merely a passive storage process; it is a controlled curing phase that requires specific environmental conditions to encourage slow moisture evaporation while deterring opportunistic pathogens. The outer skin must cure and harden while mold breaks down the outer epidermal layer—a normal and necessary part of the process, provided it does not penetrate the woody interior wall.
Temperature and airflow are the two most critical environmental variables. The curing space must maintain steady ambient temperatures between 65°F and 85°F (18°C to 29°C). If the environment is too cold (below 50°F / 10°C), cellular respiration drops, moisture remains trapped inside, and internal rotting accelerates before the woody walls can set. Conversely, extreme heat causes the exterior to dry too rapidly while the interior remains saturated, creating internal pressure differentials that lead to cracking and structural failure.
💡 Pro-Tip: Never dry your gourds in direct, blazing sunlight or inside a closed plastic container. While UV rays can kill surface mold, they also make the outer skin brittle and unevenly textured. Air circulation is your best defense against deep rot; running a small oscillating fan on a low setting inside your curing room will reduce drying failure rates by up to 40%.
| Parameter | Optimal Condition | Common Mistake | Why It Matters |
|---|---|---|---|
| Harvest Maturity | Completely brown stem; hard skin resistant to thumbnail pressure | Harvesting while vines are green and fruit feels heavy with water | Immature gourds lack structural cellulose and will collapse or rot during drying |
| Curing Temperature | 65°F to 85°F (18°C to 29°C) | Storing in unheated, freezing sheds or damp cellars | Extreme cold halts evaporation and triggers destructive bacterial soft rot |
| Relative Humidity | 40% to 60% relative humidity with active cross-ventilation | Stacking gourds tightly on solid, non-porous surfaces | Trapped moisture pools underneath the fruit, inviting fatal fungal penetration |
| Spacing & Position | Arranged in a single layer with 2 inches (5 cm) of space between each fruit | Piling multiple layers deep in cardboard boxes | Prevents adequate air exchange and causes localized wet spots to spread |
3. Step-by-Step Cultivation, Feeding & Propagation
While drying occurs post-harvest, getting a successful dried specimen begins with proper cultivation. If you want to grow your own hard-shelled gourds for drying, follow this precise sequence from seed to finished craft-ready shell.
- Seed Germination and Soil Preparation: Select high-quality Lagenaria siceraria seeds. Soak them in warm water (75°F to 85°F / 24°C to 29°C) for 24 hours to soften the hard seed coat. Sow seeds 1 inch (2.5 cm) deep in rich, well-draining garden soil amended with compost, maintaining a soil temperature of 70°F (21°C). Space your planting mounds 4 to 6 feet (1.2 to 1.8 meters) apart to accommodate the aggressive vine spread.
- Nutritional Management and Irrigation: Provide a balanced, slow-release organic fertilizer high in nitrogen during the first 30 days of vegetative growth to encourage robust vine development. Once flowers appear, switch to a low-nitrogen, high-phosphorus and potassium fertilizer to support fruit set. Water deeply at the base of the plant, delivering approximately 1.5 inches (3.8 cm) of water per week, ensuring the root zone stays moist but never waterlogged.
- Treakling and Fruit Elevation: Install a sturdy cattle panel arch or heavy-duty wooden trellis capable of supporting 50 to 100 pounds (22 to 45 kg) of hanging fruit. Guide the primary tendrils upward. For gourds resting on the ground, place a small cedar shingle, an inverted terracotta saucer, or a thick layer of straw underneath each developing fruit to keep them elevated 1 to 2 inches (2.5 to 5 cm) above wet garden soil.
- The Late-Season Harvest: Leave the gourds on the vine as long as possible, ideally right up until the first hard frost kills the vine. Cut each fruit from the vine using sterilized pruning shears, leaving exactly 2 to 3 inches (5 to 7.5 cm) of stem attached. Never pull or snap the stem, as an intact stem acts as a physical barrier preventing air and bacteria from entering the internal cavity.
- Surface Sanitation and Initial Prep: Wash harvested gourds in a basin filled with warm water and mild dish soap to remove surface dirt, aphid residue, and soil-borne fungal spores. Dry them thoroughly with a clean cloth, then wipe down the entire outer shell with a 10% household bleach solution (1 part bleach to 9 parts water) to sterilize the surface before moving them to your curing area.
- The Long Curing Phase: Place your sanitized gourds in a single layer on wooden slatted shelves, wire racks, or on top of multiple layers of black-and-white newspaper. Ensure no two gourds touch each other. Turn the gourds over once every 14 days to inspect for rot and ensure even drying. Over the course of 90 to 180 days, the skin will turn black, brown, or develop intricate patterns of green and white mold. This discoloration is completely normal and expected.
- Scraping, Washing, and Finishing: Once the gourds feel exceptionally lightweight and you hear seeds rattling clearly inside when shaken, the drying process is complete. Submerge the dried gourds in warm water for 20 to 30 minutes to soften the dried epidermis and mold residue. Use a stiff-bristled plastic scrub brush, a scouring pad, or fine 0000 steel wool to scrub away the outer skin layers. Rinse thoroughly, wipe down with denatured alcohol, and allow them to air dry completely for 24 hours before applying sanding, wood stain, or waterproof spar varnish. For deeper botanical insights into cucurbit management, consult resources provided by the Royal Horticultural Society.
4. Common Problems, Pests & Troubleshooting
Even with meticulous attention to detail, drying gourds can present unexpected hurdles. Diagnosing issues early saves your crop from total loss.
- Issue: Deep Soft Spots and Foul Odor. If a gourd develops a sunken, mushy brown spot that feels spongy under gentle pressure and emits a foul, rotting odor, it is experiencing bacterial soft rot.
- Solution: Discard this gourd immediately. Do not attempt to save it, as it will leak fluids and contaminate adjacent gourds. Check surrounding fruits to ensure they are not touching.
- Issue: Excessive Shrivelling and Crinkling. If your gourd begins to wrinkle like a dried raisin shortly after harvest, you harvested it prematurely before the lignified shell had formed.
- Solution: Unfortunately, immature gourds cannot be saved once this process begins. Throw them out and adjust your harvesting timeline for the next growing season by waiting for brown, corky stems.
- Issue: White or Green Powdery Mold Proliferation. While mold is a normal part of the curing process, a thick, furry, unmanageable mat of mold can occasionally overwhelm the drying room if humidity exceeds 80%.
- Solution: Increase cross-ventilation immediately by adding a secondary fan. Wipe down the affected gourds with a sponge soaked in a 10% bleach solution or a commercial fungicidal wash once every two weeks until the skin turns completely dry. For a comprehensive guide on diagnosing plant pathogens affecting cucurbit fruits, refer to guidelines from the University of Minnesota Extension.
⚠️ Important Caution: Never use a steel scraper or sharp knife aggressively on a drying gourd while its skin is still damp with active rot, as you can easily puncture the soft wall and ruin the entire interior cavity. Always complete the final scraping phase only after the internal moisture has fully evaporated and the shell has hardened into wood.

5. Frequently Asked Questions
How long does it take for a gourd to dry out completely?
The drying process typically takes anywhere from 3 to 6 months (90 to 180 days), depending on the size of the gourd, the thickness of its shell, and the humidity levels in your curing environment. Smaller ornamental-style hard-shelled varieties may cure in 8 to 10 weeks, while massive bushel gourds can require up to 8 months. You will know they are finished when the fruit feels remarkably light, the outer shell is completely hard, and you can hear loose seeds rattling distinctly inside the hollow cavity when shaken.
Can I dry gourds indoors in a house or apartment?
Yes, you can dry gourds indoors, provided you choose an appropriate location with good ventilation, such as an unfinished basement, a heated garage, a utility room, or a spare bedroom. Avoid living spaces like kitchens or primary bathrooms where ambient humidity fluctuates wildly from cooking and showering. Because mold spores will release during the curing process, individuals with severe respiratory allergies or asthma should avoid keeping drying gourds inside inhabited living areas.
Do I need to remove the mold that grows on the gourd while it dries?
You do not need to remove the mold while the gourd is actively drying; in fact, letting the mold grow is a natural part of the curing process that helps break down the waxy outer cuticle of the fruit. You only need to remove the mold at the very end of the drying cycle. Once the gourd is completely dry and lightweight, simply soak it in warm water for 30 minutes and scrub the mold away with a scouring pad or steel wool.
What should I do if a gourd starts leaking or collapsing during the drying process?
A leaking or collapsing gourd is infected with internal bacteria or soft rot and cannot be saved. The structural integrity of the shell has been compromised. Immediately remove the rotting gourd from the drying area, discard it in the trash or outdoor compost heap, and wipe down the surrounding surface with a disinfectant solution to prevent the rot from spreading to healthy neighboring gourds.
Related Guides
📋 Table of Contents ▼ Click to expand
Tags:
🌿 Related Plants You Might Like






PlantSavvyWorld
Editorial team
PlantSavvyWorld is an independent botanical education project. Articles are drafted with AI assistance, then edited and checked against university extension services, botanical garden collections and other published horticultural sources.