

How to Condition a Straw Bale for Gardening Straw Bale Gardening Guide
Written with AI assistance, edited and checked against horticultural sources.
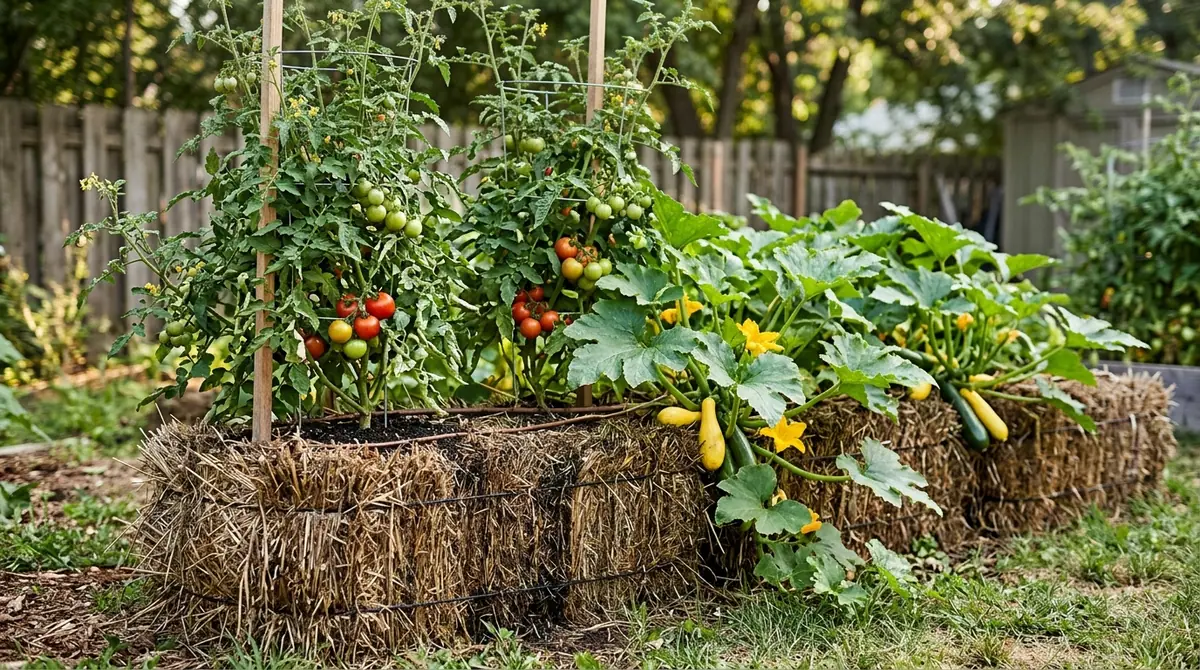
When planning a lush kitchen garden for tomatoes, peppers, and trailing herbs on top of impenetrable native clay or compacted construction fill that resists a spade at two inches (5 cm), straw bales provide an alternative growing medium. Planting directly into raw, carbon-rich bales on day one causes a microbial feast that robs every available ounce of nitrogen from the soil, leaving starts stunted and yellow within a fortnight. Proper conditioning—the alchemy of turning raw agricultural waste into a thriving, nutrient-dense biological sponge—saves the entire growing season.
1. Botanical Overview & Natural Habitat

Because straw is biologically dead plant tissue with a remarkably high carbon-to-nitrogen (C:N) ratio—often exceeding 80:1—it is naturally resistant to rapid decay. In its native agricultural habitat, straw fields lie exposed to seasonal weathering, slowly broken down by saprophytic fungi and soil bacteria over many months. When we repurpose straw bales for gardening, we are artificially hijacking this natural decomposition cycle. We compress thousands of hollow stems into a dense, rectangular brick, bound securely with heavy plastic or sisal twine, and accelerate the natural rotting process through deliberate applications of moisture and concentrated nitrogen.
| Parameter | Optimal Condition | Common Mistake | Why It Matters |
|---|---|---|---|
| Material Composition | Clean cereal straw (wheat, oat, rye) | Using grass hay containing seed heads | Hay introduces unwanted weeds and lawn grasses that compete with crops |
| Carbon-to-Nitrogen Ratio | Initial 80:1, dropping to 20:1 | Skipping nitrogen enrichment | Raw straw sequesters all ambient nitrogen, starving plant roots |
| Internal Temperature | Peak at 120°F–130°F (49°C–54°C) | Planting while bale is over 100°F (38°C) | Excessive heat cooks tender root systems and kills beneficial microbes |
| Moisture Content | Uniformly damp, like a wrung-out sponge | Allowing internal core to dry out completely | Dry straw halts microbial activity and prevents the necessary composting process |
2. Essential Environmental & Care Requirements
To successfully condition a straw bale, you must cultivate an internal biological ecosystem capable of supporting plant life. The straw bale essentially functions as a vertical, self-contained raised bed, but its environmental requirements differ vastly from traditional garden soil.
First, position your bales in a location that receives at least six to eight hours of direct sunlight daily. The entire conditioning process relies on microbial respiration, which thrives in warmth. Orient the bales on their cut edges—not flat sides—so that the hollow interior stems face upward like vertical straws. This orientation allows water and nutrients to penetrate deeply into the core while making it easy to nestle seedlings directly into the matrix later.
Water management is the linchpin of straw bale conditioning. Because bales are elevated and exposed on all sides to airflow, they dry out exponentially faster than ground-level garden beds. During the critical 10-day conditioning phase, the bale must never dry out entirely. If the internal core goes bone-dry, the nitrogen-loving bacteria go dormant, resetting your timeline. You will need a reliable water source nearby, equipped with a fine-spray wand or a dedicated soaker hose looped across the top surface.
Nutrient management is equally exacting. Raw straw contains almost zero available nitrogen. To trigger the thermophilic (heat-loving) bacteria that break down lignin and cellulose, you must supply an external source of nitrogen. Whether you use synthetic granular fertilizers like urea (46-0-0) or organic alternatives like blood meal, feather meal, or high-nitrogen liquid fish hydrolysate, the microbes require this fuel to multiply and soften the interior structure of the bale.
💡 Pro-Tip: Always check your straw source for residual persistent herbicides, particularly aminopyralid or clopyralid, which can survive livestock digestion and the harvesting process. Ask the farmer directly if they sprayed their grain fields with broadleaf weed killers; if they are unsure, take a small handful of straw, soak it in warm water for 24 hours, plant fast-growing bean seeds in the extract, and watch for curling, distorted leaves over 14 days before committing to a full garden layout.
3. Step-by-Step Cultivation, Feeding & Propagation
Conditioning a straw bale takes exactly 10 days when executed with precision. This timeline forces the bale through a rapid, controlled composting cycle, transforming raw agricultural waste into a spongy, nutrient-rich planting medium with a neutral pH of roughly 6.5 to 7.0.
Gather your supplies before Day 1: your positioned bales, a reliable garden hose with a nozzle, and a high-nitrogen fertilizer (approximately 3 cups of organic blood meal or 1.5 cups of synthetic urea per bale total, divided across the schedule).
- Days 1 through 3 (The Saturation Phase): Thoroughly soak the top surface of each bale twice daily until water streams freely out of the bottom. Do not add any fertilizer yet. This step begins hydrating the dry internal stems and awakens dormant microbes already present in the straw.
- Days 4 through 6 (The Nitrogen Kick): Sprinkle 1/2 cup of organic nitrogen fertilizer (or 1/4 cup synthetic urea) evenly across the top surface of each bale. Immediately water it in thoroughly to wash the granules deep into the hollow culms. Continue watering twice daily to keep the interior moist and accelerate microbial multiplication.
- Days 7 and 8 (The Temperature Spike): Reduce the nitrogen application to 1/4 cup per bale per day, continuing the twice-daily watering routine. By Day 8, insert a long-stem compost thermometer 6 inches (15 cm) into the exact center of the bale. The internal temperature should surge to between 120°F and 130°F (49°C to 54°C) as aerobic bacteria feast on the carbon and nitrogen.
- Day 9 (The Stabilization Phase): Stop adding nitrogen entirely. Water the bales once daily to maintain moisture. The internal temperature will begin to peak and slowly decline, signaling that the most aggressive phase of internal composting is winding down.
- Day 10 (Planting Readiness): Check your compost thermometer. Once the internal core temperature drops below 99°F (37°C)—or simply feels comfortably warm rather than hot to your bare hand thrust deep inside—your bales are fully conditioned. Apply a 2-inch (5 cm) layer of rich, well-composted organic potting mix directly across the top of the bales to serve as a seedbed or a planting pocket anchor, and you are ready to plant.
For broader insights on managing specialized seasonal containers and elevated growing structures, you can review our guide on Holiday Plants Care Guide: How to Force Poinsettias to Rebloom & Holiday Cacti ID.
⚠️ Important Caution: Never plant seeds or transplant tender seedlings into a straw bale while the internal core temperature exceeds 100°F (38°C). Doing so will literally cook the root systems within hours, resulting in rapid collapse and death of your crops. Always verify core temperatures with a reliable soil thermometer before introducing plants.
4. Common Problems, Pests & Troubleshooting
Even with meticulous attention to the 10-day schedule, straw bale gardens occasionally present unique physiological and pathological challenges that require swift intervention.
The most common issue is extreme temperature spikes that linger past Day 10. If your compost thermometer reads above 110°F (43°C) on the scheduled planting day, do not plant. This typically occurs because too much nitrogen was applied at once, or the bale was packed with an unusually dense concentration of green matter. Mitigate this by flooding the bale with cold water for two consecutive days to leach excess nitrogen and cool the internal core.
Another frequent visitor is nuisance fungal growth, particularly bright white or yellow slime molds and ink cap mushrooms erupting across the exterior of the bales during the conditioning phase. Do not panic; these are not pathogenic plant diseases. They are saprophytic fungi that naturally assist in breaking down lignin and cellulose. Simply brush them away or ignore them; they pose zero threat to your future vegetable crops and indicate that your biological breakdown is progressing swimmingly.
Nitrogen deficiency can also manifest mid-season, characterized by pale yellow lower leaves on heavy feeders like tomatoes and squashes. Because straw breaks down continuously throughout the growing season, soil microbes can occasionally outcompete plant roots for ambient nutrients. Correct this instantly by side-dressing the planting pockets with a balanced organic granular fertilizer or applying a liquid kelp and fish emulsion foliar feed every 14 days.

5. Frequently Asked Questions
Can I use old hay instead of straw for straw bale gardening?
No. Hay is harvested from mixed pastures and contains mature seed heads of various grasses and broadleaf weeds. When you water and fertilize a hay bale, those weed seeds germinate aggressively inside your growing medium, choking out your cultivated crops. Always insist on clean cereal straw, which contains virtually no viable weed seeds.
How many years can a single straw bale garden last?
Most straw bales last for a single intensive growing season, during which roughly half to two-thirds of the bale decomposes into a rich, earthy compost. By autumn, the structural integrity of the twine usually fails and the bales slump significantly. However, many gardeners break down the spent autumn bales and use the decomposed organic matter directly as mulch or soil amendment in raised beds for the following year.
Do I need to build a wooden frame to hold my straw bales in place?
For a standard single-row layout placed on level ground, wooden frames are entirely unnecessary. The sheer weight of a soaked straw bale—often exceeding 50 pounds (23 kg)—keeps it firmly anchored. However, if you are stacking bales vertically or designing multi-tiered landscape installations on slopes, securing them with rebar stakes driven 24 inches (60 cm) through the center of each bale is essential to prevent tipping.
How do I water a straw bale garden efficiently without wasting water?
Because straw bales are porous and shed water rapidly off their vertical sides if irrigated too quickly, traditional sprinklers are inefficient. The most effective watering strategy is installing a dedicated low-pressure drip irrigation system with emitters placed directly over each planting pocket, or running looped soaker hoses across the top surface beneath a layer of mulch. For detailed regional watering protocols suited to your climate zone, refer to the USDA National Agricultural Library guidelines on efficient agricultural water management.
Related Guides
- Palo Verde Seedling
- How to Design a Terrace Garden with Tall Privacy Plants
- When is the Best Time to Transplant a Plant
📋 Table of Contents ▼ Click to expand
Tags:
🌿 Related Plants You Might Like






PlantSavvyWorld
Editorial team
PlantSavvyWorld is an independent botanical education project. Articles are drafted with AI assistance, then edited and checked against university extension services, botanical garden collections and other published horticultural sources.