

Bromeliad
Bromeliaceae
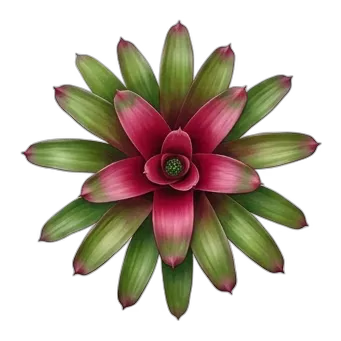
Years ago, I nearly lost a prized Neoregelia 'Fireball' because I treated it like a standard houseplant—letting the potting mix stay perpetually damp while ignoring the central cup entirely. The lower leaves turned a sickly yellow-brown, signaling root rot, while the crown remained bone dry. That failure forced me to look past generic houseplant rules and study how these plants actually survive in the wild. Once I understood that most popular bromeliads are epiphytes—drinking through their central reservoirs rather than their soil—my collection transformed into the vibrant, color-saturated focal points of a greenhouse.
1. Botanical Overview & Natural Habitat

Most cultivated bromeliads fall into three distinct life-history categories:
- Epiphytic: The vast majority of popular indoor varieties (such as Aechmea, Guzmania, and Neoregelia) grow on the branches of rainforest trees. Their roots serve primarily as anchors rather than nutrient-uptake organs.
- Saxicolous: These species anchor themselves directly onto bare rock faces, surviving on sparse organic debris blown by the wind.
- Terrestrial: Genera like Ananas (pineapples) and certain Pitcairnia species root directly in soil, maintaining more traditional root systems.
What unites them all is their specialized foliar anatomy. The leaves are tightly imbricated (overlapping) to form a central urn or "tank" that collects rainwater and falling organic debris. Specialized epidermal trichomes—microscopic, scale-like structures—cover the leaf surfaces. These trichomes absorb water and dissolved nutrients directly into the plant tissue while simultaneously reducing transpirational water loss.
When designing with bromeliads, understanding this evolutionary adaptation changes everything. They are not heavy feeders, nor do they require deep root zones. They demand an environment that mimics the dappled, humid canopy of a Neotropical rainforest.
2. Essential Environmental & Care Requirements
Replicating a tropical canopy in a home or garden requires balancing light, water, temperature, and airflow. Let us break down the exact parameters required for optimal growth.
| Parameter | Optimal Condition | Common Mistake | Why It Matters |
|---|---|---|---|
| Light | Bright, indirect light (10,000 to 20,000 lux) | Direct midday sun | Scorches leaf epidermis and bleaches vibrant bract colors |
| Watering (Tank) | Keep central cup flushed with fresh water | Allowing water to stagnate and breed mosquitoes/rot | Triggers bacterial crown rot if not refreshed weekly |
| Watering (Soil) | Allow coarse mix to dry 80% between waterings | Keeping soil saturated | Suffocates anchoring roots and causes systemic decay |
| Temperature | 65°F to 85°F (18°C to 29°C) | Exposure below 50°F (10°C) | Causes cellular damage, chill injury, and tissue collapse |
| Humidity | 50% to 80% relative humidity | Indoor air below 30% | Dries out trichomes, causing leaf tips to brown and curl |
Light Dynamics
Most indoor bromeliads prefer bright, indirect light. Species with stiff, grey-green, heavily scaled leaves (such as many Tillandsia and sun-tolerant Aechmea) can handle higher light levels, including a few hours of gentle morning sun. Conversely, soft-leaved species with dark green foliage (Guzmania and Nidularium) burn easily. If your plant loses its vivid red, purple, or orange coloration and stretches toward a window, it is signaling light starvation.
Watering Protocols
Water quality matters immensely. Tap water heavy in fluorides, chlorine, or dissolved salts will accumulate in the central urn and leave unsightly white crusts on the leaf margins via the trichomes. Whenever possible, use rainwater, reverse osmosis water, or distilled water.
💡 Pro-Tip: Empty and flush the central cup of your bromeliad completely every 7 to 10 days. Stagnant water breeds anaerobic bacteria and fungus gnats. Tip the plant sideways over a sink, let the old water drain out, and refill the cup with fresh, room-temperature water.
Temperature and Air Movement
Bromeliads thrive in warmth. Nighttime temperatures should ideally not drop below 55°F (13°C), and daytime highs should peak around 80°F (27°C). Because they are naturally exposed to breezy canopy conditions, stagnant air is their enemy. Good horizontal air circulation prevents fungal pathogens from settling in the damp leaf axils. For more detailed climate adaptability guidance, consult resources from the University of Florida IFAS Extension.
3. Step-by-Step Cultivation, Feeding & Propagation
Propagation in the bromeliad family relies on a predictable biological cycle: the mother plant blooms once, produces offsets (known as "pups"), and slowly declines over several months while the pups take over.
Step 1: Selecting the Right Substrate
Because epiphytic bromeliads rot in dense, moisture-retentive potting soils, mix a specialized orchid medium. Combine 40% coarse orchid bark (1/4 to 1/2 inch grade), 30% perlite or pumice, 20% horticultural charcoal, and 10% high-grade peat or coco coir. This ensures rapid drainage and high oxygen exchange around the anchor roots.
Step 2: Potting the Mother Plant or Pup
Select a small, heavy container—terra cotta works best because it prevents the pot from tipping over under the weight of the top-heavy leaves. Fill the container with your bark mix, place the base of the plant firmly into the top 1 to 2 inches (2.5 to 5 cm) of the substrate, and secure it with small landscape stones if necessary. Do not bury the plant deeply; burying the stem past the base will trigger rot.
Step 3: Implementing a Dilute Feeding Schedule
During the active growing season (spring through summer), fertilize sparingly. Mix a balanced, water-soluble liquid fertilizer (such as a 20-20-20 formulation) to one-quarter of the manufacturer's recommended strength. Pour this weak solution directly into the central cup once a month. Never apply granular slow-release fertilizers directly to the cup, as high salt concentrations will burn the core tissue.
Step 4: Harvesting and Separating Pups
Once the mother plant finishes flowering, it will direct its remaining energy into producing basal offsets at the soil line or between the lower leaves.
- Wait until the pup reaches at least one-third to one-half the size of the mature mother plant (typically 3 to 6 months after emergence).
- Using a sterile, sharp razor blade or horticultural knife, slice the pup away from the mother plant as close to the base as possible, ensuring you retain any small root nubbins that have formed on the pup.
- Dust the cut surfaces with powdered sulfur or ground cinnamon to act as a natural fungicide.
- Allow the cut end to callus over in a shaded, dry area for 24 to 48 hours before planting it into its own fresh orchid bark mix.
⚠️ Important Caution: Never force a pup off the mother plant prematurely. If the offset is smaller than one-third the size of the parent, it lacks the carbohydrate reserves necessary to root and survive independently.
4. Common Problems, Pests & Troubleshooting
Even with careful management, environmental stressors can trigger aesthetic and physiological issues. Here is how to diagnose and correct them.
Fungal Crown Rot (Phytophthora and Pythium)
- Symptoms: The inner leaves of the central cup turn black, smell foul, and easily pull away from the base with a gentle tug, while outer leaves remain green for a short time.
- Cause: Stagnant, dirty water left in the cup combined with cool temperatures and low light.
- Correction: Cut away rotting tissue with a sterile blade down to healthy, white-green tissue. Treat the wound with a copper-based fungicide. Move the plant to a warmer, brighter spot with strong air movement, and keep the central cup completely dry until new growth emerges.
Scale Insects and Mealybugs
- Symptoms: Small, immobile brown bumps along the leaf veins (scale) or cottony white masses tucked tightly in the leaf axils (mealybugs).
- Cause: Low humidity, dry indoor air, and a lack of natural predators.
- Correction: Do not spray bromeliads with heavy horticultural oils; their delicate trichomes can clog, suffocating the plant. Instead, dip a cotton swab in 70% isopropyl alcohol and physically dab each insect. For severe infestations, apply a targeted application of insecticidal soap, rinsing it thoroughly off the leaves after 30 minutes.
Leaf Tip Burn
- Symptoms: Brown, crispy tips extending inward along the margins of the foliage.
- Cause: Low relative humidity (below 40%), tap water high in mineral salts and fluoride, or severe underwatering of the root zone.
- Correction: Switch to distilled or rainwater, increase ambient humidity using a cool-mist humidifier or a pebble tray filled with water, and ensure the potting mix is hydrated slightly every 10–14 days.

5. Frequently Asked Questions
Do bromeliads die after they flower?
Yes, the individual rosette that produces a bloom will slowly decline and die over a period of several months to a year. This is a natural monocarpic life cycle. However, before the mother plant perishes, it invests its remaining energy into producing multiple offsets (pups) at its base. These pups ensure the survival and continuation of the plant family. You can also explore cultivation insights provided by the Royal Botanic Gardens, Kew.
Can I grow bromeliads mounted on wood instead of pots?
Absolutely. Because many species are natural epiphytes, mounting them on driftwood, cork bark, or tree fern plaques mimics their native rainforest habitat. Wrap the plant's base with a small handful of long-fiber sphagnum moss to retain minimal moisture, and secure it firmly to the wood using coated floral wire or heavy-duty fishing line. Mist the roots and moss daily, as mounted plants dry out much faster than potted specimens.
How do I force a bromeliad to bloom if it refuses to flower?
If a mature bromeliad has reached full size (usually 2 to 3 years old) but shows no signs of producing an inflorescence, you can trigger flowering using ethylene gas. Place the bromeliad inside a large, clear plastic bag alongside a ripe apple or banana. Seal the bag tightly and leave it in bright, indirect light for 7 to 10 days. The ripening fruit releases natural ethylene gas, which stimulates the plant's apical meristem to transition from vegetative growth to flowering. Remove the bag afterward, and expect a flower spike to emerge within 6 to 12 weeks.
Why are the new leaves on my bromeliad turning pale and spindly?
This condition is called etiolation and is caused by insufficient light. When a bromeliad receives too little light, it stretches its cellular walls in search of a brighter environment, resulting in weak, elongated, pale green leaves that lack structural integrity and vivid coloration. Move the plant progressively closer to an east- or west-facing window, or supplement with a full-spectrum LED grow light positioned 12 to 18 inches (30 to 45 cm) above the foliage for 12 hours a day.
📋 Table of Contents ▼ Click to expand
Tags:





